")
")


Creating estimates is an essential part of business operations, especially for B2B and those involved in project-based work, bulk transactions, and customized services. It plays a vital role in securing business deals. It acts as a deciding factor in winning or losing a contract.
However, creating estimates manually often becomes impractical for many businesses that handle numerous customers and audiences daily. Because the process is time-consuming and can impact business efficiency. This is why ERP (Enterprise Resource Planning) solutions have become so popular in automating this type of business activity.
WP ERP is a great WordPress-based ERP solution for small and large business operations. With this, not only can you automate estimate creation but also countless other repetitive tasks. In this article, we’ll guide you on how to create an estimate in ERP with a step-by-step guide using this solution.
What Is WP ERP?

WP ERP is a comprehensive Enterprise Resource Planning plugin dedicatedly developed for WordPress. This means you can manage your various business operations from the WordPress dashboard. The plugin has three core modules: Human Resource Management (HR), Customer Relationship Management (CRM), and Accounting.
Things you can do with the HR module:
- Manage employee profiles
- Attendance tracking
- Leave management
- Recruitment & onboarding processes
- Performance evaluations.
Things you can do with the CRM module:
- Contact management
- Lead tracking and nurturing
- Maintain communication logging
- Task and activity management
- Sales pipeline tracking
Things you can do with the Accounting module:
- Income and expense tracking
- Invoice & estimate generation and management
- Payment tracking
- Bank account reconciliation
- Financial reporting and analysis
In addition to all these, WP ERP offers a wide range of extensions by which you can expand the functionalities of your business. They include features like payroll management, recruitment tools, asset management, and more. What’s more, the plugin has integrations with many popular tools.
So, if you are a budget-friendly user looking for a cost-effective ERP solution, you must try the WP ERP plugin. It has a free and premium plugin. Get them by clicking the buttons attached below.
Once you have the plugin on your site, you can start the tutorial coming below. At the beginning, you can try the free version. Because creating estimates is possible with the free version.
Things to Consider When Creating an Estimate

Before jumping into the tutorial, let’s spare a few minutes to skim through the points you must consider in creating business estimates. Check them below.
Accuracy of Costs – Make sure every expense, including materials, labor, overhead, and taxes, is precisely calculated to prevent pricing errors.
Scope of Work – The estimate should contain a detailed description of what is included to avoid potential misunderstandings.
Profit Margin – Include a fair profit margin in your estimates for sustainable business operations while ensuring competitive pricing.
Discounts and Additional Charges – Must list all relevant discounts and additional fees in their estimates to ensure pricing transparency in businesses.
Compliance and Legal Terms – Carefully adhere to all the existing industry regulations as well as tax rules and contractual requirements.
How to Create an Estimate Using WP ERP: Step-by-Step Guide
Hope the WP ERP plugin is installed and activated on your website. Now, get ready to explore the tutorial on how to create an estimate using the WP ERP plugin. Keep reading!
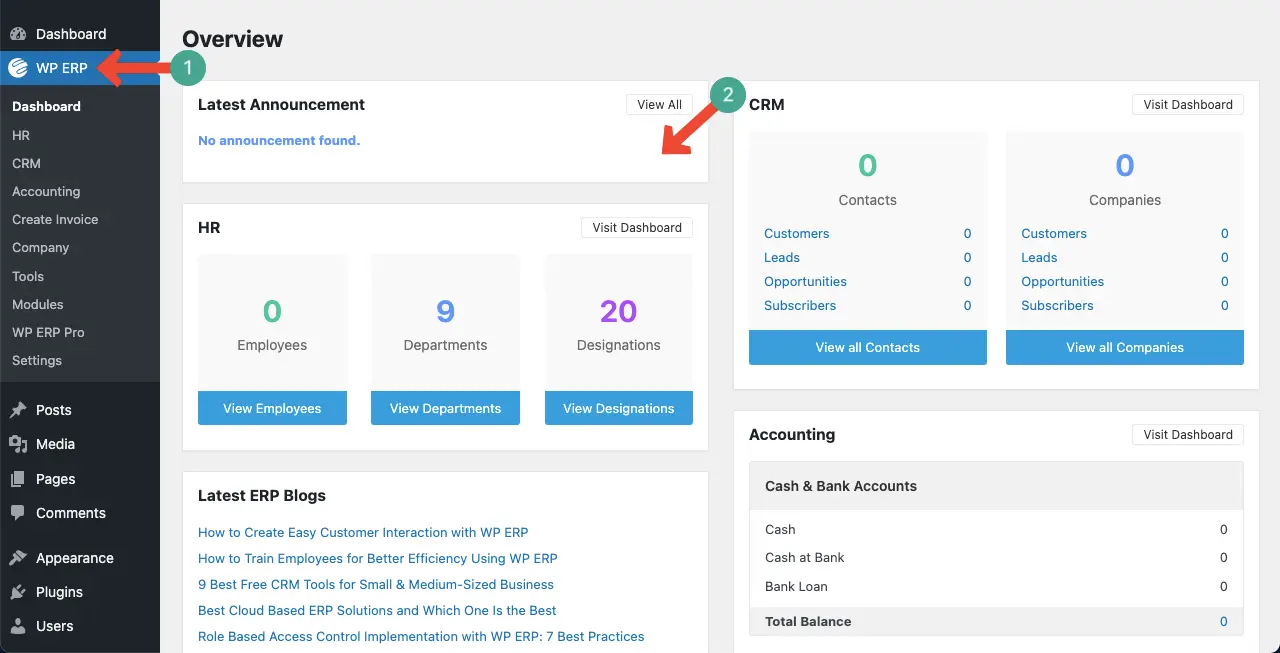
Step 01: Go to the WP ERP Dashboard
Once installed, the WP EPR plugin adds a menu in the admin menu bar. Go to the WP ERP dashboard.
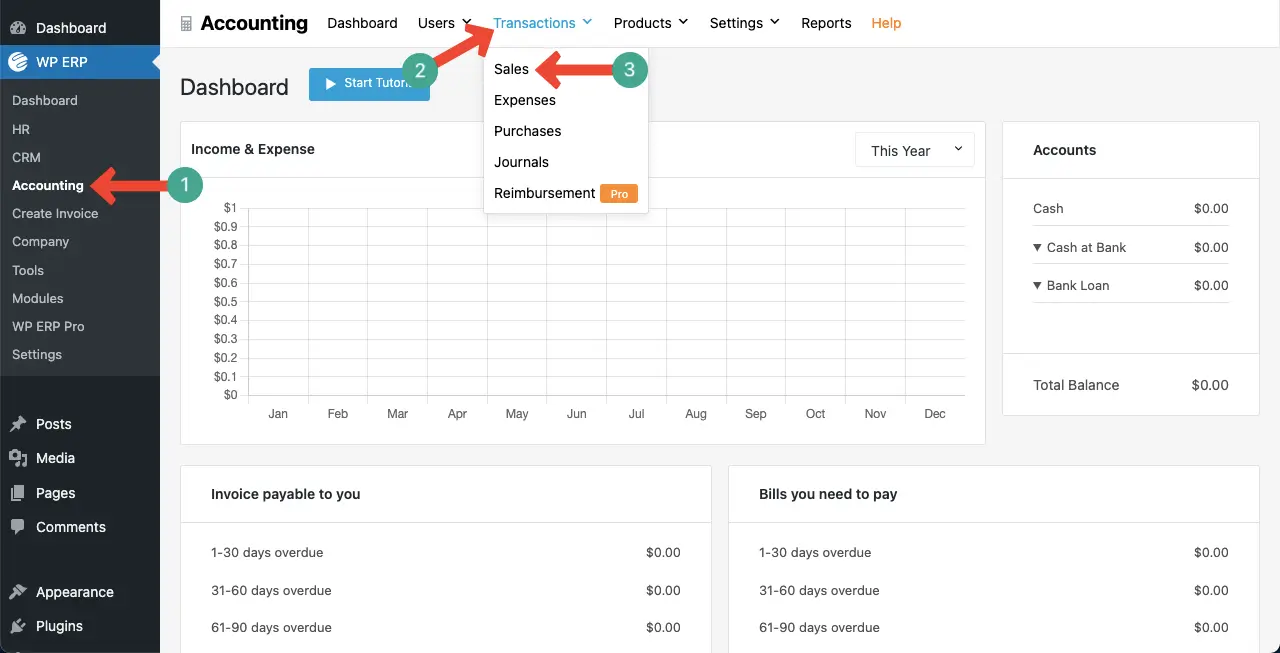
Step 02: Go to the Sales Section
Estimation creation is a part of the Accounting module. So, to get the option, go to Accounting > Transactions > Sales, as shown in the image below.
Step 03: Start Creating an Estimation
After coming to the sales page, navigate to New Transaction > Create Estimate.
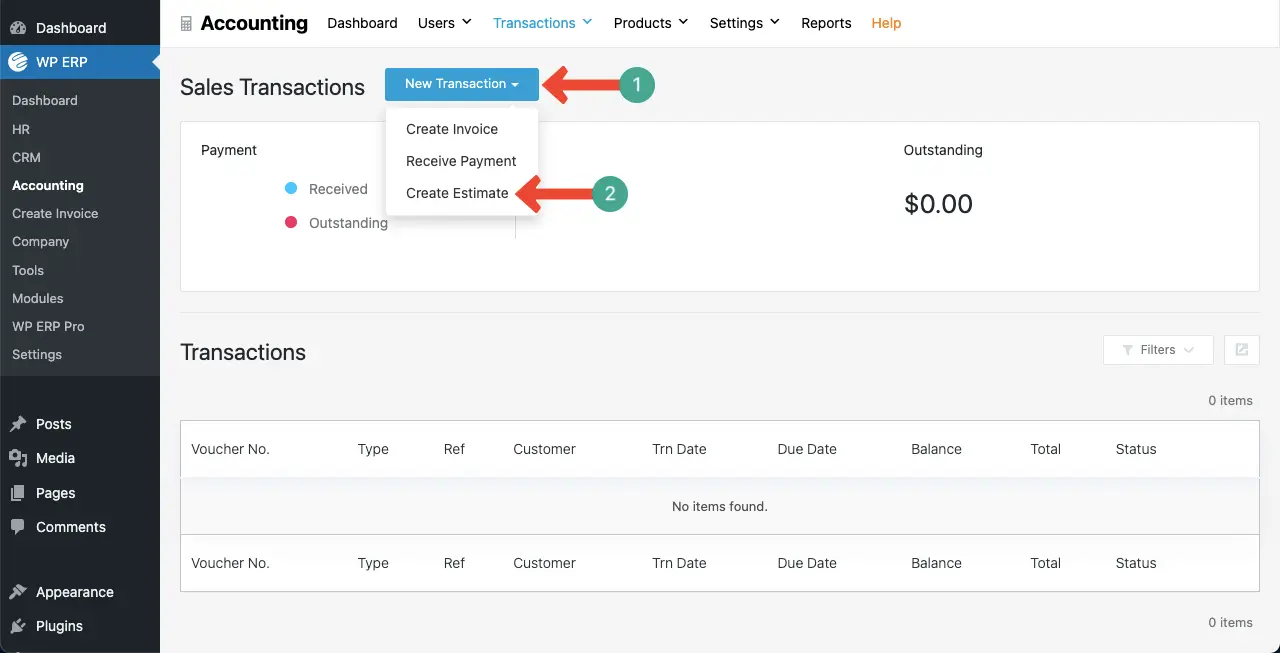
You’ll get the New Estimate page. It’s now your time to add information to the fields on the page.
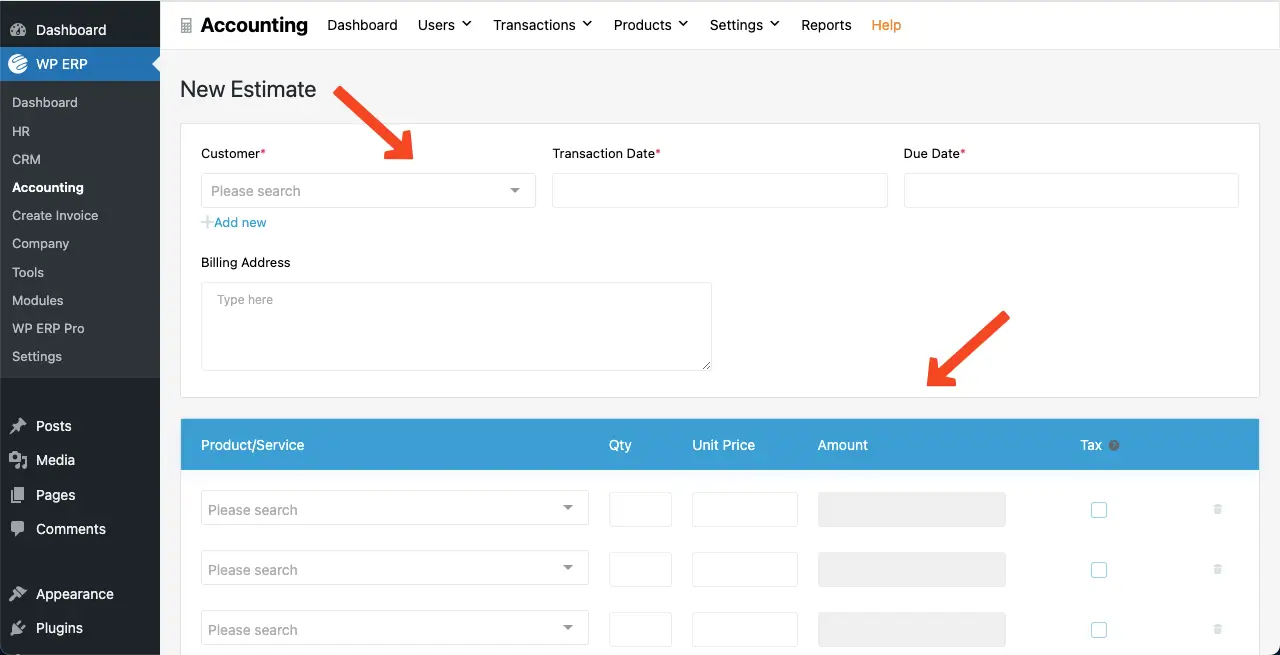
Step 04: Add Information to the New Estimate Page
On the page, you can add information about your customer, transaction date, due date, billing address, product information, and more. Let’s check how to do this.
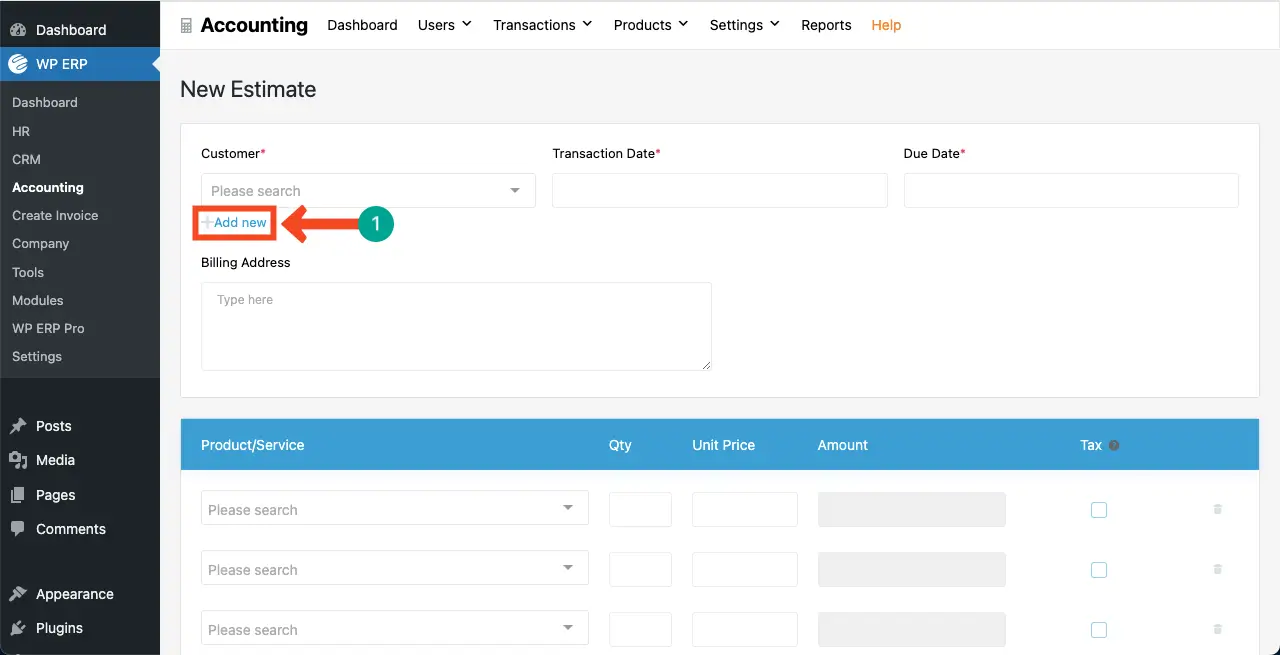
# Add New Customer
Click the + Add New button under the customer field.
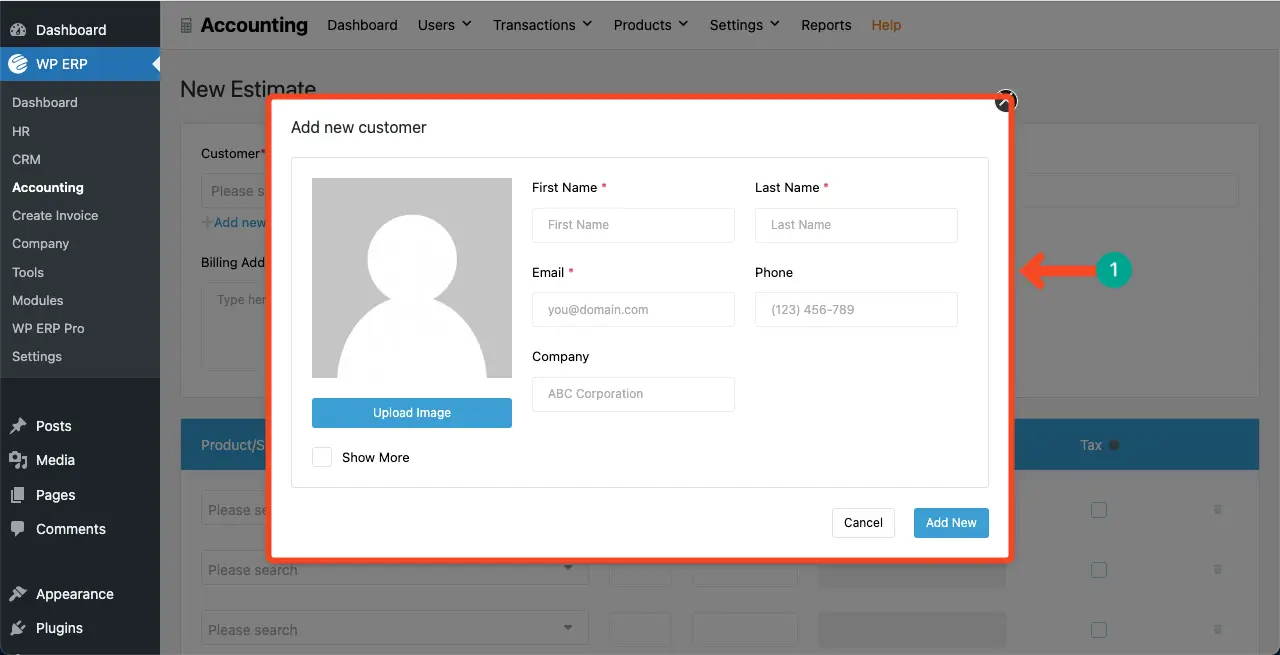
A popup will open up. Fill up information about your information on the respective fields.
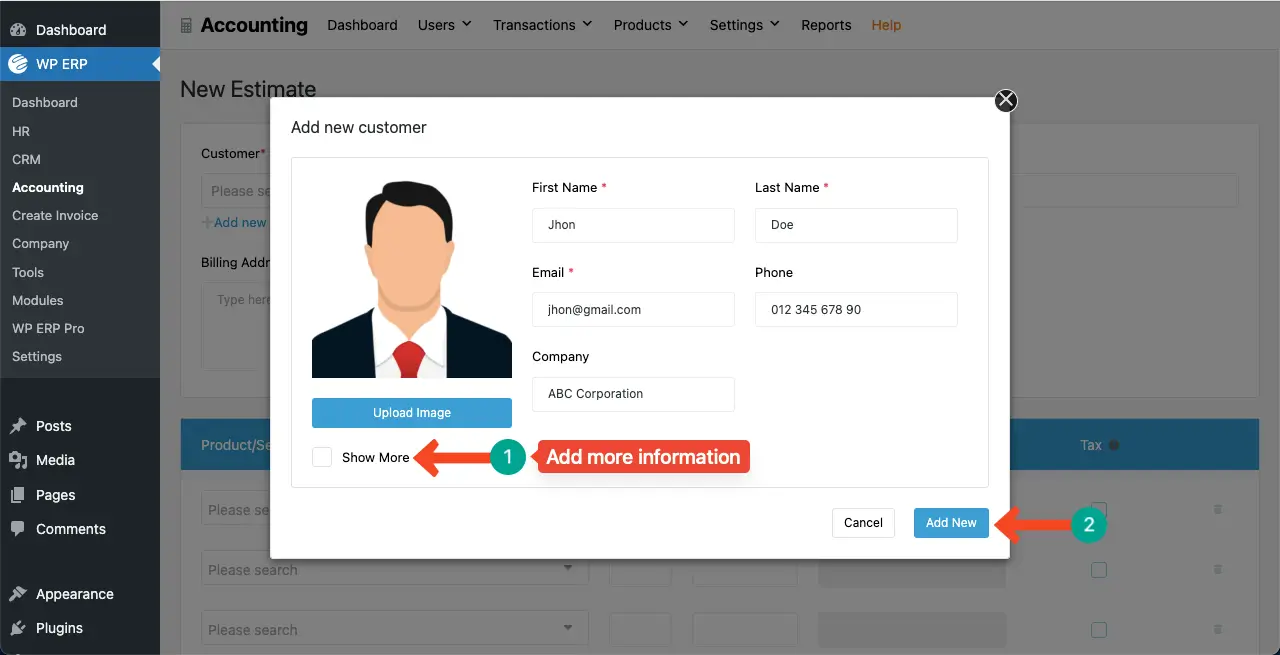
You can see information about the customer is added to the popup. To add more information, tick mark the Show More option. This will extend the popup and allow you to add information like mobile numbers, websites, faxes, street addresses, and more.
Once done, click the Add New button.
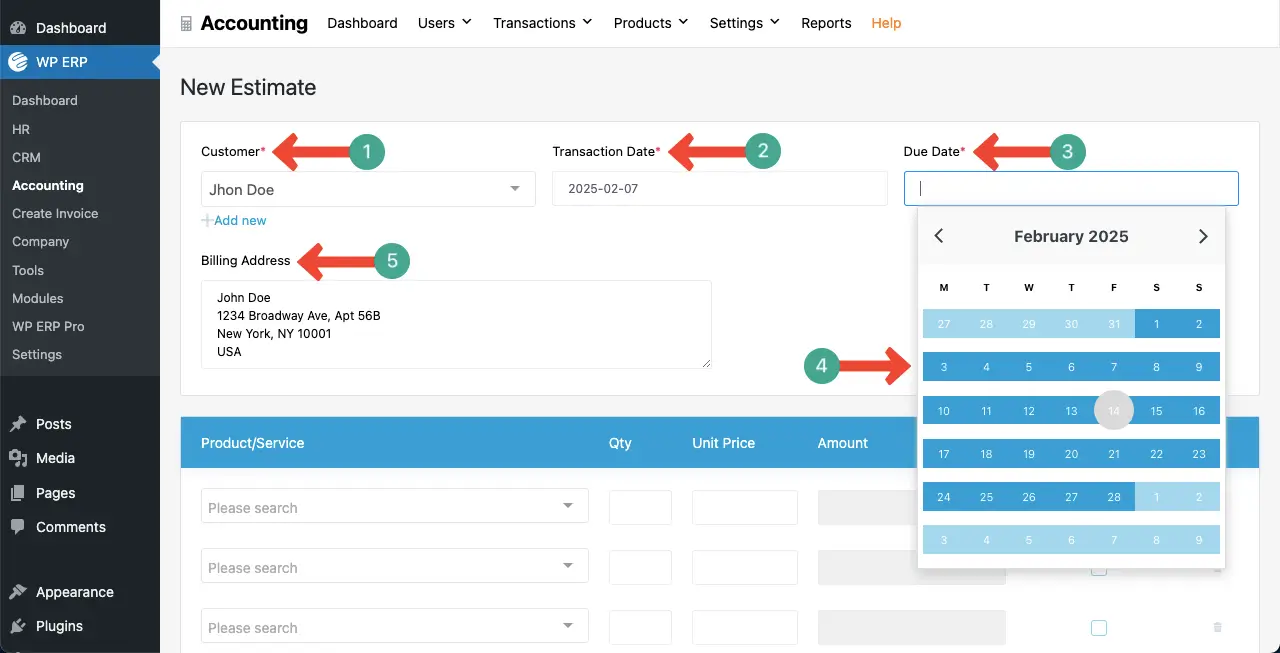
Now, add the customer’s name to the first field. Then, add the transaction date, due date, and billing address.
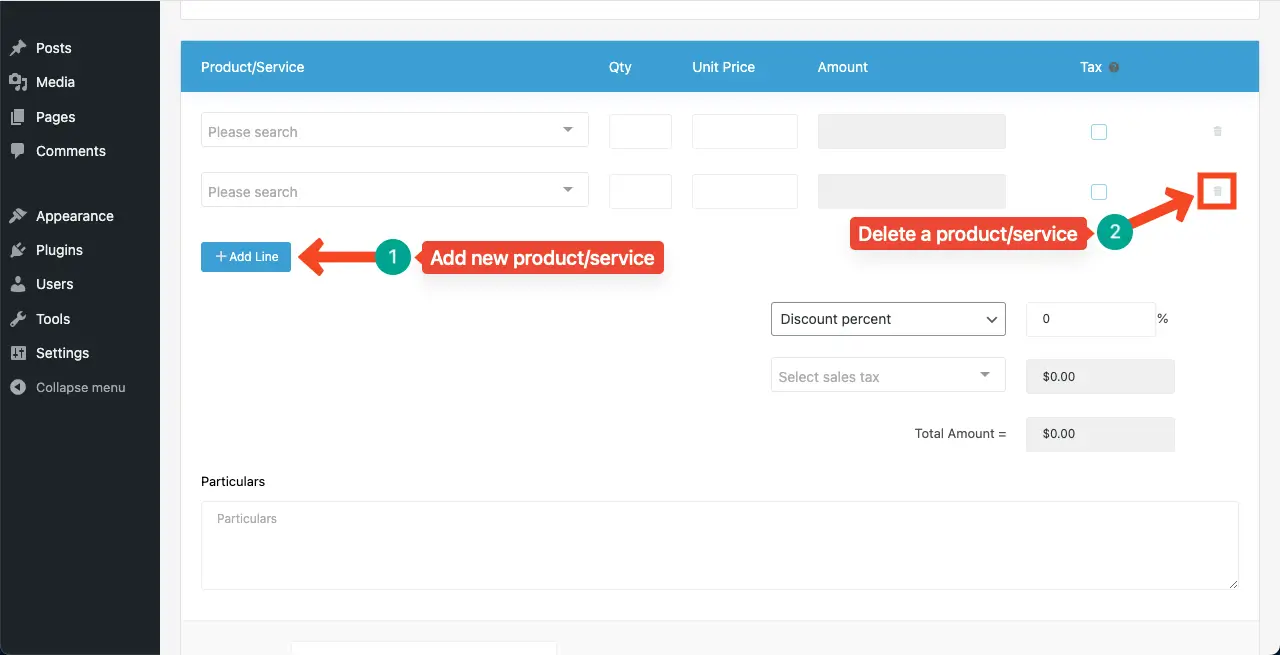
# Add Product/Service
You may add multiple products/services in the estimate. You may even want to remove any particular product/service from the estimation at the eleventh hour before creating it. So, how to do this?
By clicking the + Add Line button, you can add a new product/service to the estimate. In the same way, by clicking the delete icon, you can remove the respective product/service from the estimate sheet.
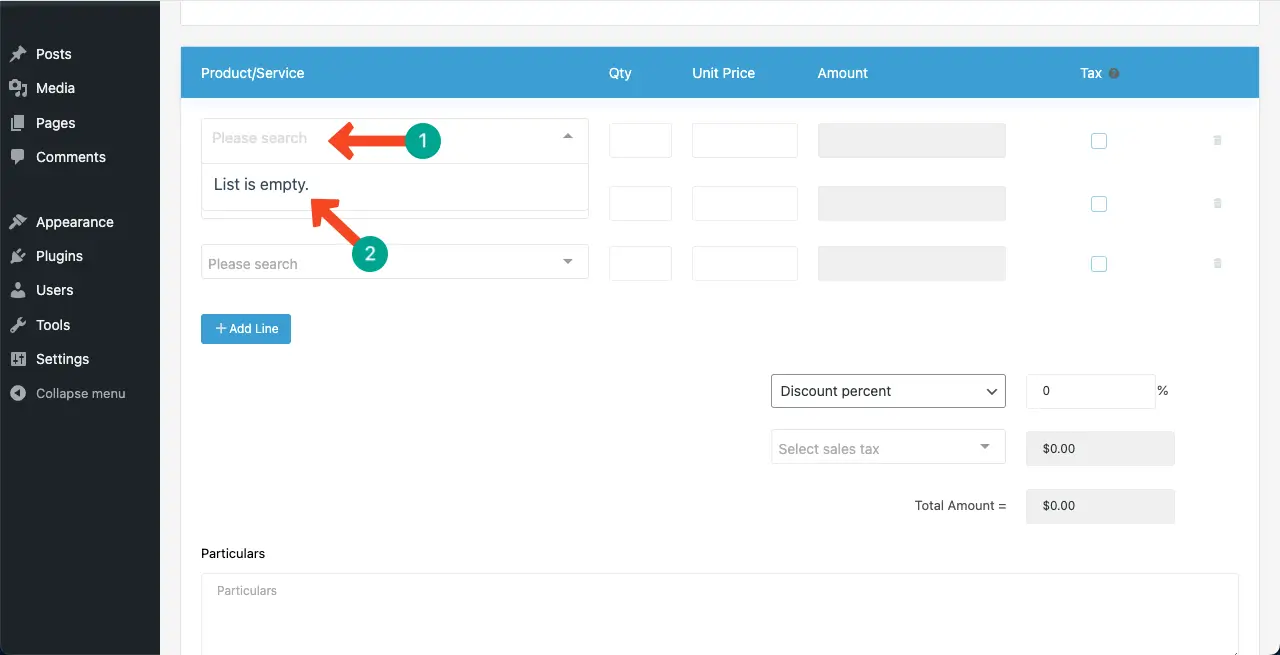
Place your cursor on the product field. You’ll see ‘List is empty’ if there’s no product added yet.
In this case, you have to add products, their information, and vendors to WP ERP. Otherwise, you can’t add them to this place.
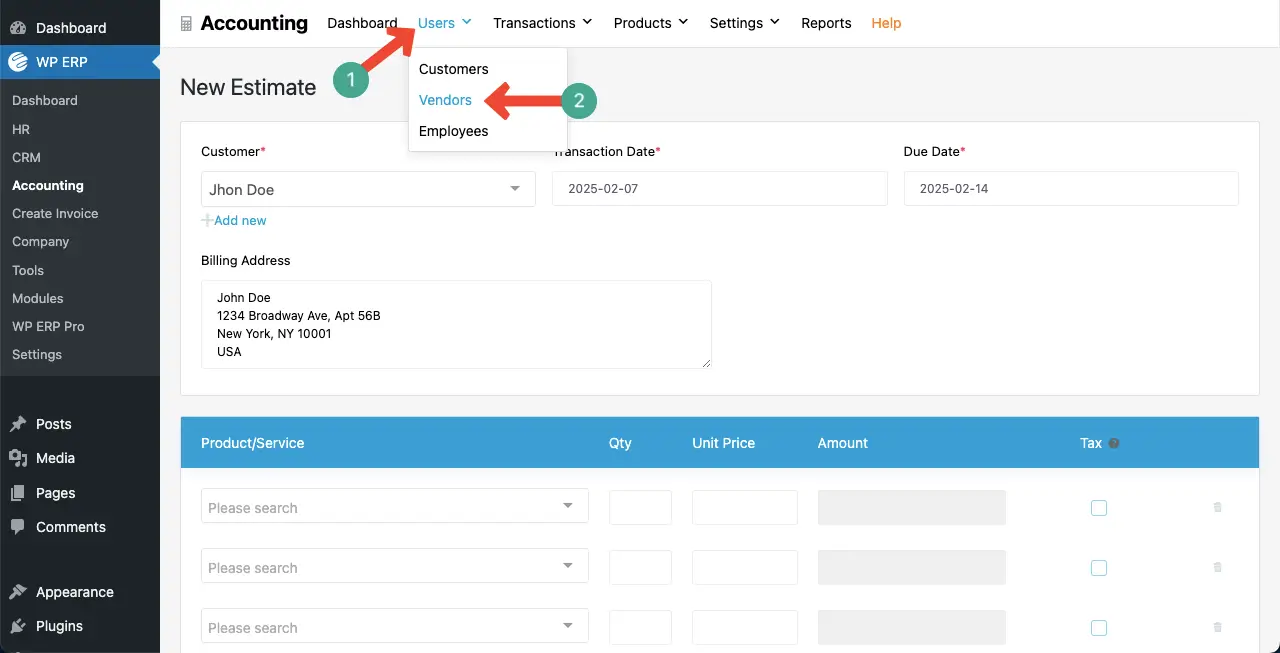
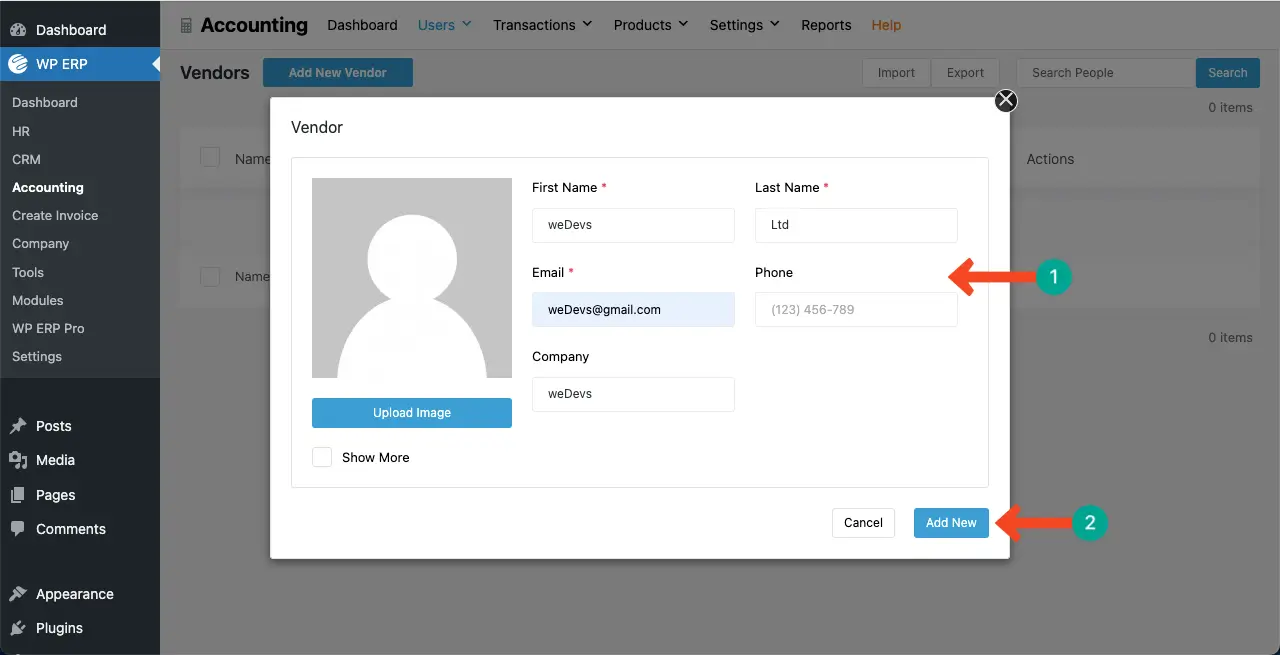
# Create Vendors
This vendor might be you, adding all your company or business’s information. To create vendors, go to Users > Vendors.
Click the Add New Vendor button.
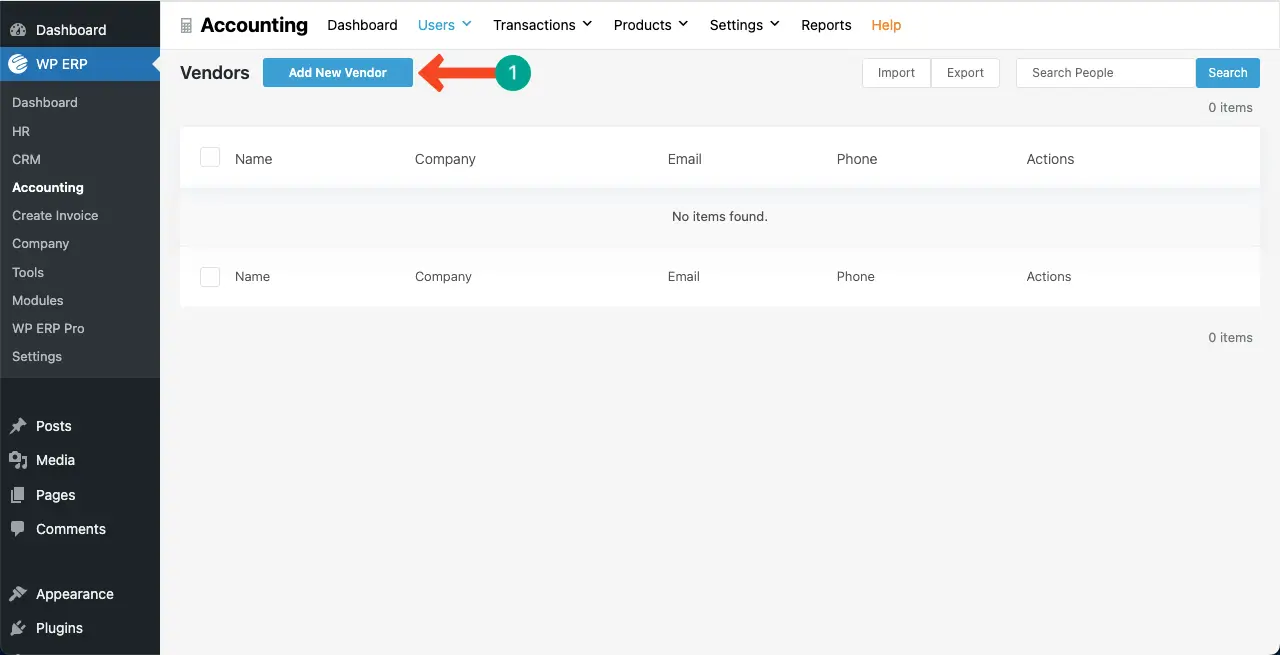
Fill in the necessary information about the vendor. Hit the Add New button at the end.
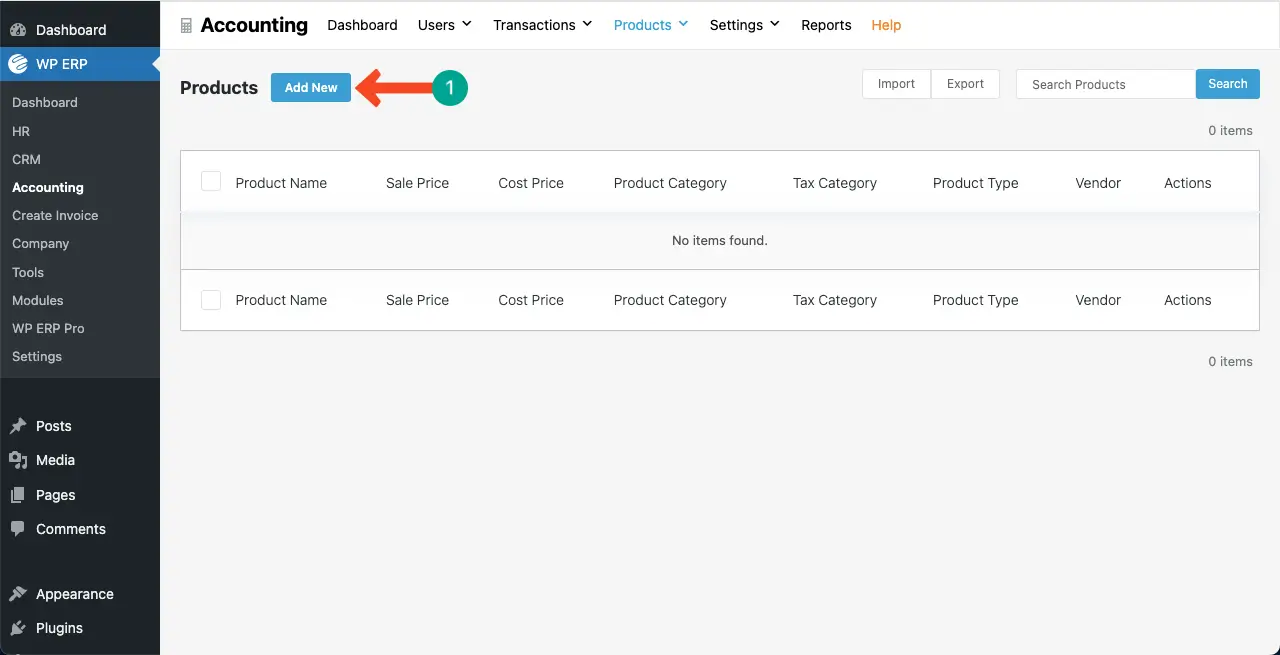
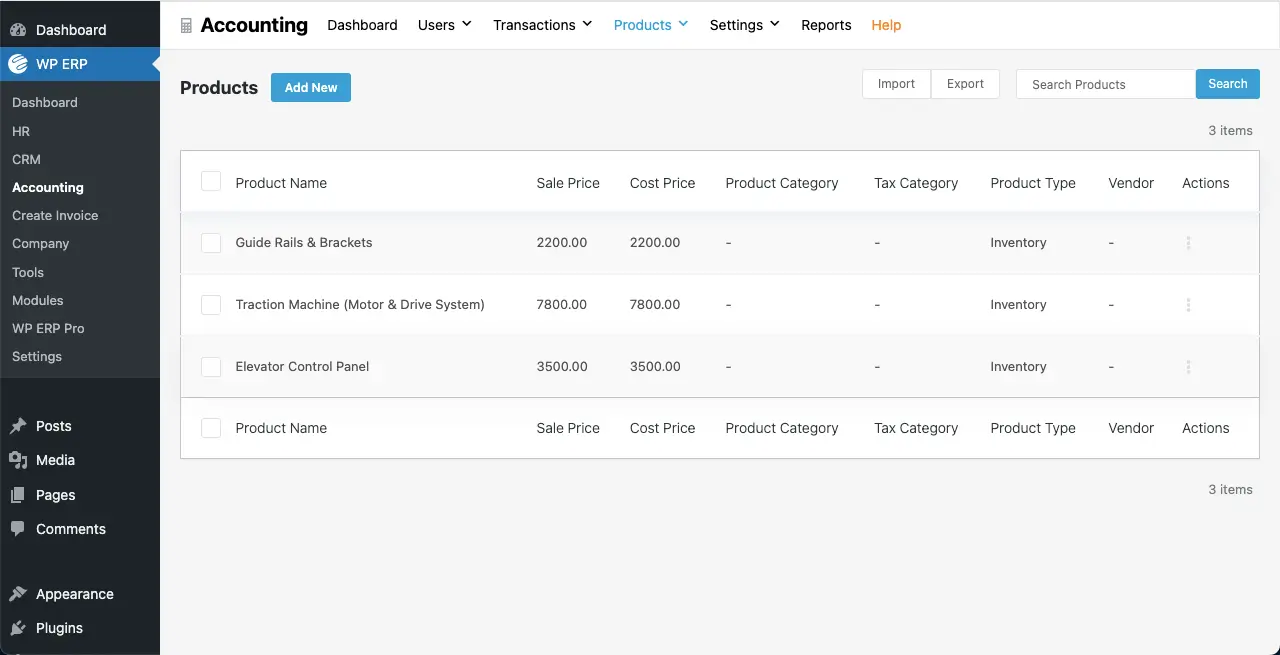
# Add Products/Services
To add products to your ERP, go to Products > Products & Services.

Click the Add New button.
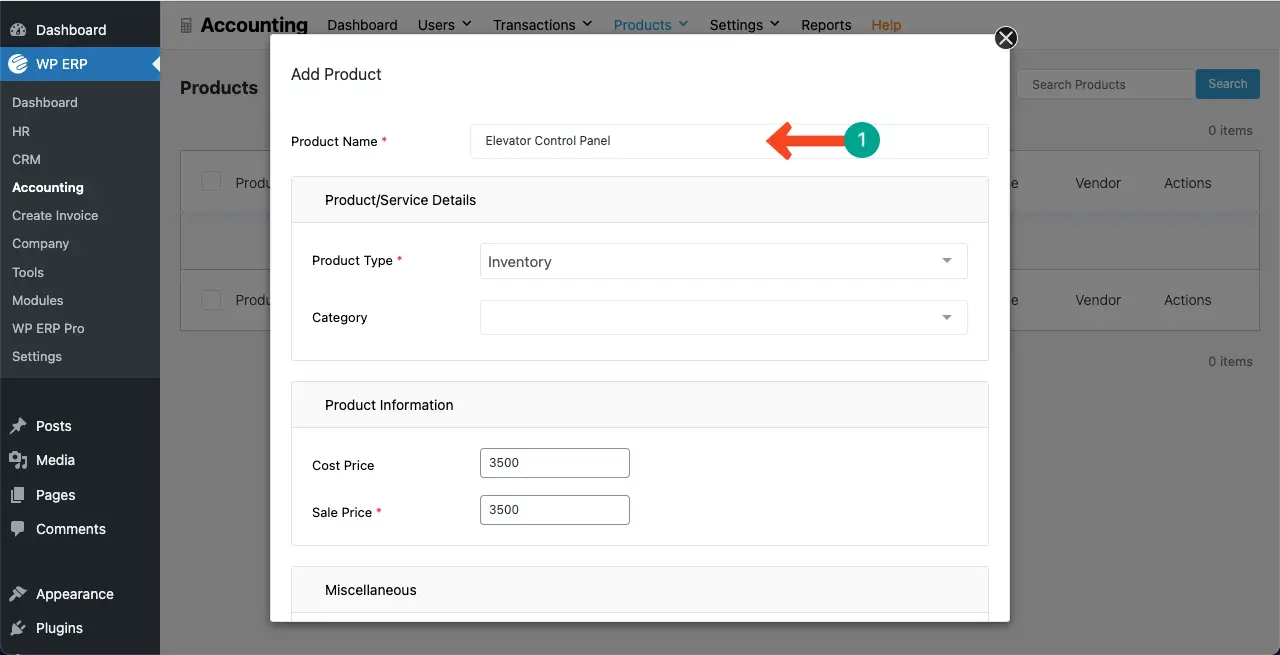
Add information about the product to the respective fields on the popup.
Save the product’s information by scrolling down the popup a bit.
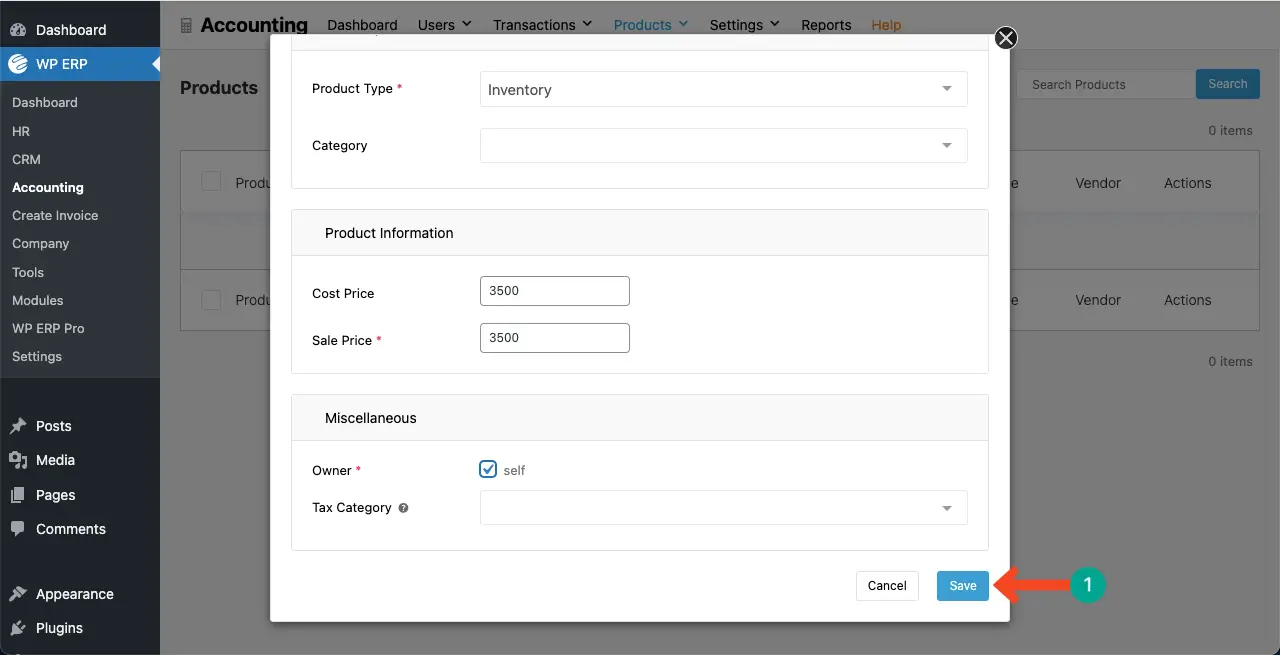
You can see that products have been added to the ERP.
# Add Products/Services to the Estimate
Come to the estimate page again. Place your cursor on the product’s field. You’ll see the products you have added just a few minutes ago. Choose the products one by one for each field.
If you want to create the estimation with only one product, select one product.
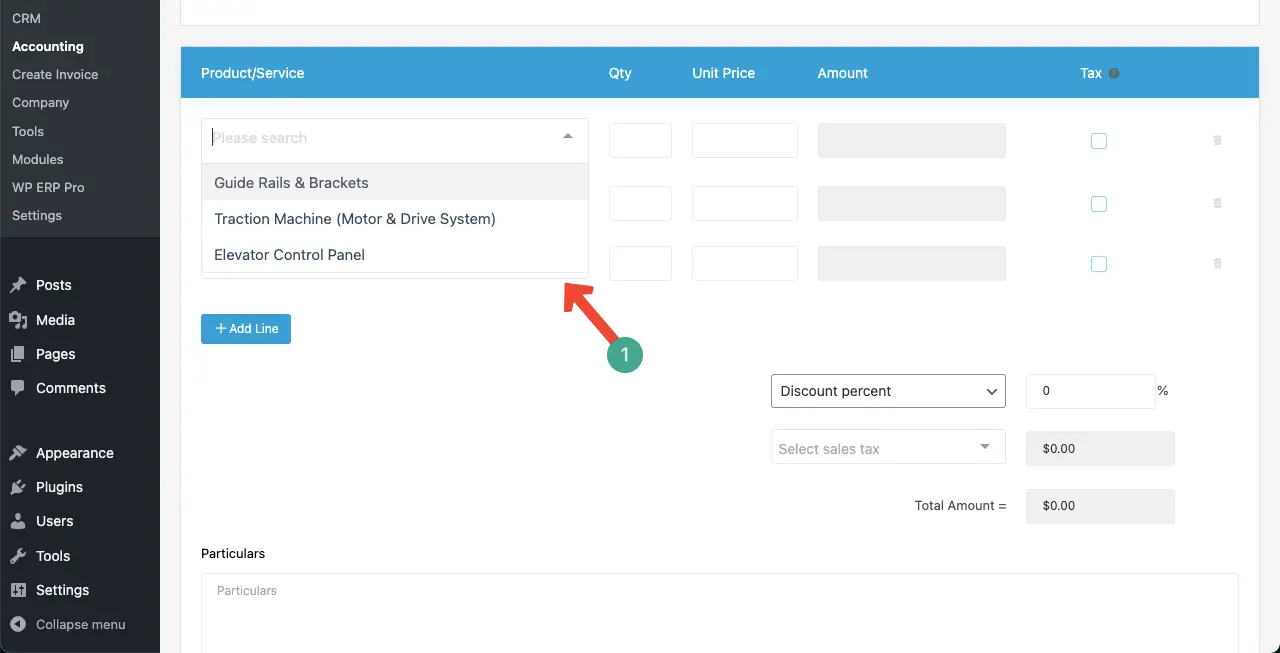
Add as many products/services as you want. You’ll see the prices automatically appear on the list as you set them in the product section.
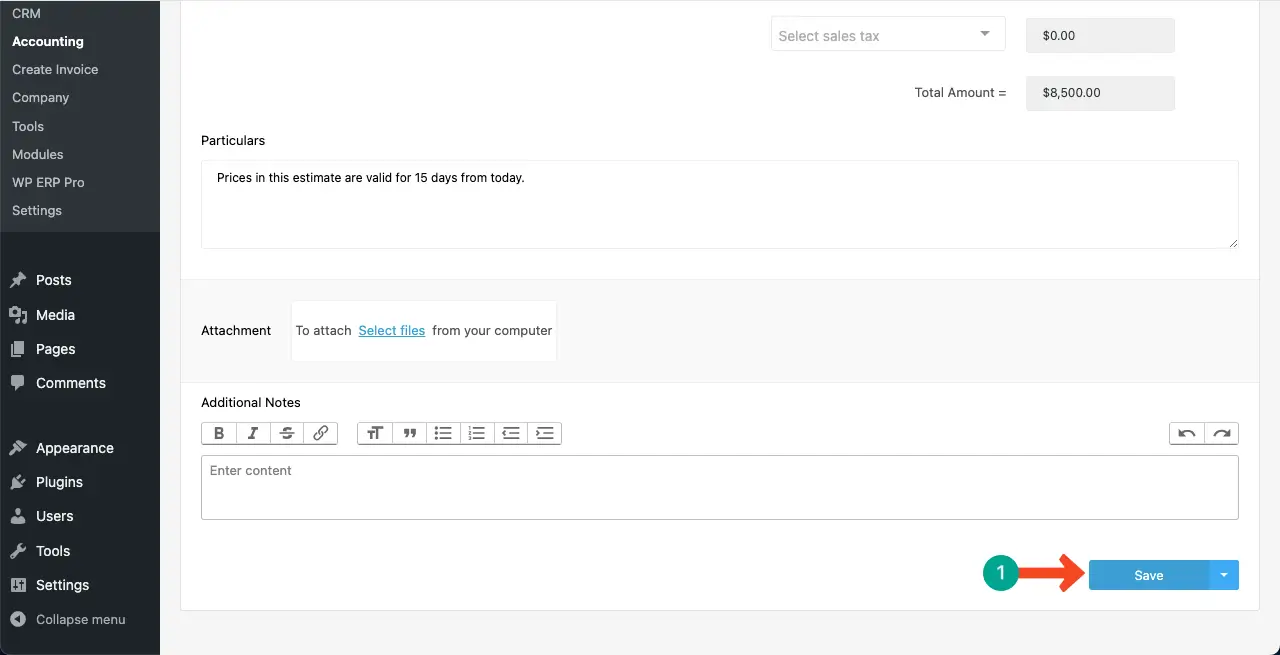
Then, set a discount percentage. The final price will automatically be calculated.
You can even add a particular. Do it if required.

Scrolling down the page, come to the Save button. Click the button to save all the changes you have made.
Come to Accounting > Transactions > Sales page. You’ll see the list of all the estimates you have created.
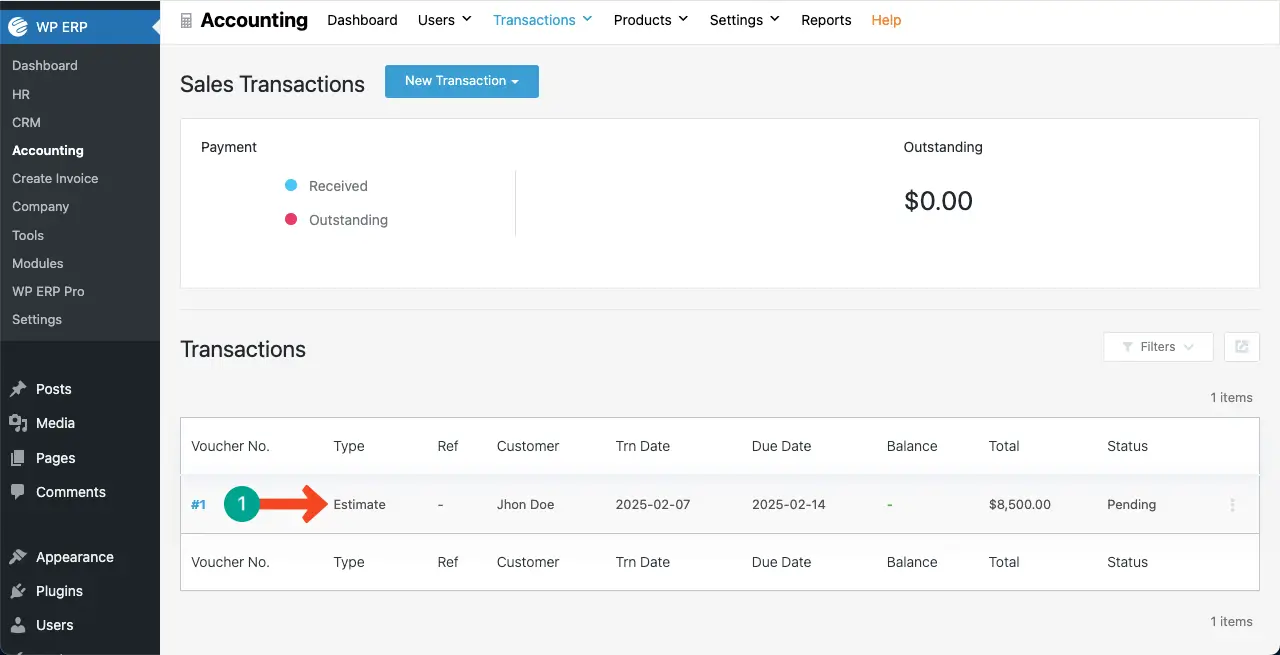
Thus, you can create an estimate in ERP using the WP ERP plugin. Once your ERP system is finely tuned, you can create as many estimates as you want quickly whenever needed and keep their record.
Here’s the repository of all the documentation guides about the features and functionalities of the WP ERP plugin.
Closing Up!
The process of generating estimates within WP ERP can improve the speed of quoting while delivering more precise estimates, which builds customer trust. However, to quickly and efficiently create estimates, you have to do some prior work. Add all your business products and services to the ERP.
You can even categorize them for the better organization. If your business works with multiple vendors, make sure to add them as well to the ERP. Only after that will it be easy to create estimates quickly.
Honestly, WP ERP is a big plugin with countless features and options. But never get worried! Its user interface is so easily designed that even beginners can become experts in it within a few days of operating this solution. If you have any confusion, about the plugin, let us know about it through the comment box below.