
We are living in an age of open knowledge base. But Success depends on how you resource and utilize this knowledge. In this regard, most of the big companies around the world focus more on client and employee management strategy rather than spending too much time collecting necessary data.
The same thing is happening for small and medium enterprises. They too have started adopting tools that help them create automated data storage to handling all of the business information easily.
Managing business becomes easier with enterprise resource planning software like WP ERP. With this full-fledged WordPress ERP plugin, you can gather and maintain your HR, CRM, Accounting, and PM data from one single platform. Turning your website into an ERP system will save time, money, and effort which leads to more productivity.
In this post, we will show you how to install WP ERP and configure it by following some simple steps.
Installing WP ERP on WordPress
WordPress is covering almost 60% of the global CMS market share. If you already have a WordPress site, you have an upper hand over others. From your plugin dashboard, you can install WP ERP for free.
Here what you should do.
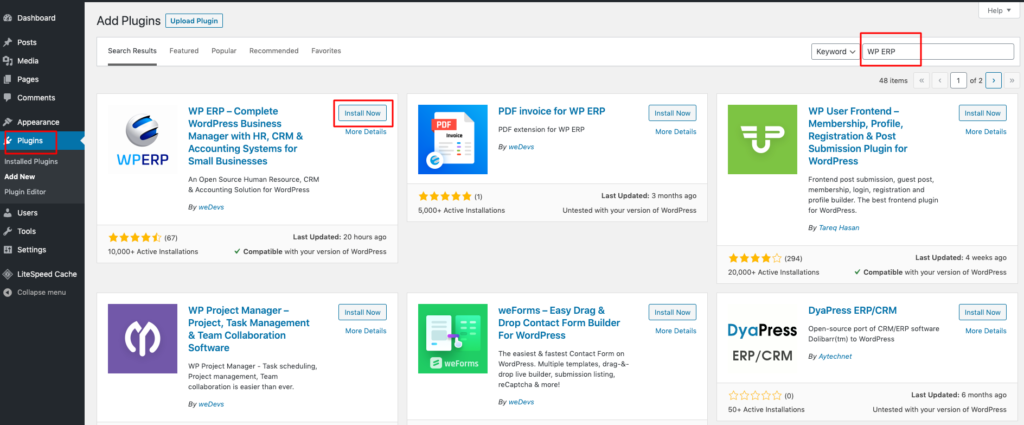
⇒ Go to your dashboard. Then put your cursor on Plugin and click on add new.
⇒ Then make a search for WP ERP.
⇒ You will find it just like the image below. Click on install.
⇒ After installing the plugin, click on the activate button.
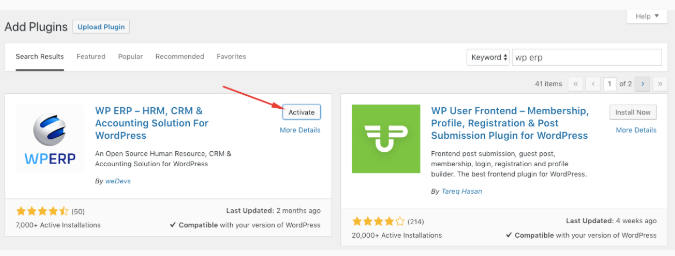
Now you are ready to go to the next phase.
Completing the Setup Wizard
WP ERP will guide you through a simple activation wizard to complete the whole activation process.
Let’s follow-through.
Step One.
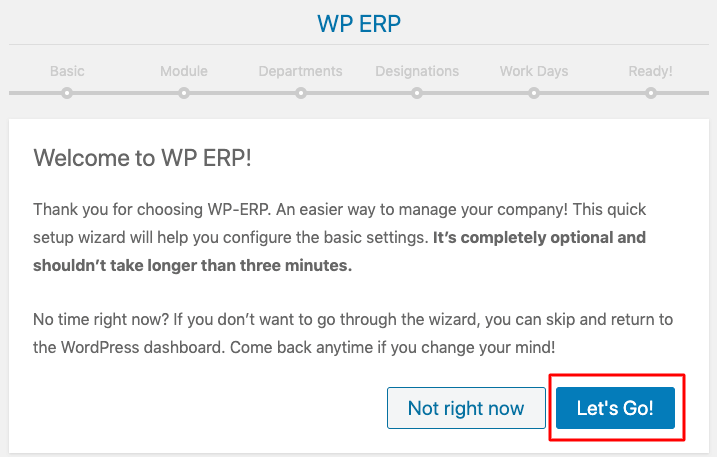
After you clicked on ‘Let’s Go!’, there is a setup wizard that will take you to all the steps one by one.
Though you can skip them and complete activation, our suggestion is to fill up all the necessary information in the beginning.
Step Two.
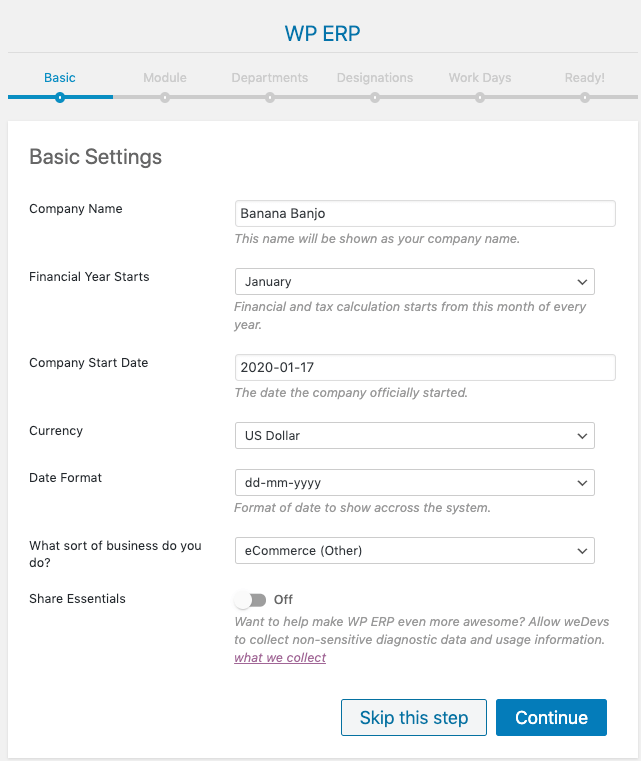
The core things you need to put in this stage are- your company name, the month when your financial year starts, when did you start your company, currency preference, and the types of business you are doing. Then click on Continue.
Step Three.
As we’ve mentioned in the beginning. WP ERP is a complete ERP solution, and one of the very first in the WordPress industry. It comes with four components or modules. They are-
⇒ HR (Human Resource Management)
⇒ CRM (Client Resource Management)
⇒ Accounting
⇒ WP Project Manager
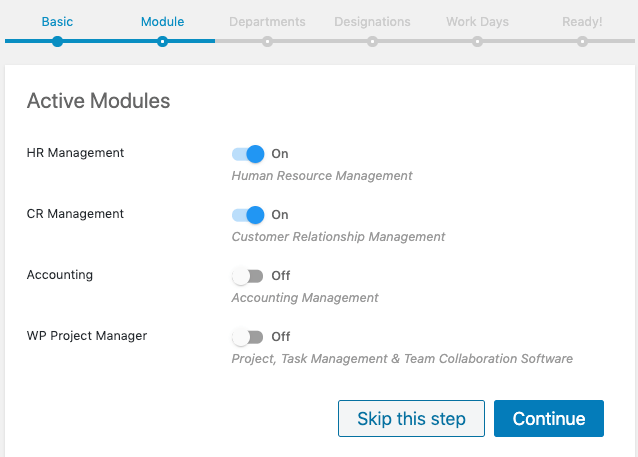
In this step, you can select all four, or click the slide to turn off any modules. Then click the ‘Continue’ button. Our suggestion is to turn off the WP Project Manager. It’s better to install WP PM separately form the WordPress.org dashboard.
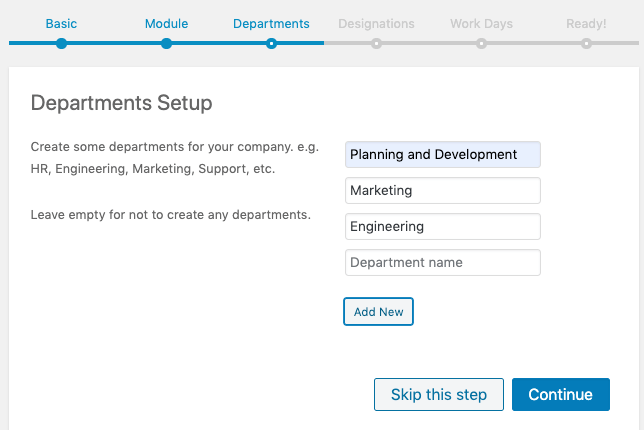
Step Four.
Here, you need to create the company departments. It’s possible to add as many departments as you want. To do this, simply click on the ‘Add New’ and go on. Also if you want to skip this for future customization, do it as well.
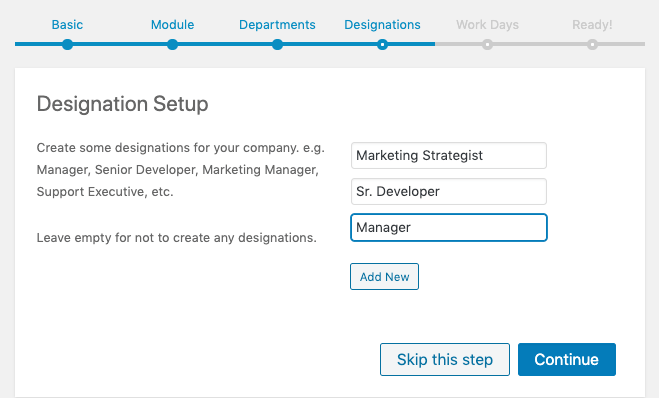
Step Five.
Creating designations in your company means you tell the plugin how many people your business has and you want to track their data. For example, you can add Manager, Sr. Accountant, Marketing Lead, Area Supervisor or any major and minor designations within a second.
Step Six.
After completing the Designation Setup, it’s time for you to set the workdays. There are three alternatives- FullDay, Half Day, and Non-Working Day. So this stage lets you arrange your weekly holidays and working days.
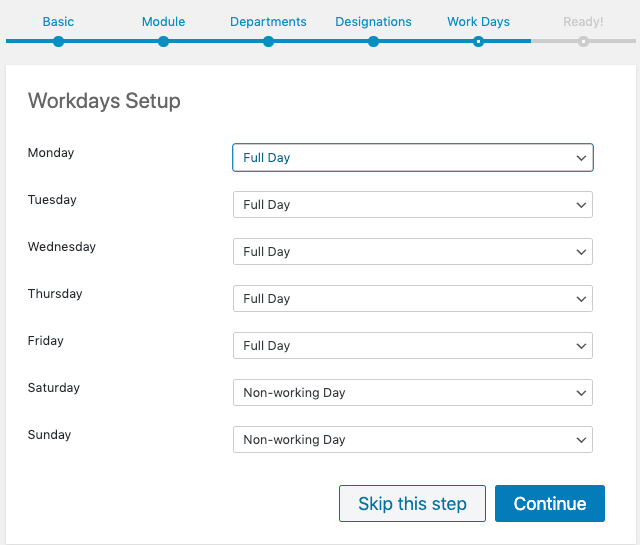
Now click to continue. And you are done with the WP ERP installation process.
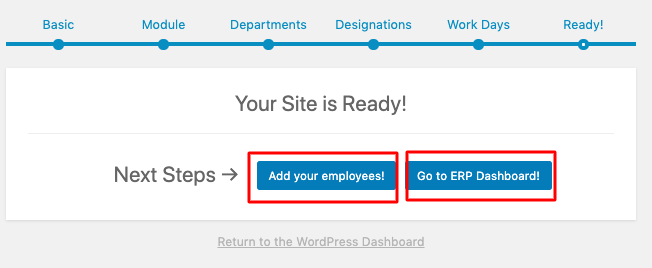
From this stage, you can add employees or directly go to your ERP dashboard. There are several settings and configurations which you will need to do from the dashboard anyway.
How to Configure WP ERP from Your WordPress Dashboard
The installation process is easy. Mainly you just go to the plugin store, make a search, then install and activate the plugin in your WordPress dashboard.
But unless you make WP ERP completely ready, you can’t start managing your business right on. It’s necessary to configure the features in different modules, learn and understand all of their functions to get the highest results.
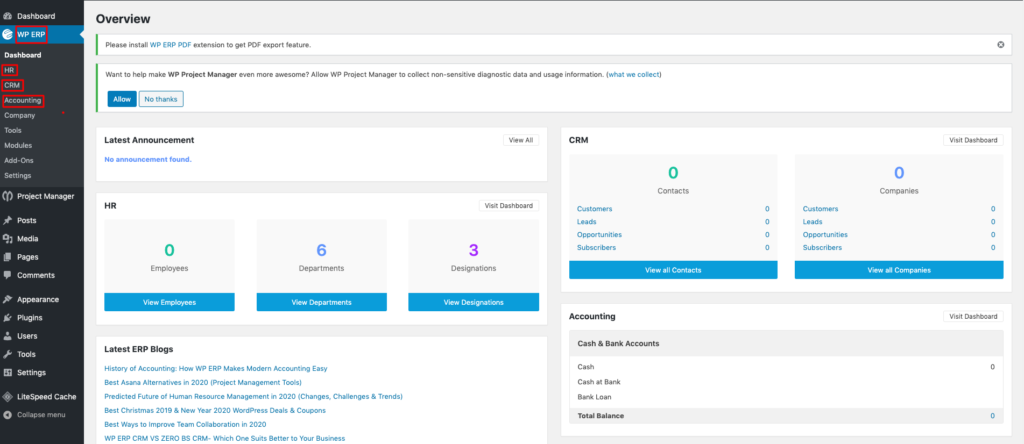
As you can see from the dashboard, HR, CRM, and Accounting have different options. Then we have the WP Project Manager yet to explore.
For a beginning, take a look into the settings option.
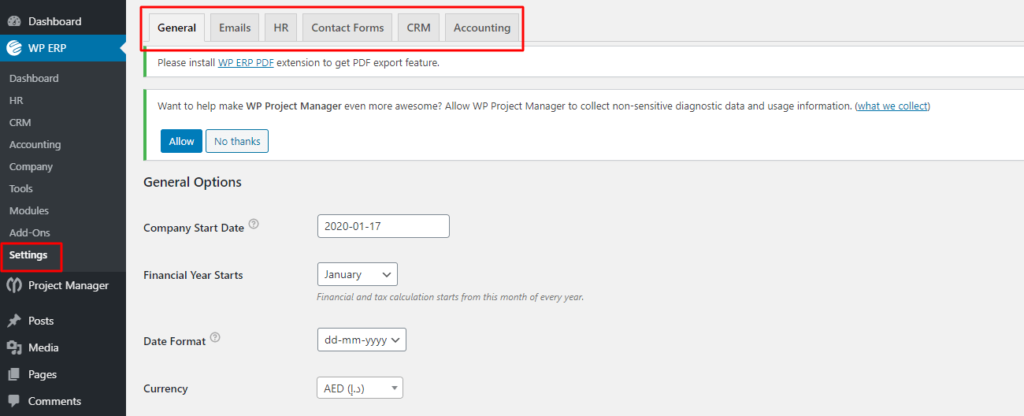
While you have gone through the activation wizard, there were settings like including the start date of your business, when your financial year starts, currency, etc. The general setup is all about putting this info or editing the user role in CRM, giving permission to importing CSV files, etc.
They aren’t that hard things to set or customize. But to become a successful user, you should master the configuration of different modules of WP ERP. We are going to show you some of the core settings of four different modules.
Configure WP ERP HR
The HR module lets you add employees, departments, and set designation. The activation wizard has already made you familiar with them. You can also manage your leave, different announcements, and get reports like salary history, gender profile, or years of service of the employees.
If you want to have a quick look at how WP ERP HR works, take a tour with this video for some seconds.
Well, let’s see how to add employees to your HR database.
⇒ Click on the HR module
⇒ Now go to the Employee section in the top menu bar.
⇒ Click on add your first employee. Also, you can upload a CSV file with the complete employee list.
⇒ On the next page, you will find a form to upload employee photo, names, types, and status of the employee, start date, and ID.

⇒ Fill up all the information one by one. After that, click on ‘Create Employee’.
Have you noticed the tickbox on the bottom? You can check that for adding further info anytime you want. Like this section, it’s super easy to manage your leaves, and monitoring all of your HR reports.
Configure WP ERP CRM
Either it’s adding new contacts, remove old ones, WP ERP CRM simply put you through an easiness. Hence, you can add client companies to gather their information, follow up with their activities, and manage contact groups.
However, two of these tasks are pretty similar to creating customer or designation in the HR module. So, here we will show you how to log new activities into your schedule.
⇒ Go to CRM.
⇒ Click on Schedules in the top menu bar.
⇒ Click on any date you need to add your log.

⇒ Hence, this form will be shown to you. Fill up each box with the date, time-frame, which contacts you want to assign, detail description, types of the schedule, etc.

And, after that, click on ‘Create Schedule’. Then you will be done creating your very first schedule with WP ERP CRM. Your CRM calendar will show you the details like the image below whenever you click upon the date.

Configure WP ERP Accounting
The accounting section gives you instant access to the balance statement. It will help you to know the expenses and earnings of your petty cash and savings account. Always you can monitor, follow up, or add data to your accounting activities.

Even if you are not an accounting specialist, you can handle your balance sheets, debit-credit, and income statement. There are options to upload your banking information, vendor list, and their balance, transaction info with the customers, etc.
Besides, it will help you generate reports like trial balance and sales tax.
For example, if you want to create a new expense account like “snacks expense” in the Chart of Accounts, how to do that? Take a look.
Creating a new account on the Chart of Accounts
⇒ Go to WP ERP from your Dashboard
⇒ Now go to Accounting
⇒ Now put your cursor on Chart of Accounts and click on the Add new button

⇒ Now from the drop-down menu, select expense in the first box.

⇒ Write the account name.
⇒ Click on Save, and your account has been created. It’s that easy.
For a cautionary note, while selecting the chart in the first box, be careful. Only select expense when you want to create an expense account. A missed selection can put your whole system in the wrong direction.
What to Do Next
So, that’s it. Now that you know how to install and configure WP ERP, what should be your next step?
The free version of WP ERP gets you the basic features to manage your business. Besides, this powerful plugin offers plenty of rooms to adding extensions and avail advanced-level functions. However, you won’t be able to utilize all of them. There are different pricing plans for those ERP pro features and extensions.
If you face any problem while installing the plugin, you can always contact our support team.
