Workflow
Automate actions in your WP ERP system with this advanced add-on. Save time and reduce the margin of error.
In this documentation, we will discuss-
- Basic idea of Workflow within WP ERP
- Trigger Modules
- Events based on different WP ERP modules
- Actions based on different conditions
- Creating & activating New Workflow
- Managing Created Workflows
- Managing the Status of Workflows
What is Workflow?
It is an automated system to trigger actions based on many different events within your ERP system. Workflow is fully compatible with all the modules of WP ERP and it can save your time and also reduce margin errors in many cases.
Workflow basically helps you to create triggers or tasks based on different events. This means you can set different activity or task based on conditions or events. For example, you want to send a welcome email to your newly subscribed user. You can easily create a workflow based on these conditions. The workflow will trigger an email when a new user subscribes to your website. You don’t have to manually send emails to your subscribers.
Trigger Modules
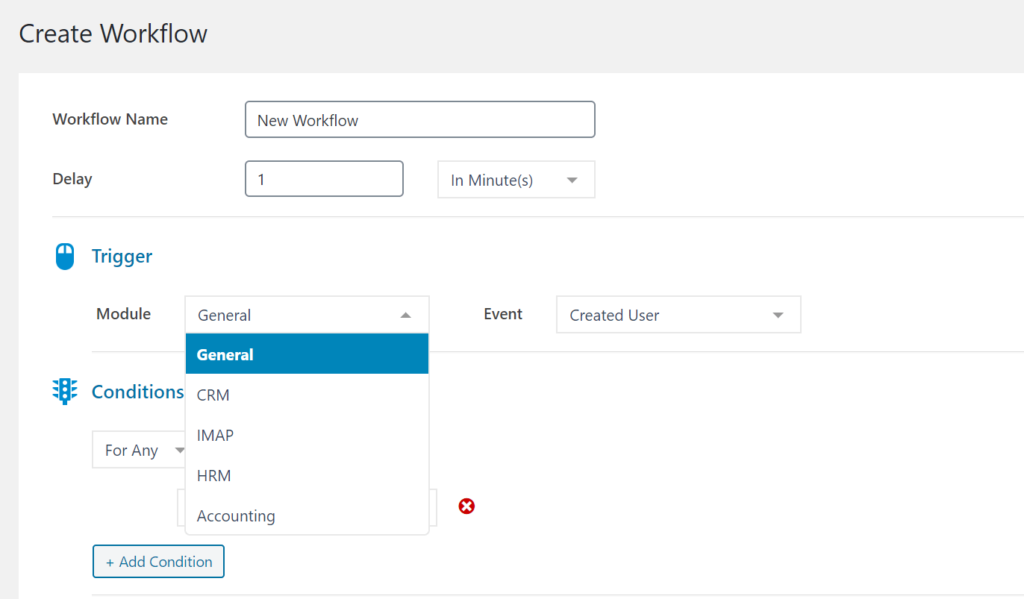
Trigger modules specify the WP ERP modules that are being used for Workflow. The following modules are available for Workflow including all three core modules of WP ERP.
- General: This is the common module that specifies all the modules of WP ERP.
- CRM: This module applies the CRM module of WP ERP.
- IMAP: This module specifies the mailing feature of WP ERP.
- HRM: This module specifies the HRM module of WP ERP.
- Accounting: This module applies the Accounting module of WP ERP.
Different Events Based on Modules
The following table contains available events based on the above modules.
| General | CRM | IMAP | HRM | Accounting |
| Created User | Created Contact | Inbound Email | Created Employee | Created Customer |
| Deleted Contact | Deleted Employee | Deleted Customer | ||
| Subscribed Contact | Published Announcement | Added Sale | ||
| Unsubscried Contact | Requested Leave | Added Expense | ||
| Created Note | Confirmed Leave Request | |||
| Created Task | Happened Birthday Today | |||
| Scheduled Meeting |
Actions Based on Different Conditions
There are options to create conditions for a workflow. You can select either For Any or For All condition. Under them, you can define any of the fields related to the module that has been selected. For Example, the CRM module contains the information related to the customers. You can specify conditions including the First or Last name of the customer, their contact information, life stage etc.
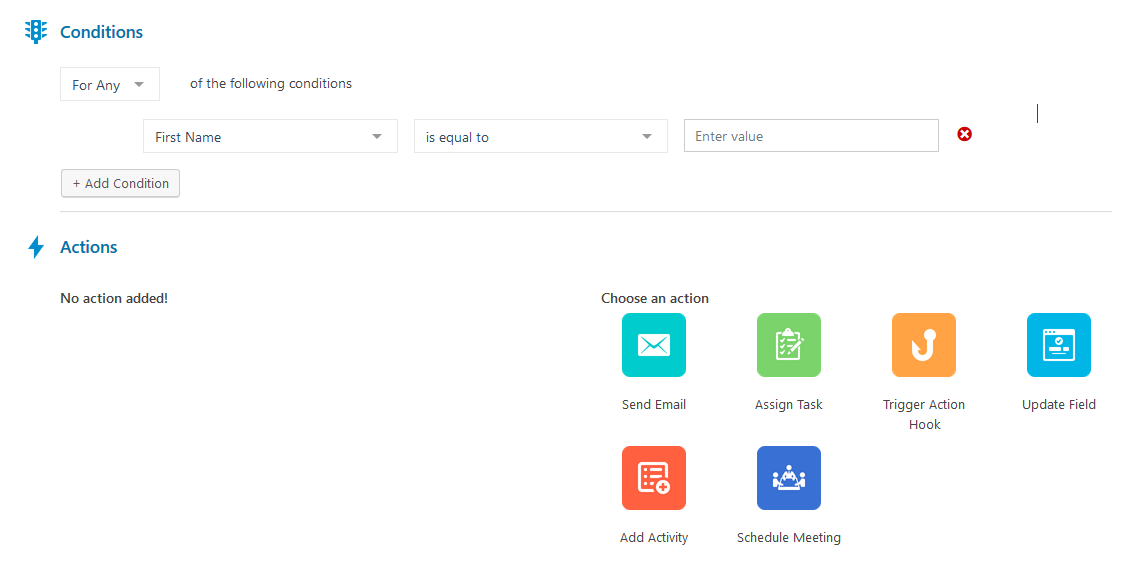
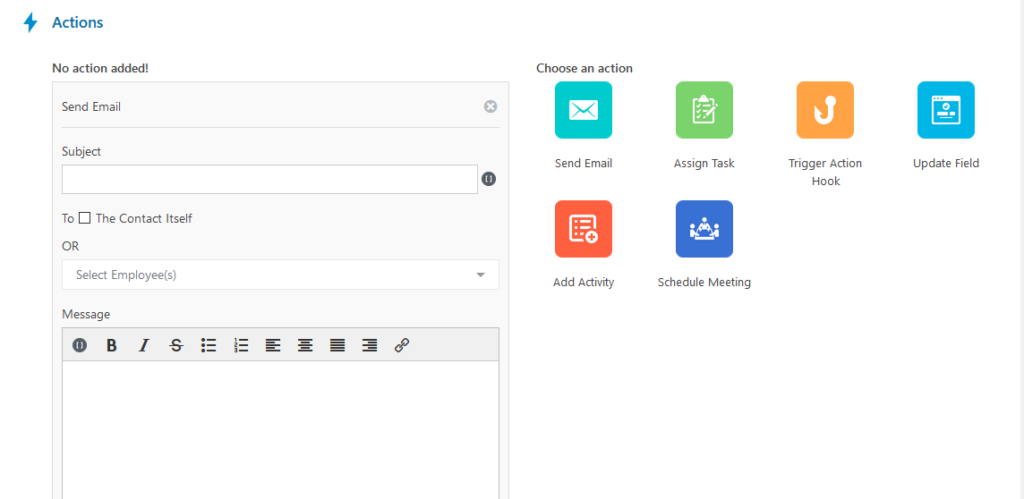
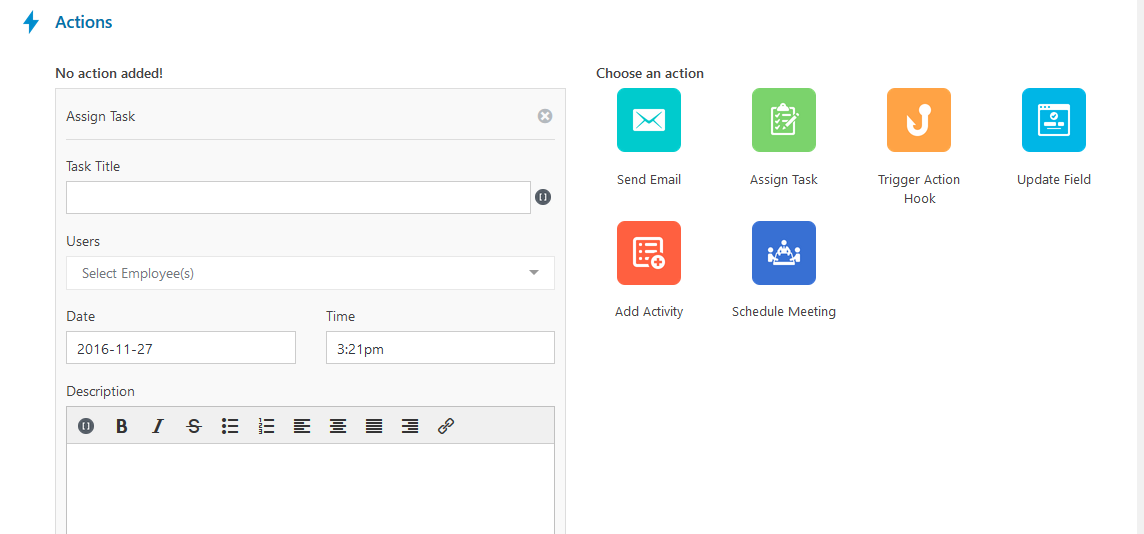
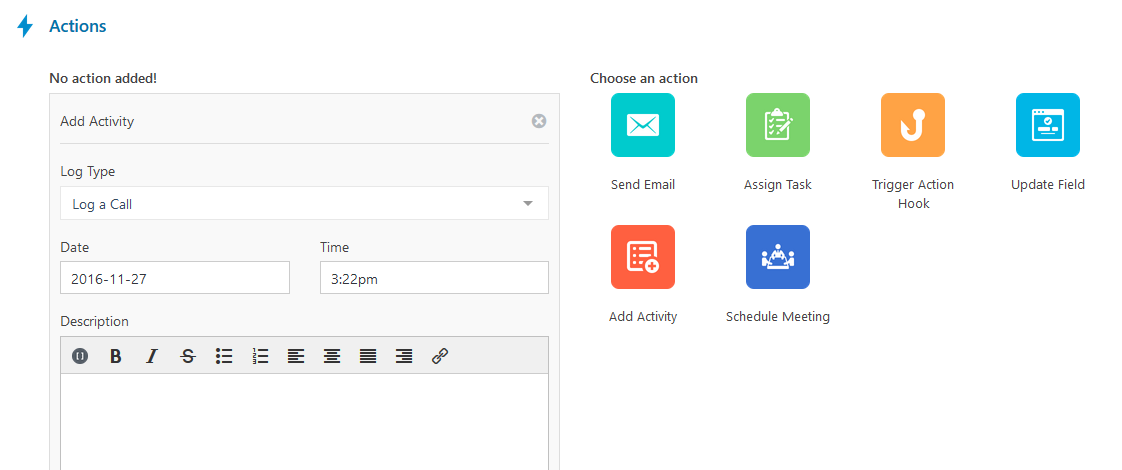
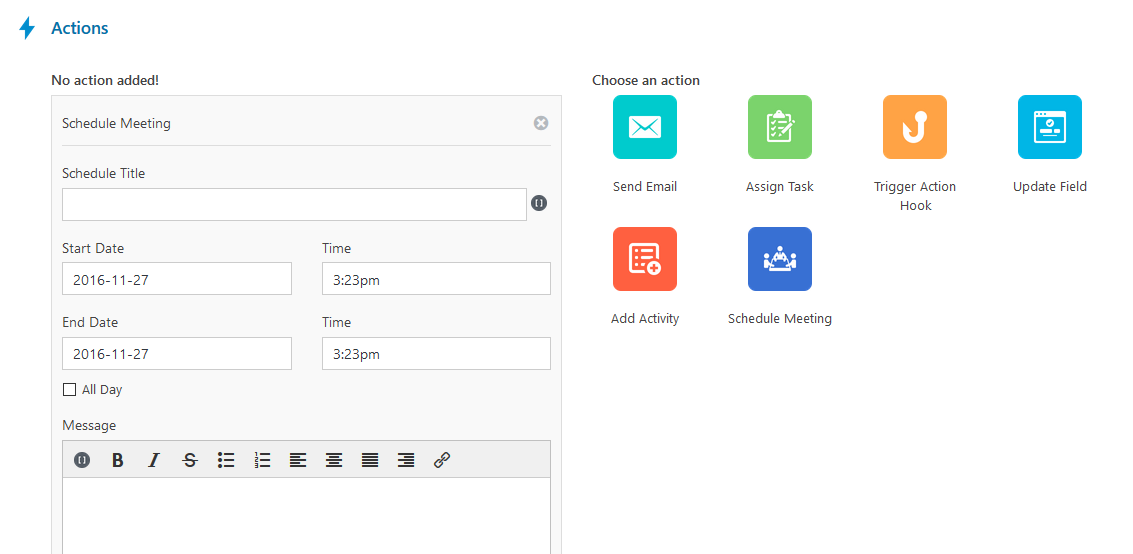
There are total six actions available for the modules. Some module has less because of different functionality. The available actions are,
- Send Email: This Action triggers an email to the people that are defined by the modules, activity, conditions and actions.

- Assign Task: This action triggers a task on a selected employee and on a selected date and time.

- Trigger Action Hook: This action triggers an action hook created by you.

- Update Field: This action triggers an event where a field will be updated according to your conditions.

- Add Activity: This action triggers an activity created by you. This activity can be logging a call, meeting, email or email on a specific day and time.

- Schedule Meeting: This action triggers the schedule of a meeting from a specific date and time.

Creating and Activating a Workflow
In order to create a new workflow, navigate to WP Dashboard → Workflow → Add New
It will redirect you to the Create Workflow page. From there, you will have to add the Workflow name.
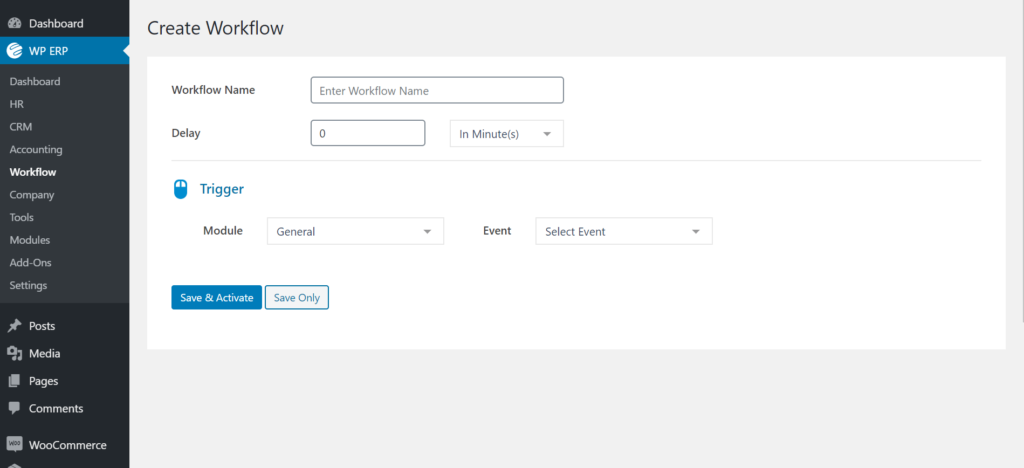
Then, select the trigger module and an event.
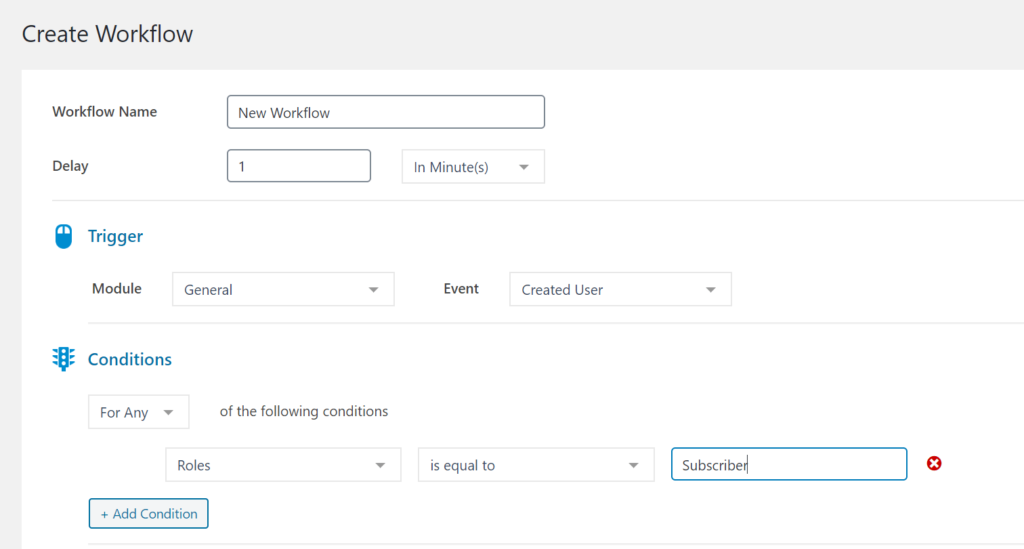
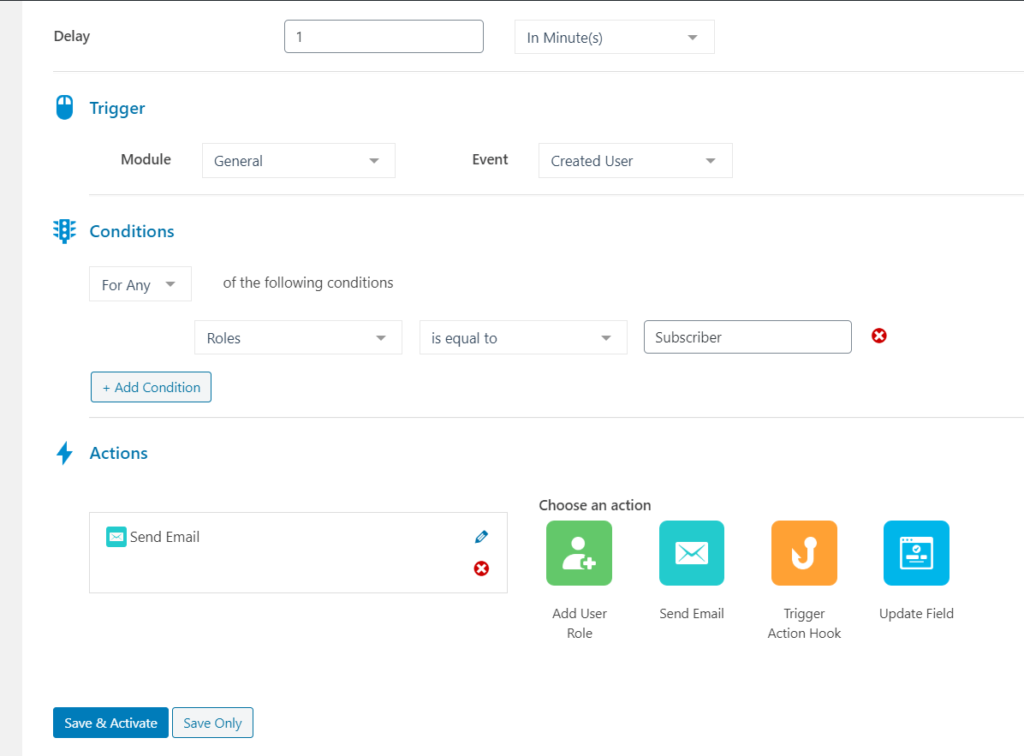
Now, provide the conditions according to your requirement. For example, we have selected General module and Created User event. For the condition, we have selected For Any and specified the Roles as Subscriber.
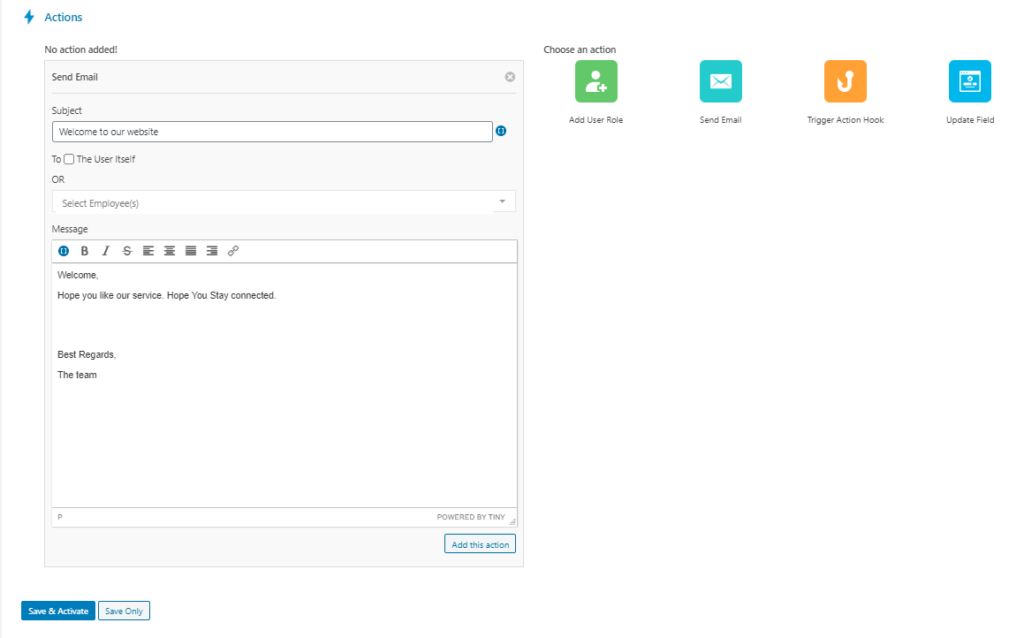
At this point, Select the action you require. For example, we have selected Send Email action. After that, enter the action title, select user and provide the message. After completing these, Click on the Add this action button.
Next, you will have a preview like this. You can also add another action if you require. After reviewing the workflow, click on the Save & Activate button at the bottom of the page.
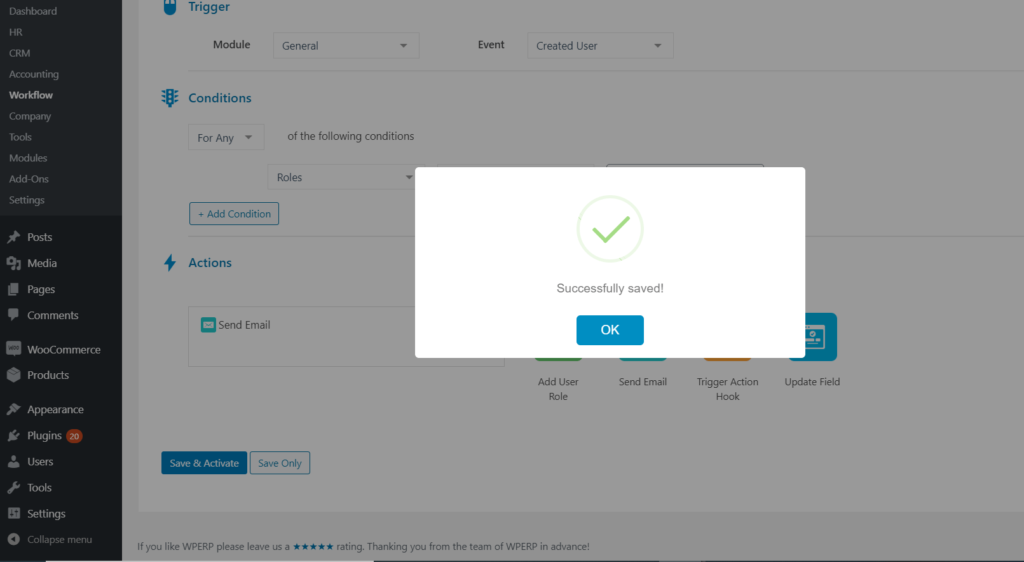
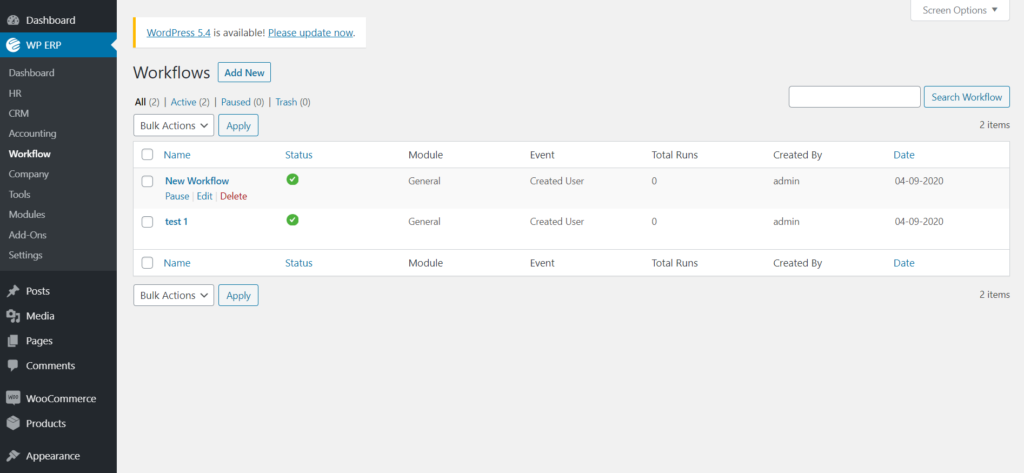
You will see a confirmation message and redirected to the workflow list. From there you will be able to see the status of the workflow.
You can pause the workflow by clicking on Pause and the status will change by showing a yellow icon.
Editing and Deleting a Workflow
You can edit or delete a workflow if you want. To do so, click on the workflow from the list, it will redirect you to the edit page.
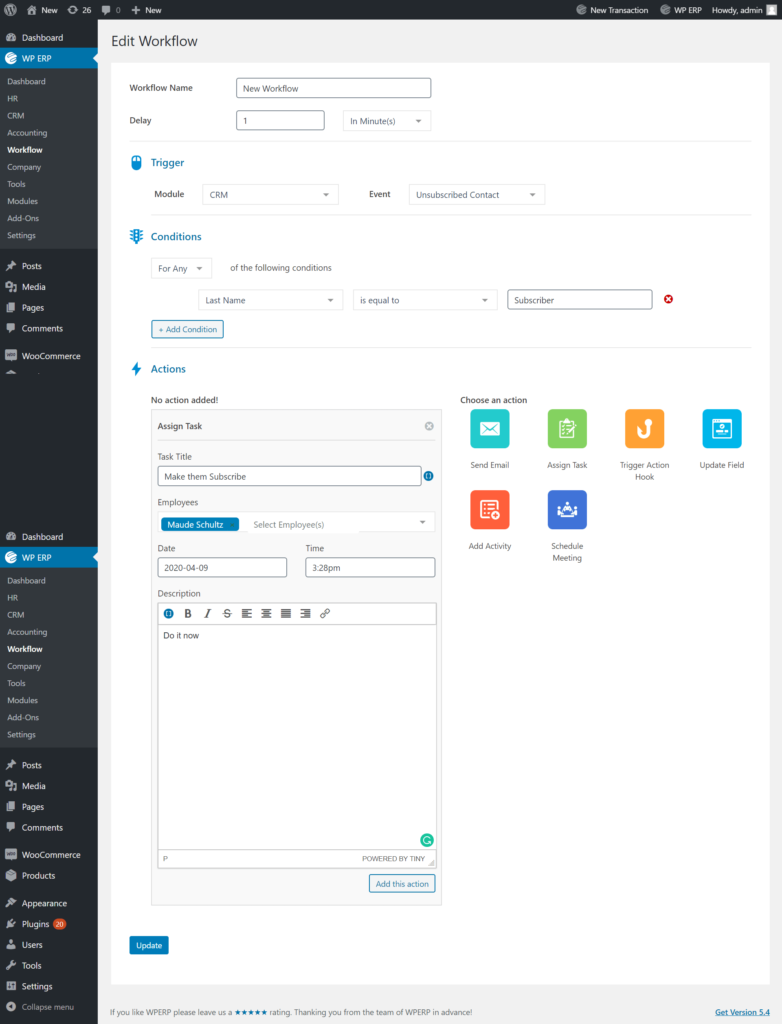
You can also delete a workflow by going to the workflow list page and hover over the workflow. You will see edit, pause and delete option. Click on the delete option to delete the workflow. The workflow will be available in the trash and you can restore it or permanently delete it from the trash section.

