
Awesome Support Sync
Awesome Support is one of the most popular WordPress help provider and support service plugins. The solution describes itself as a WordPress Help Desk and lives up to it with powerful capabilities. Awesome Support provides everything customer support-related: tickets generation, customizable email notifications, automatic agent assignment with multiple agents, file attachments, and plenty of add-ons. But if you need that extra for full and better management of your clients, then get it with the help of WP ERP Awesome Support Sync.
With this extension you can transform your Awesome Support into a full-fledged CRM. Do much more customer relationship management functions with your Awesome Support contacts with this extension.
Staying ahead with customer history and details just got easier!
Pre-requirements
For this add-on to work you need:
3. ERP Awesome Support Integration
Installation & Configuration
- To download the integration visit your My Account page. Here you will find the link to download the ZIP file containing the Awesome Support Integration. Download the zip file from My Account and save it in your desired place.
- Visit WordPress ERP dashboard>Plugins. Click on Add New to upload the ZIP file you just download from your My Account page.

3. When you click on Add New you will be asked to upload your file. Click on Choose File, then click on Install Now.

4. After the file is uploaded, click on Activate Plugin and get started!

5. Next navigate to WordPress ERP dashboard>ERP Settings>Settings>CRM>Awesome Support. Here you will find the default settings for the contacts that will be imported from Awesome Support. From here, you can change the default Customer Life Stage and Default Contact Owner as you like. Then click on Save Changes.

How to submit a ticket & Sync data with CRM
At first a new user registers to submit a ticket in the usual way that he/she would.
Existing users will simply log in with their email/username and password.
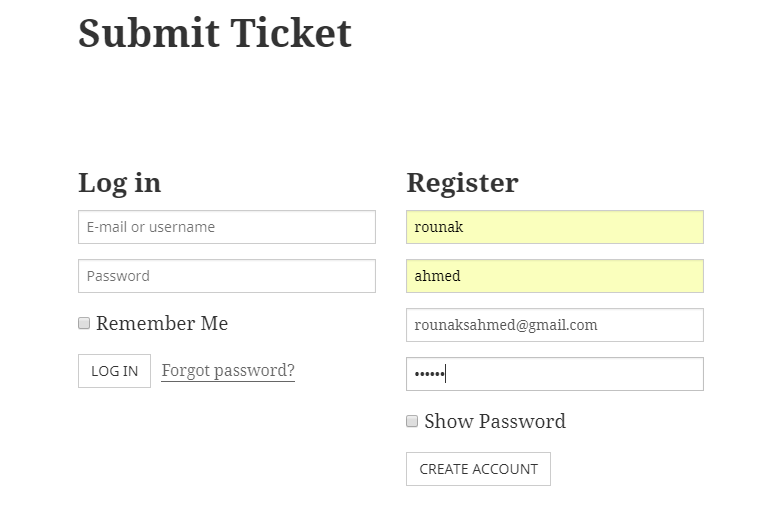
The user will then write his/her issue.
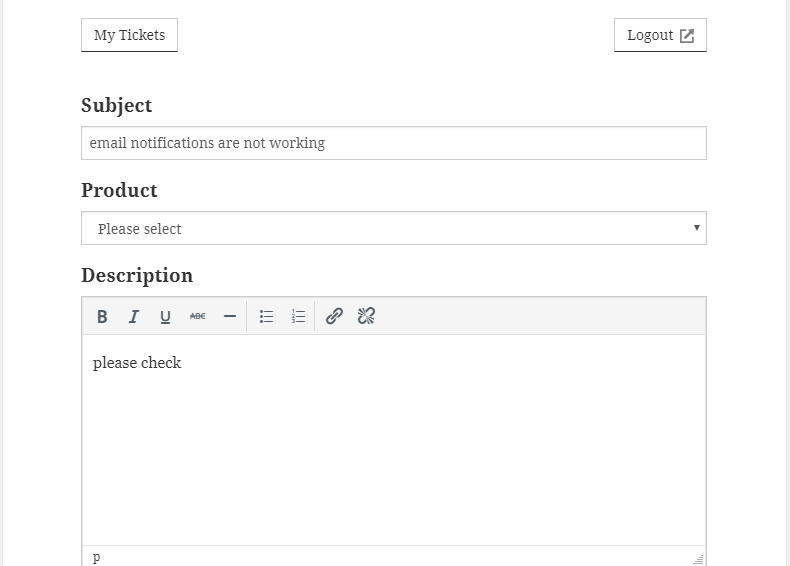
And then hit submit.

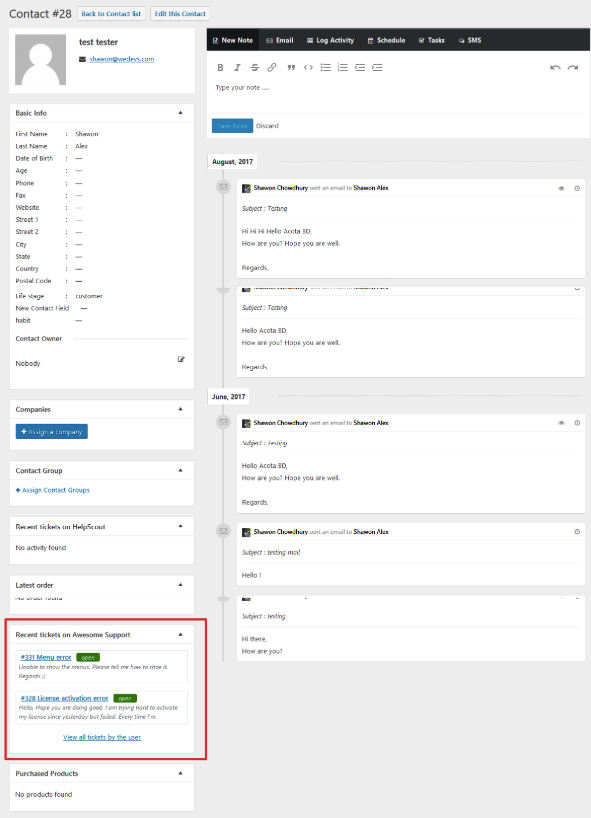
As soon as the ticket is submitted, the contact will sync with your CRM, along with all the details relating to that contact. This will also include any previous tickets that were generated by the contact previously and that you have dealt with via the Awesome Support plugin.
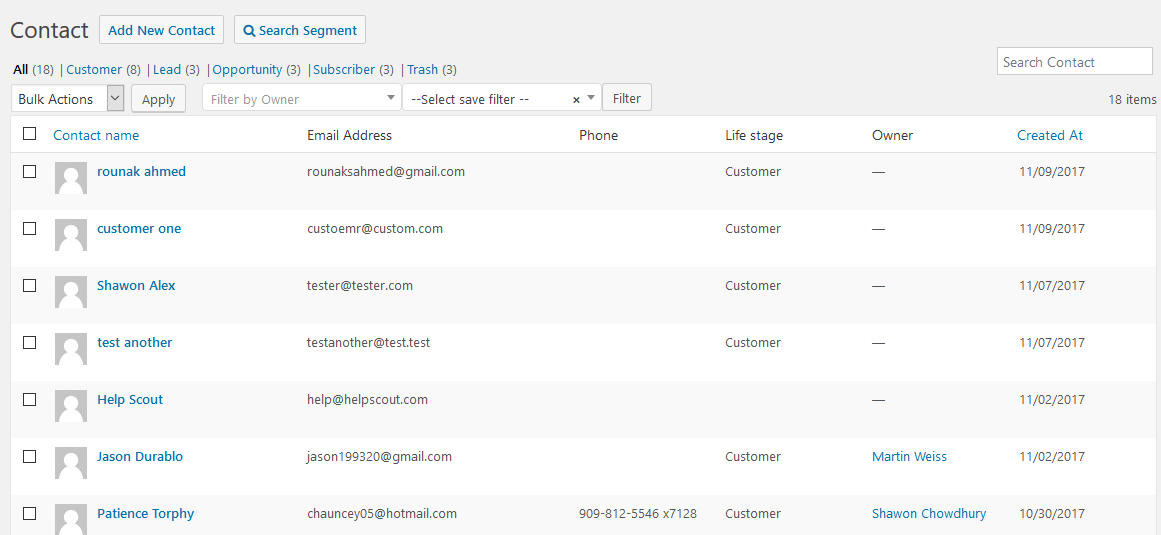
Navigate to WordPress ERP dashboard > CRM > Contacts.
Here you can see that the new ticket generated by this user now appears in your CRM contact list.
When you click on this contact, you will see all the details along with any previously generated issues/tickets by this user.
By default, the life stage will be Customer. You can change this in the default setting for all contacts, or you can change it manually for each contact by visiting the contact’s profile.
Moreover, you can now email this contact directly, log activities, schedule meetings and other things, add tasks, and send SMS right from your CRM dashboard, without having to resort to different mediums for each of these activities.
Think of the amount of hassle and time it saves you!
And that’s it! The syncing is totally instant and automatic.
N.B. Currently, this integration only imports users who created tickets after you installed the add-on. Unless an old user creates another ticket, you won’t be able to see pre-installation users as contacts and their tickets.