
HR Frontend
With WP ERP HR Frontend brings the HRM module of WP ERP to your web front. You can view and manage your employees securely from your website without going to the Backend or WordPress Admin Dashboard.
Employees and staff will also be able to access important functions from the frontend without having to resort to the dashboard.
In this documentation, we will discuss-
Activating HR Frontend
First, install and activate the WP ERP Pro plugin on your site with the license key from your WP ERP account.
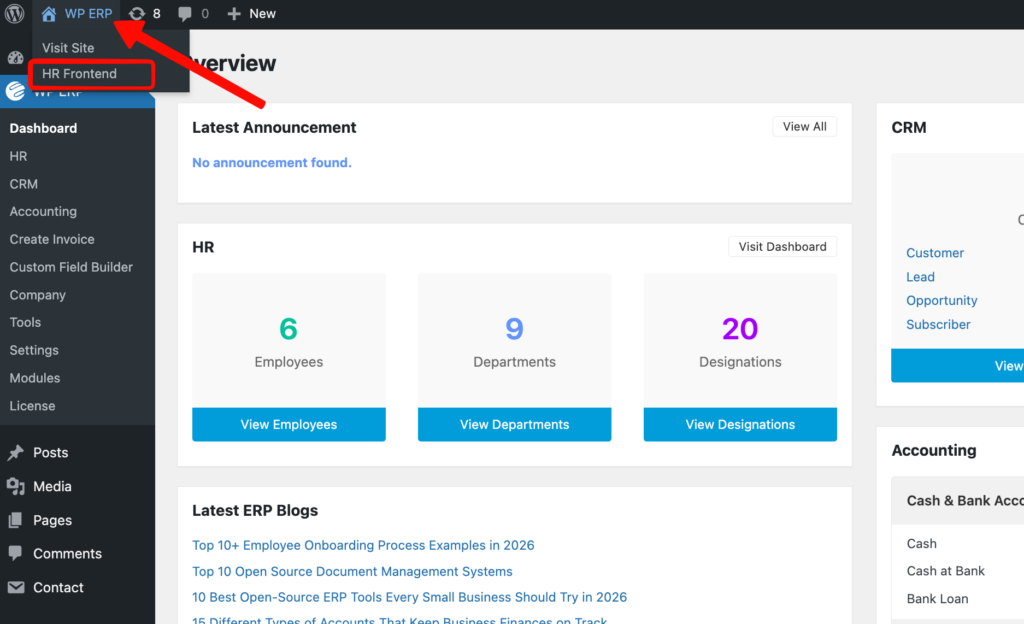
Navigate to WP Admin Dashboard → WP ERP → Modules → Purchased → HR Frontend → toggle on the bar to activate it.
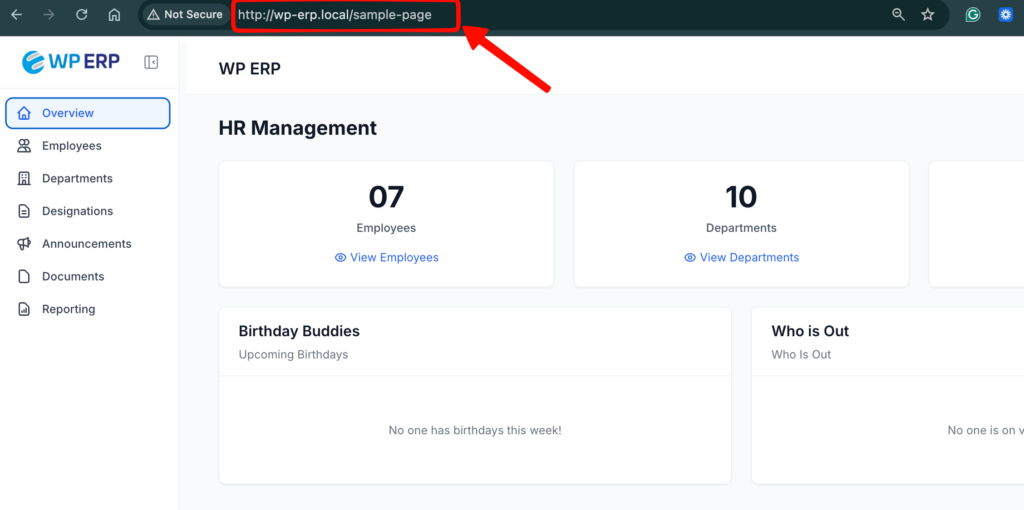
Once activated, you will find a new tab under WordPress ERP when you click on it, with the name HR Frontend:
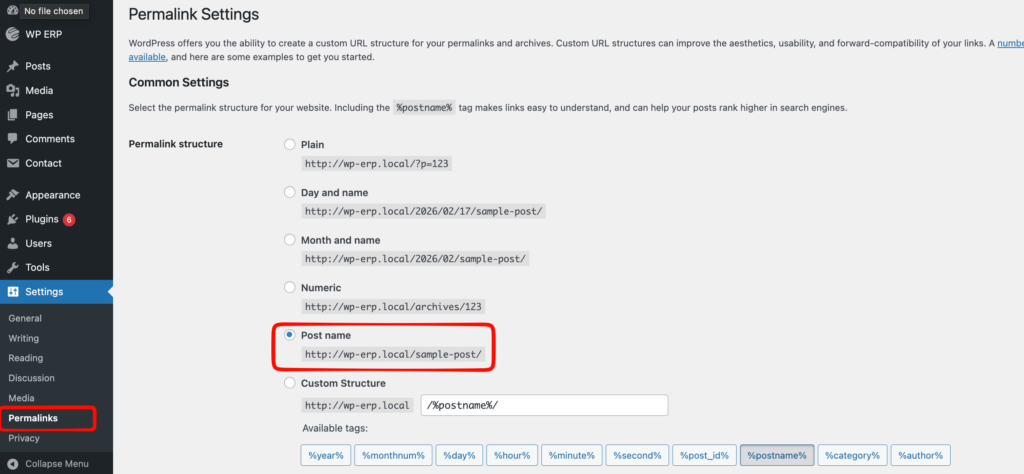
The next step is to reset the Permalink:
As we have a frontend interface, we have some templates that load depending on the request URL.
Navigate to WP Admin → Settings → Permalinks and select Post Name and click Save Changes.
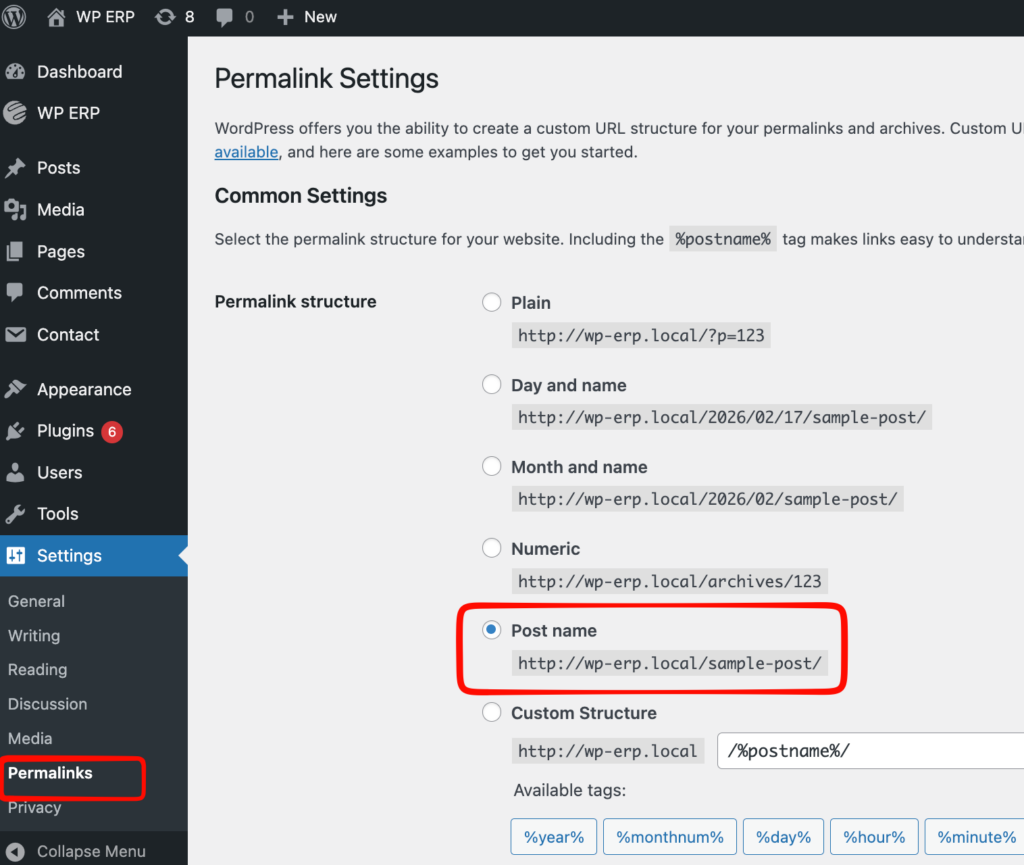
If you have already set the permalinks to Post Name, then only clicking Save will do the trick.
If you deactivate and reactivate the plugin, then this process is required again.
Admin View
Admins are able to view and manage many different options, as shown below:
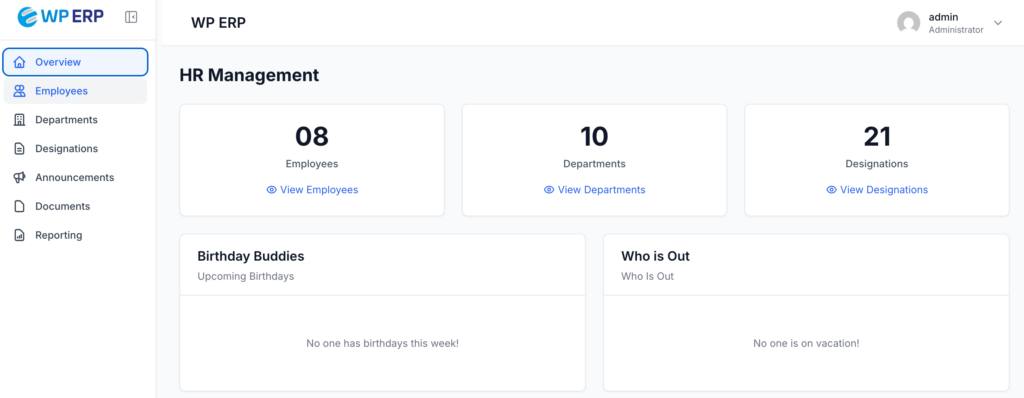
1. Managing Employees
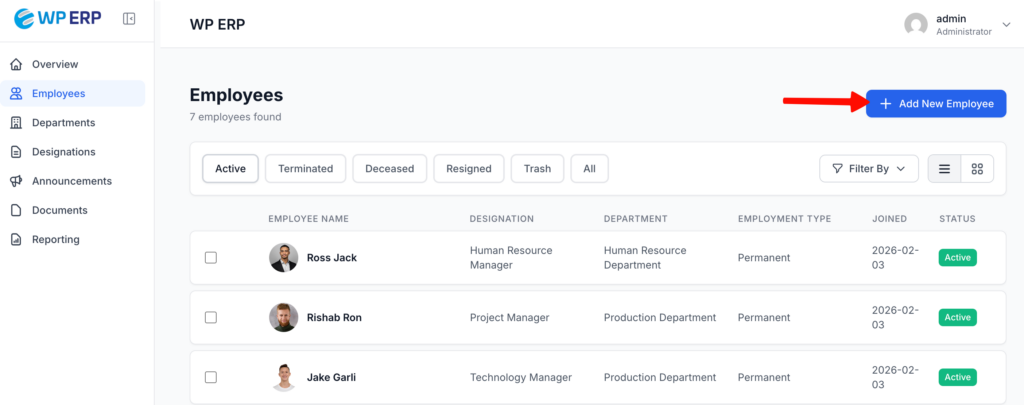
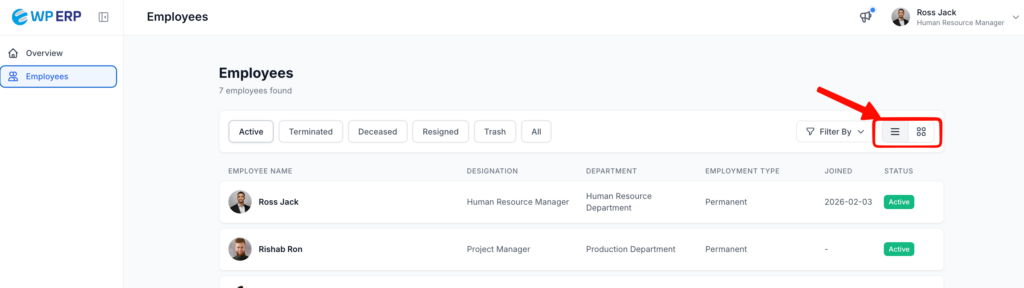
You can view all your employees and their profile from HR Frontend. The dashboard page gives an overview of your HR module including a leave calendar. You can click on the View Employees button to view the list of your employees.
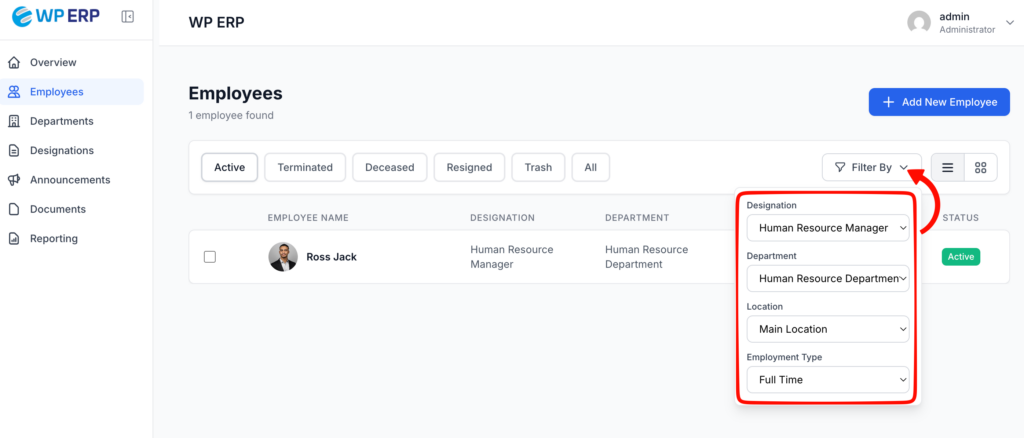
Here you can view employees by Status [Active, Terminated, Deceased, Resigned]. Two additional tabs are Trash and All.
Simply click on the tabs to view employees under these categories.
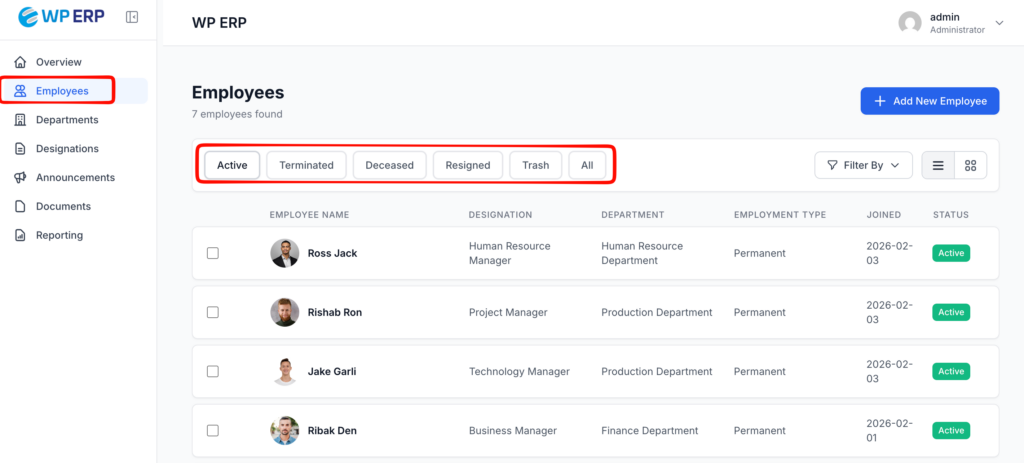
These tabs will show you the Employee Name, Designation, Department, Employment Type, Joining Date, and Status in a table format.
There are further ways you can filter employees from the drop-down on the right.
Choose employees by designation, department, location, and employment type.
To add a new staff click on ”+Add New Employee” button on the top right of the page.
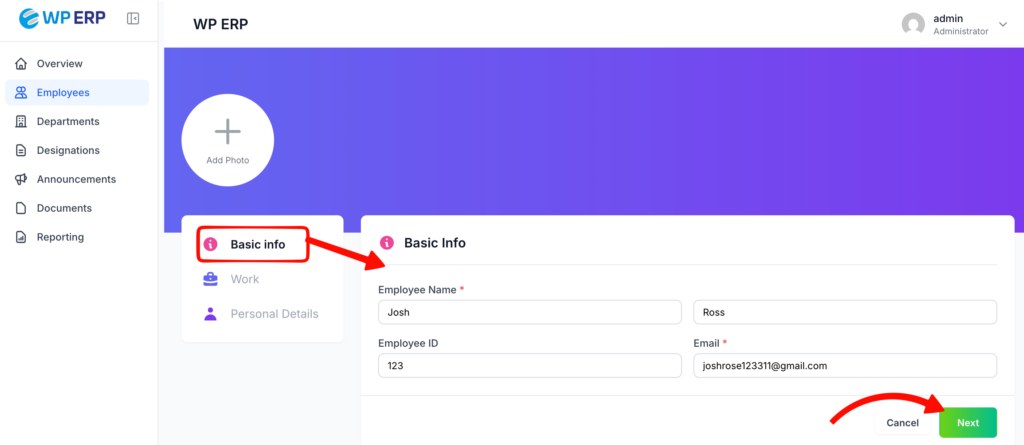
This will open up a new page for you to fill in all the details of the new employee.
1. First, fill out the Basic info and click on “Next.”
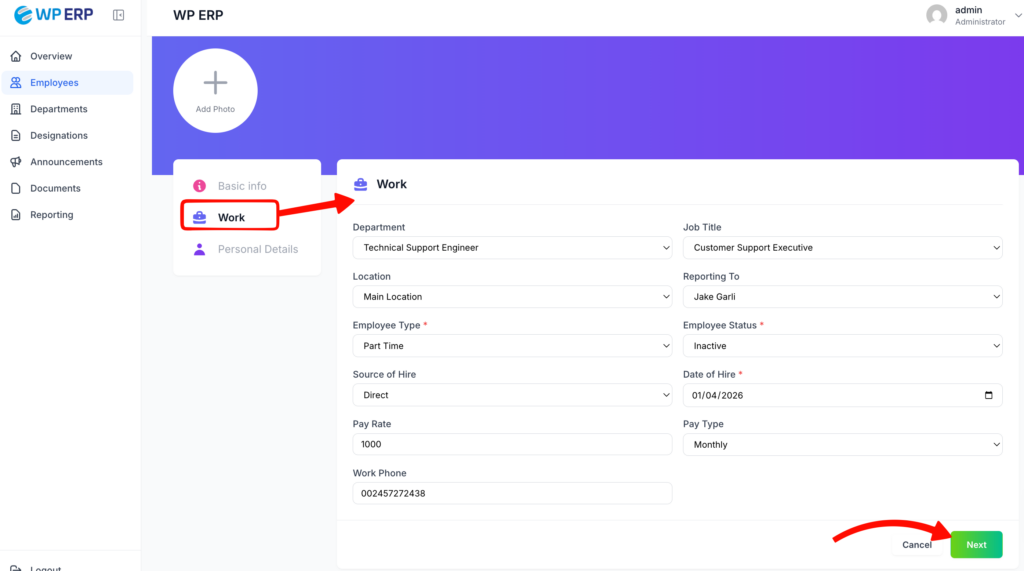
2. Then update the Work information, including employee type, employee status, date of hire, pay rate, etc.
3. Add Personal details, including mobile number, gender, address, nationality, country, post code, etc. Now click on “Create Employee” button and the employee will be created.

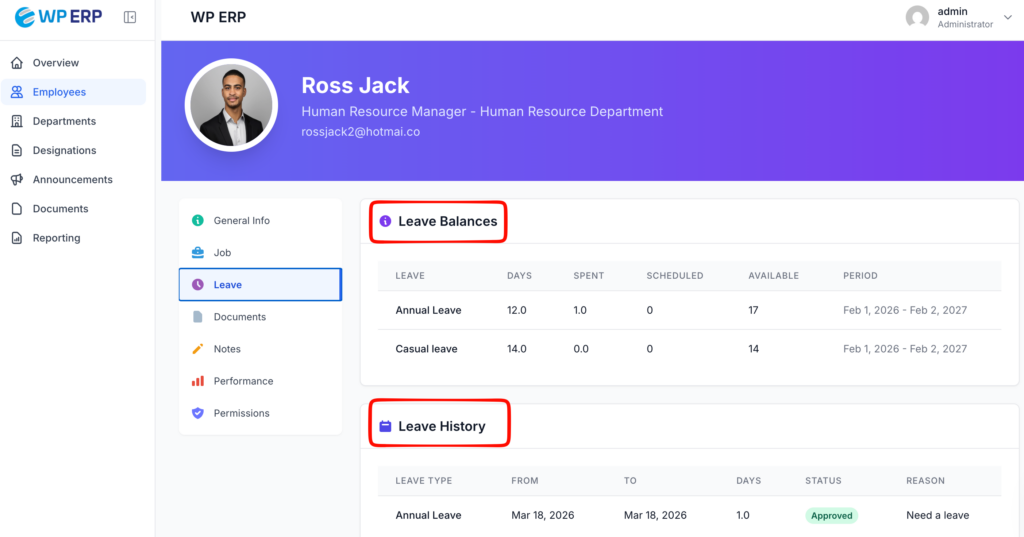
Leave
Under the Leave tab, you can view the balances and history of leaves used by the employee.
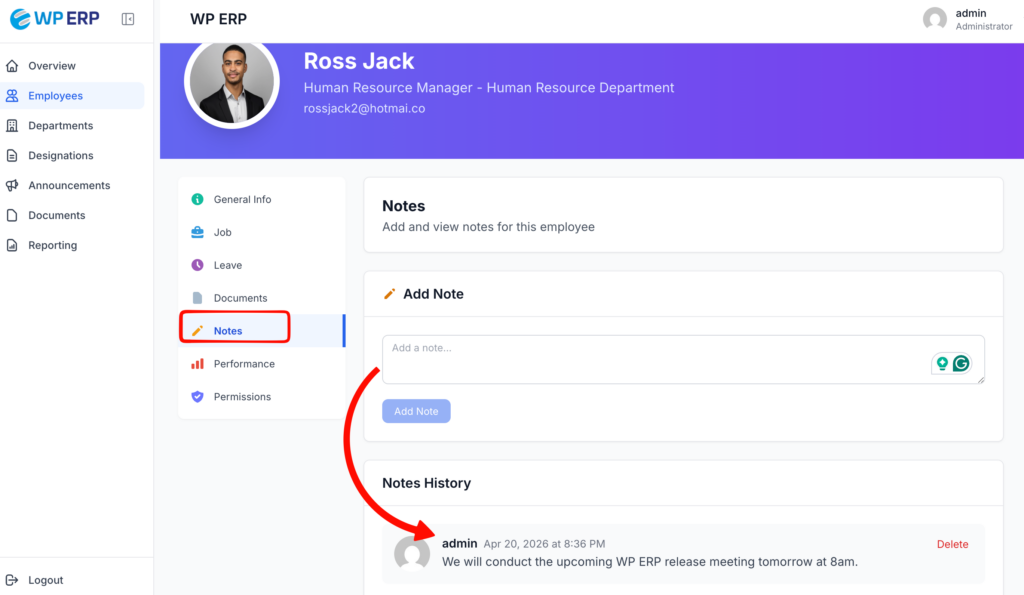
Notes
Click on the Notes tab and add important impressions, notes, remarks, notices, reminders, messages, and more for an employee for your own record.
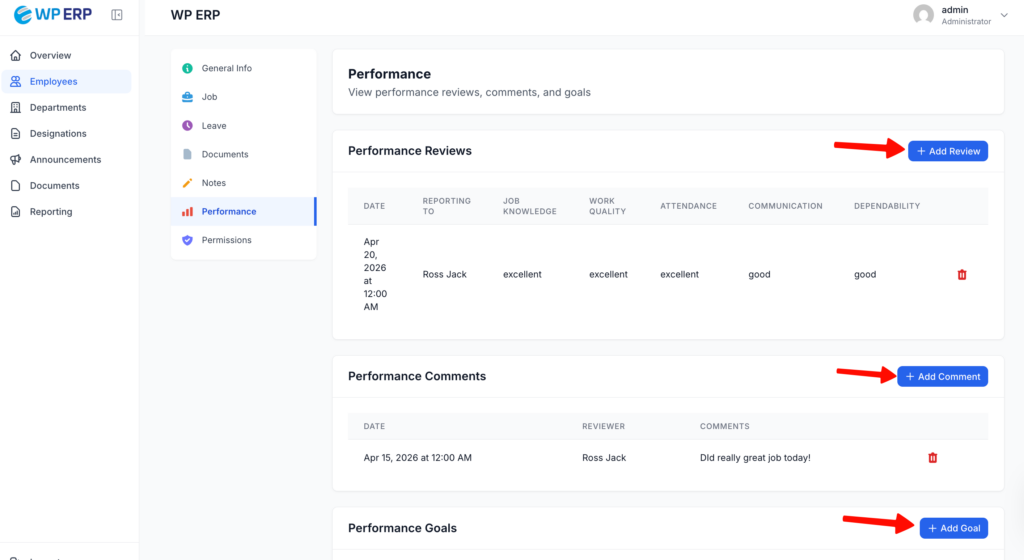
Performance
Add Performance Reviews, Comments, and Goals for each employee and as many as you like from the Performance tab.
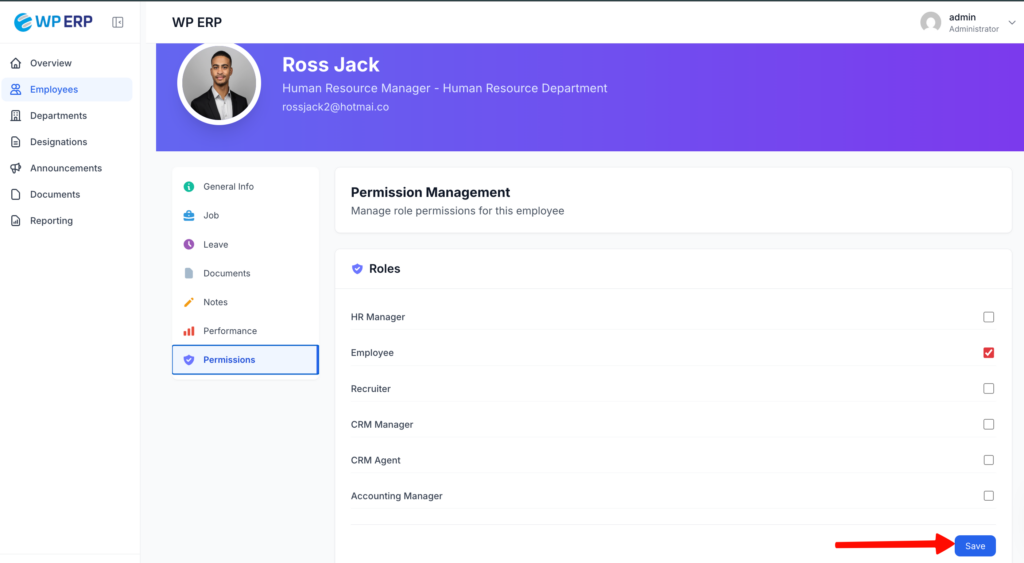
Permissions
You can manage the kind of access each employee will have from the Permissions tab.
2. Managing Departments
Admins can also view and edit the departments of each of their employees from the HR Frontend:
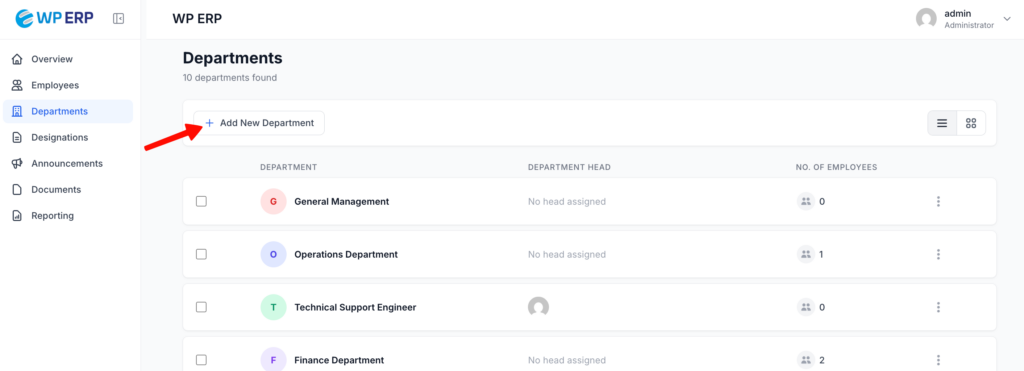
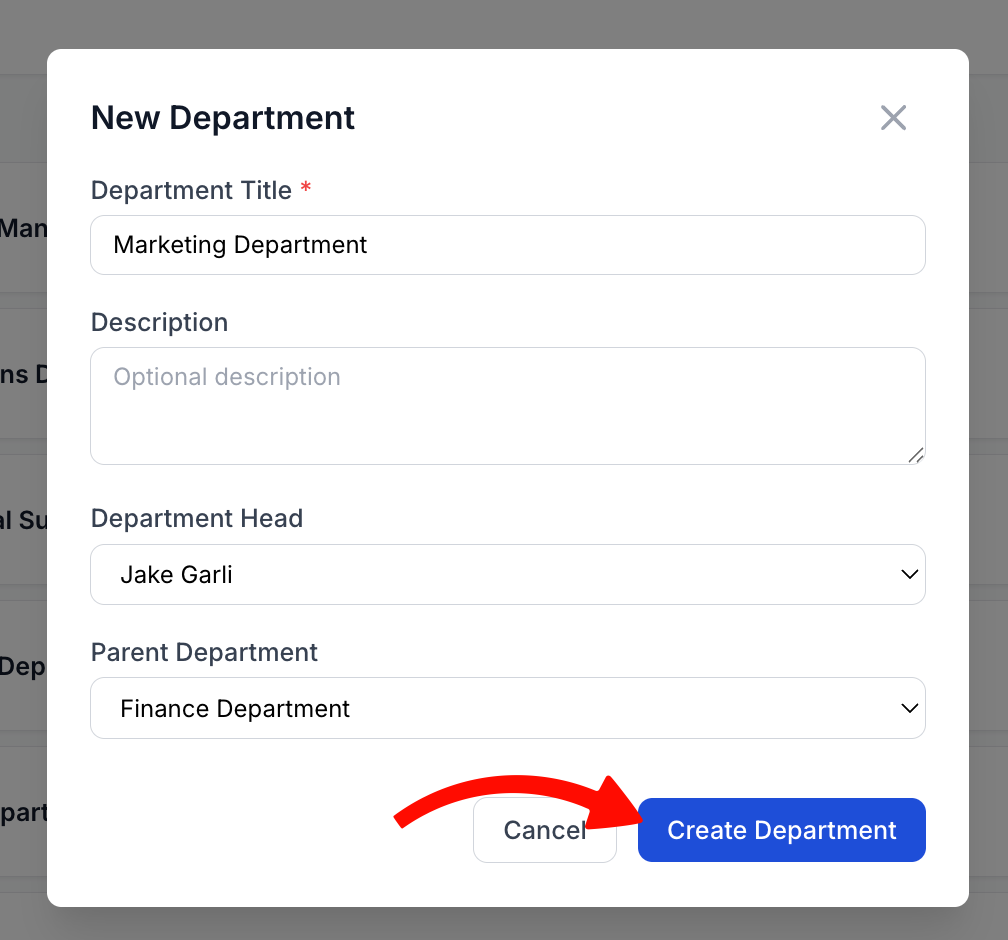
To create new department, click on Add New Department on the top left of the page. This will open a pop-up, which is the New Department form.
From here you can input Department Title, Description, and choose the Department Head and Parent Department from the given drop-downs.
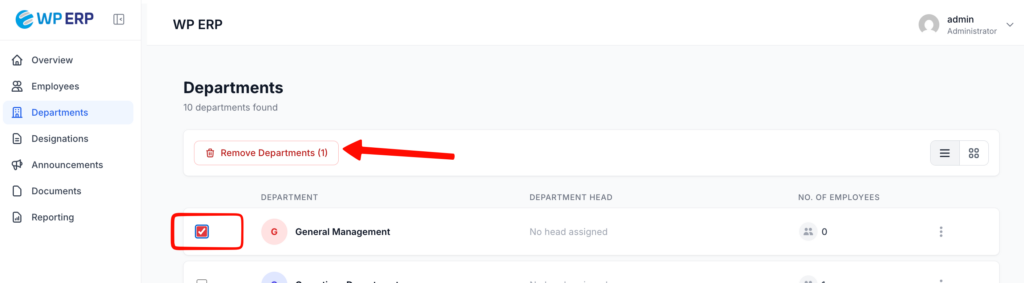
From the main page you can also delete multiple departments. Select the check-boxes beside each department you want to remove, then click on Remove Departments located on top left.
You can also Edit and Remove individual departments. Click on the on the check box beside department.
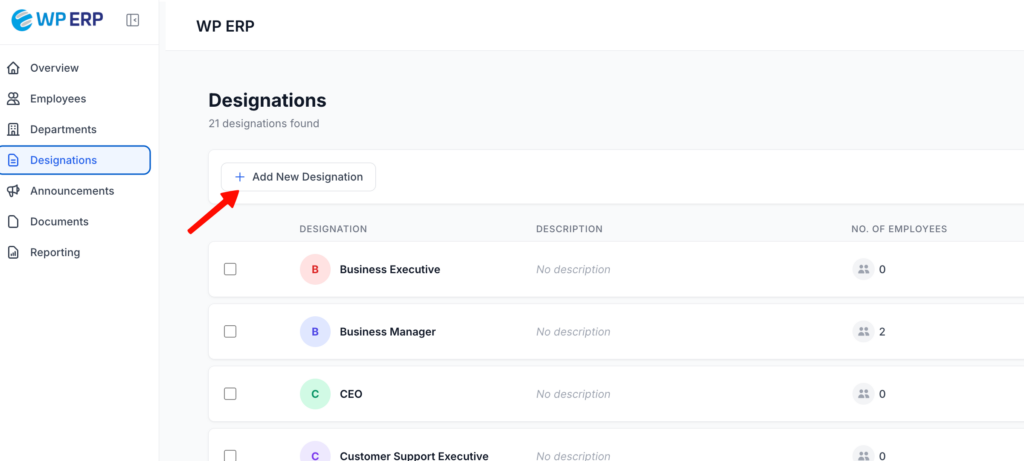
3. Managing Designations
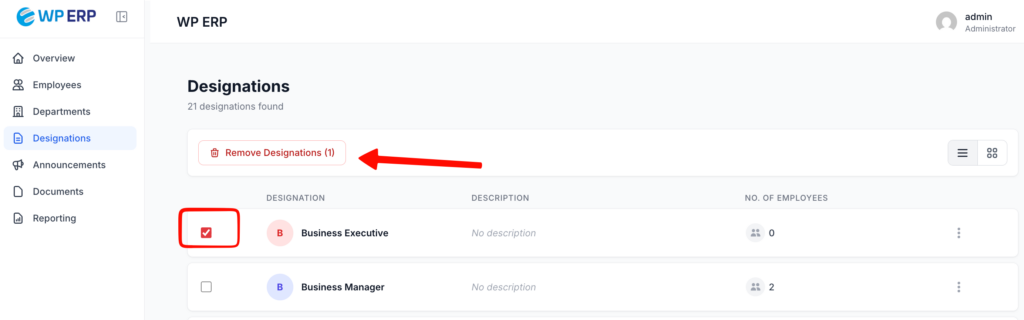
Similarly, for Designations, you can view the Department, Description, and No. of Employees.
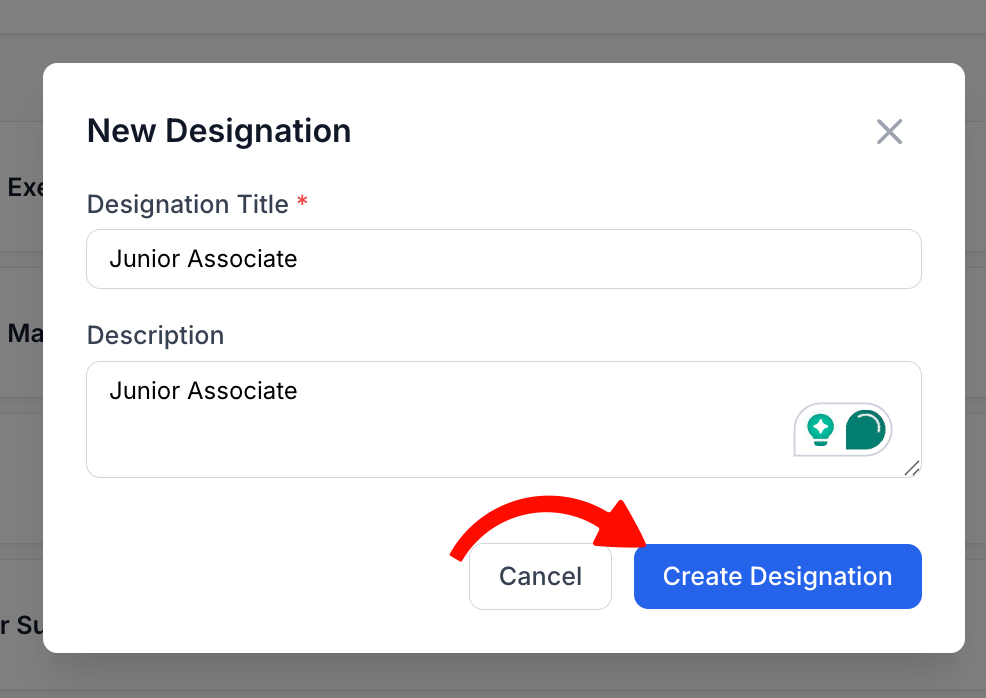
You can add a new designation by clicking on the button Add New Designation.
This will open the New Designation form where you can fill in the Designation Title and Description.
You can also delete multiple designations together. Select the check boxes and click on Remove Designations.
Edit or trash individual designations by clicking
4. Announcements
You can also add announcements on your site for your employees using HR Frontend.
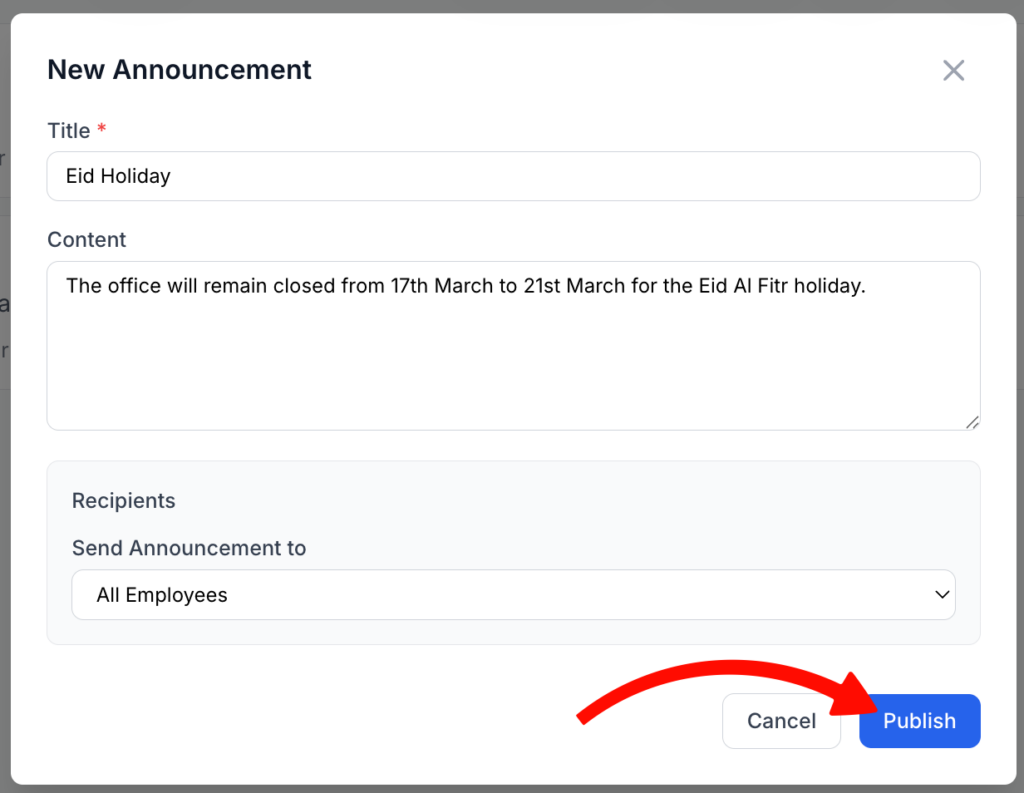
To add a new announcement, click on Add New Announcement:

Here, add the title of the Announcement, Content, and the Recipients for the announcement.
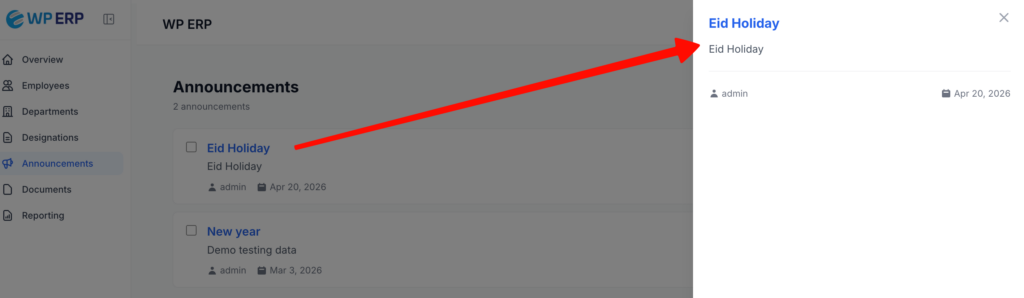
To view it, click on the annountment title and it will open the announcement form on the side.
5. Reporting
In this tab, you will be able to view 5 types of detailed reports.
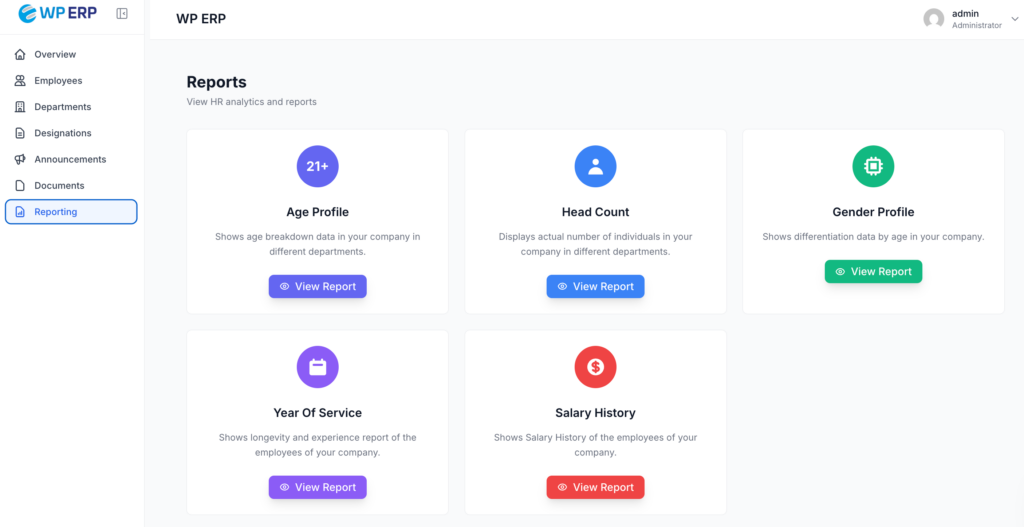
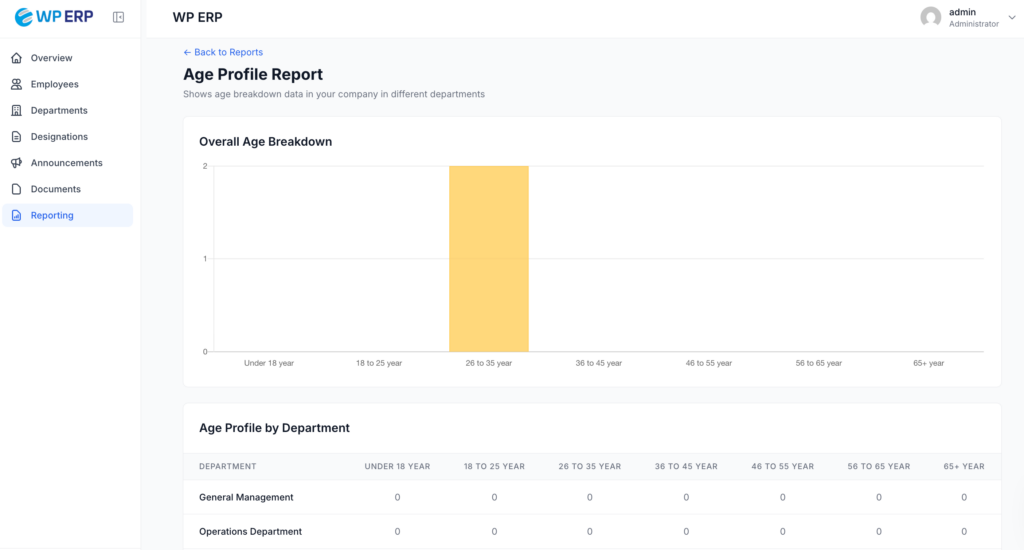
a) Age Profile: Shows age breakdown data in your company in different departments.
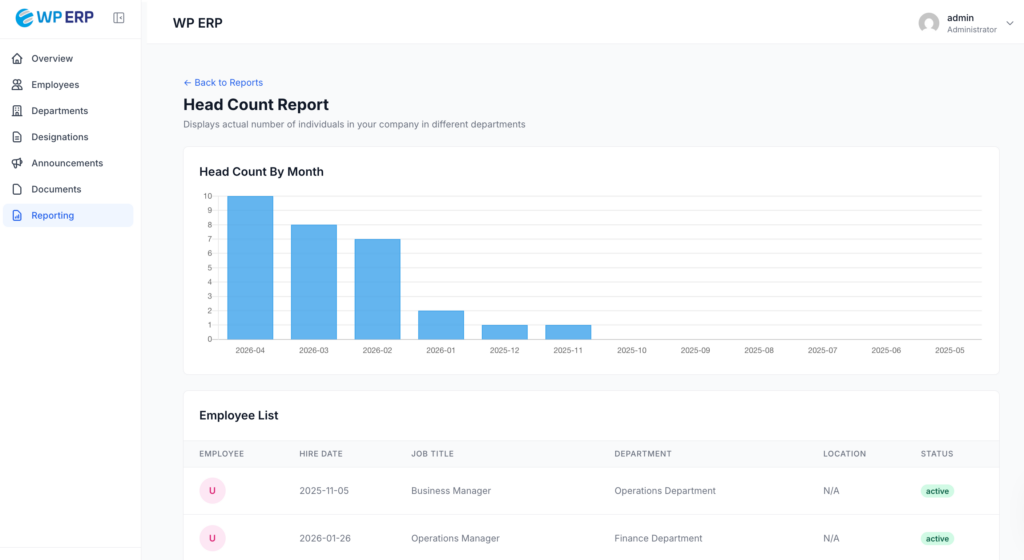
b)Head Count: Displays the actual number of individuals in your company in different departments.
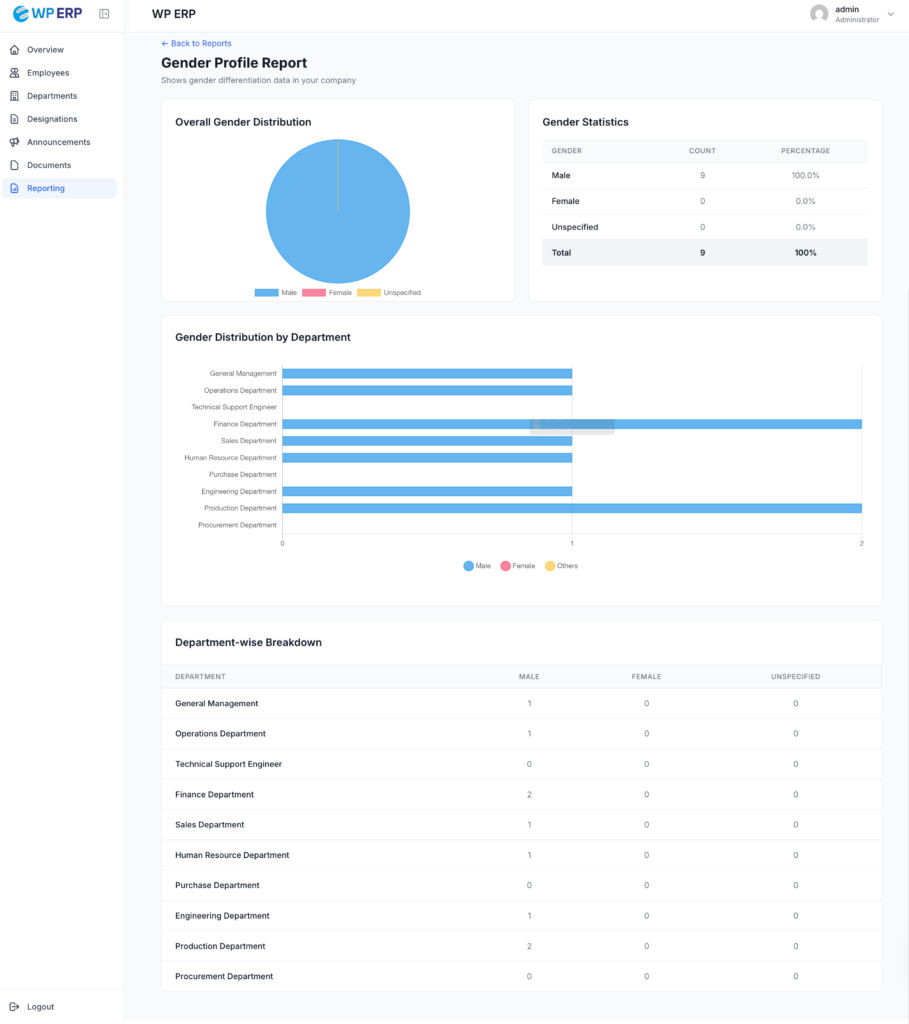
c) Gender Profile: Shows differentiation data by age in your company.
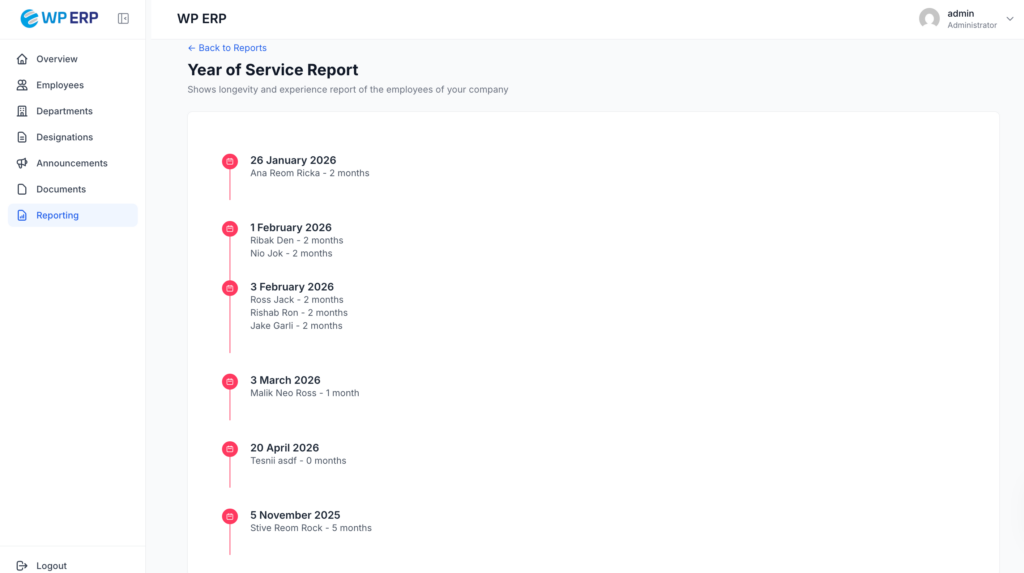
d) Year of Service: Shows longevity and experience report of the employees of your company.
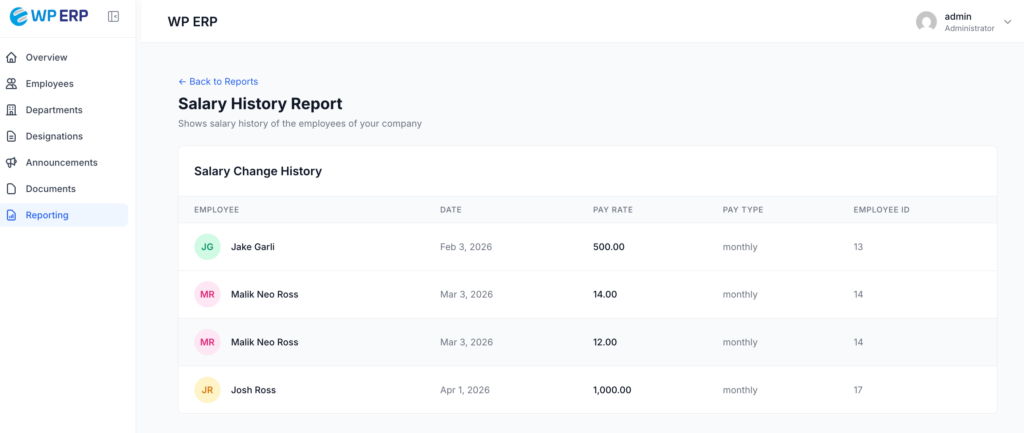
e) Salary History: Shows Salary History of the employees of your company.
6. Changing the link of your HR Frontend Dashboard
Admins are able to change the default link of HR Frontend.
To do this:
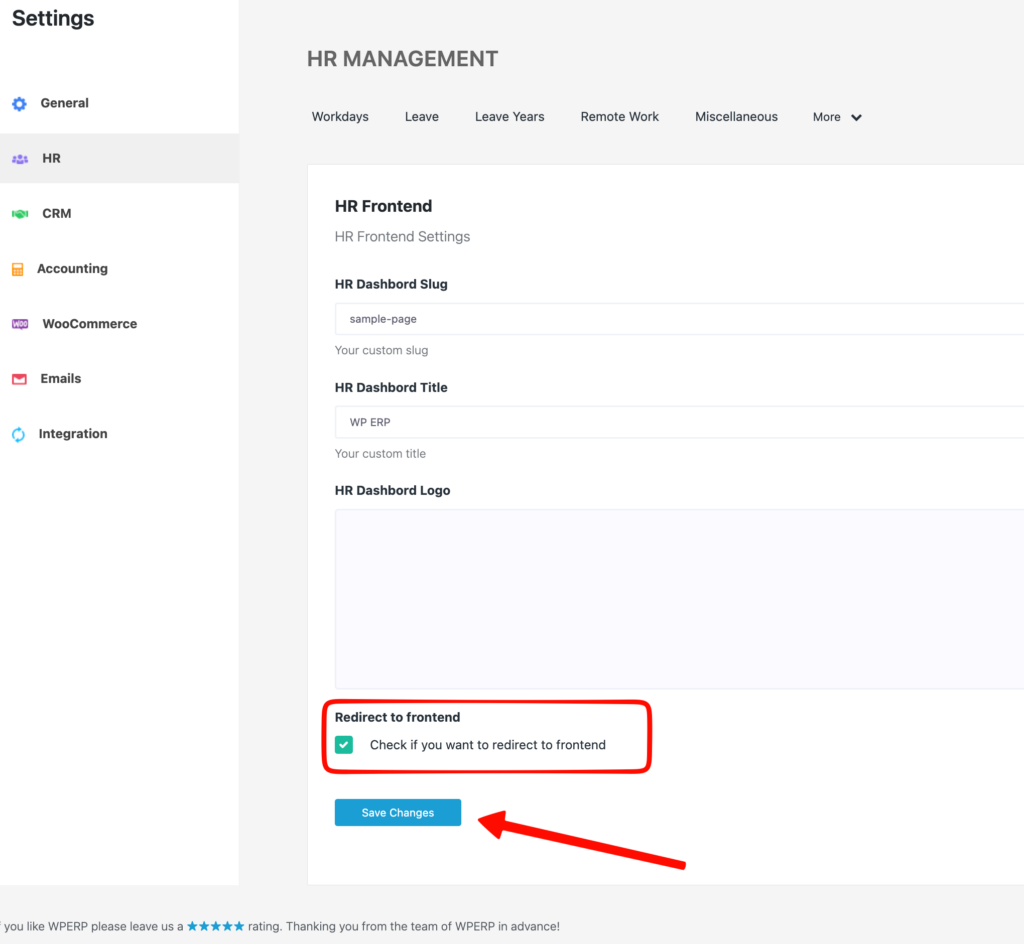
1) Navigate to WordPress ERP dashboard→ERP→Settings→HR→More.
2) Then click on the HR Frontend page.
3) In the given field for HR Dashboard Slug, type your chosen slug/link for your HR Frontend Dashboard.
4) Click on Save Changes.

5) The next step is to go to WordPress→Settings→Permalinks.
6) Navigate to the bottom of the page and click on Save Changes. This will update your permalink structure.
Now you can check this updated slug on your browser from the frontend by clicking on WordPress ERP→HR Frontend.
If you check the Redirect to frontend, then after logged in, employee will be redirected to the HR Frontend.
Employee View
When your employees login to your website, they get a simplified dashboard, a list of employees with minimum information and their own profile.
1. Employee Dashboard
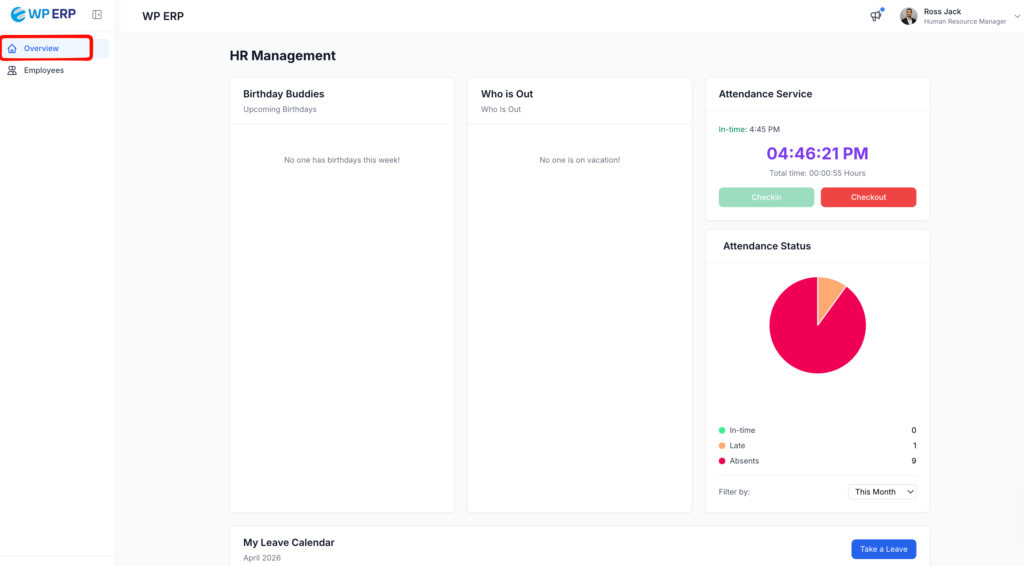
From here employees can check-in and check-out using the self-attendance service.
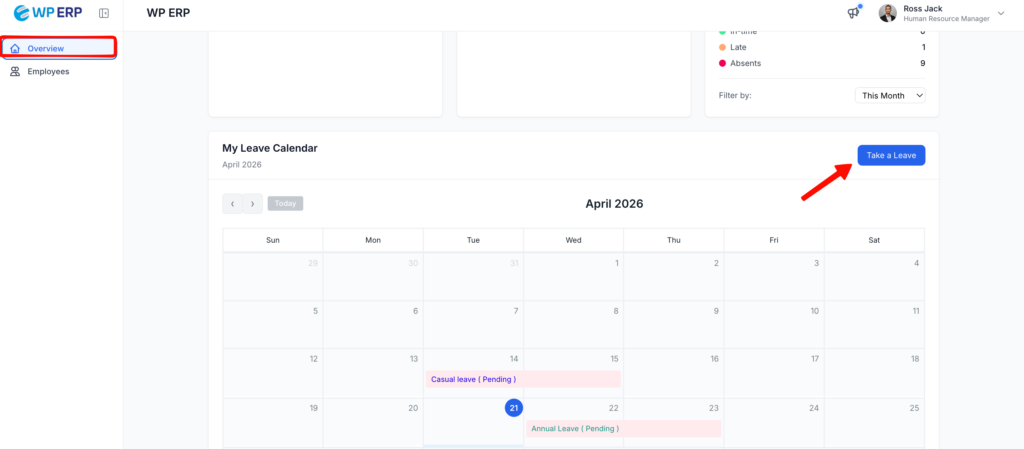
Employees can also view the upcoming birthdays of other employees as well as who is on leave on what day.
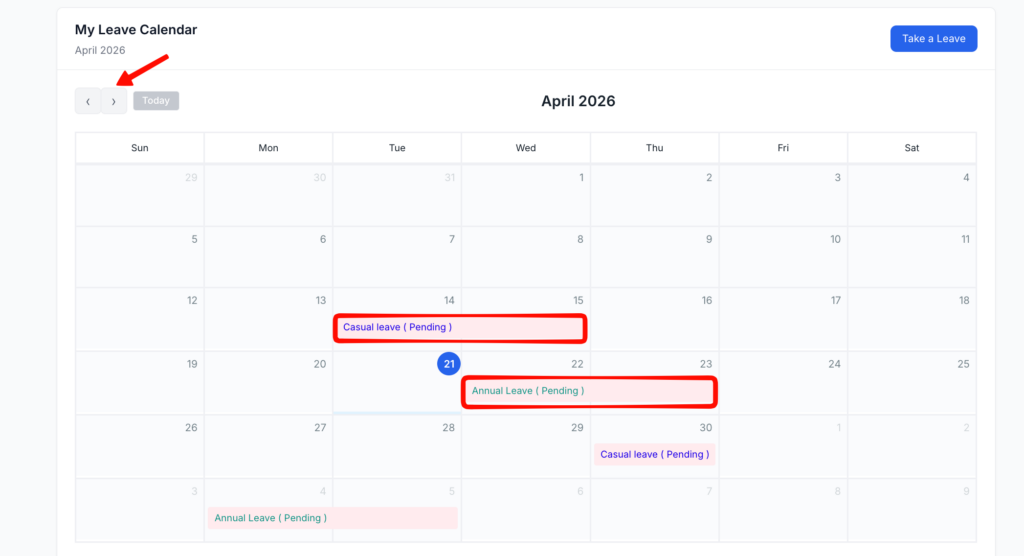
Moreover, employees can view previous leaves, upcoming leaves that have been approved, and upcoming holidays in the My leave Calendar.
They can also slide to previous and next months to view these.
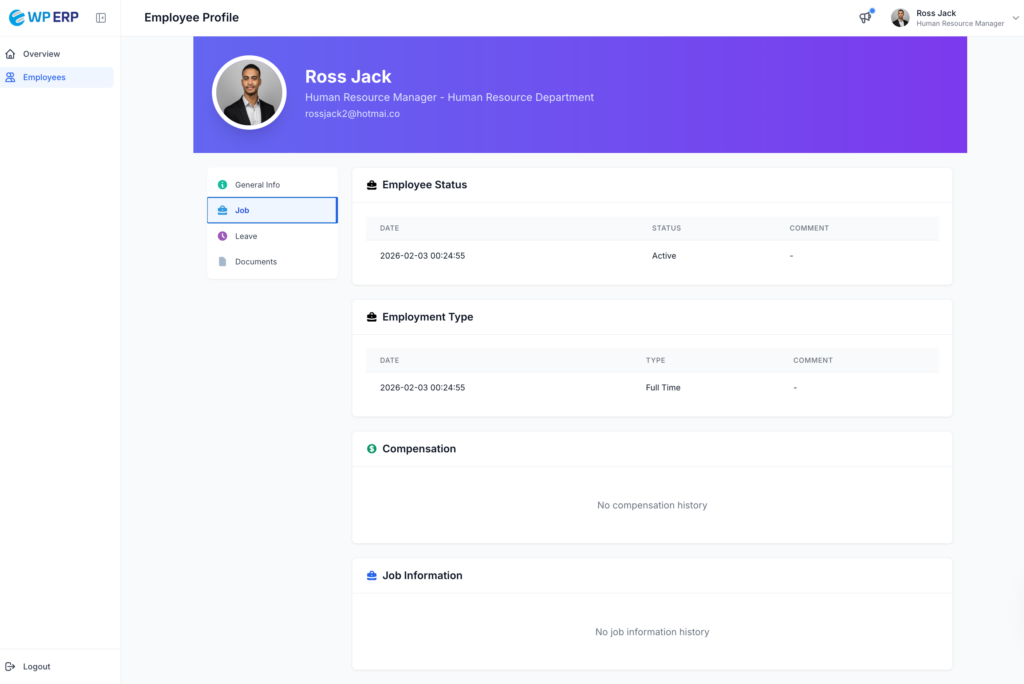
2. Detailed Employee Profile
An employee can only edit their own profile by navigating to the top right corner of the page and click on My Profile.
The following page opens where the employee can fill in and save their information under General Info. Here employees can add their Work Experience, Education and Dependents.
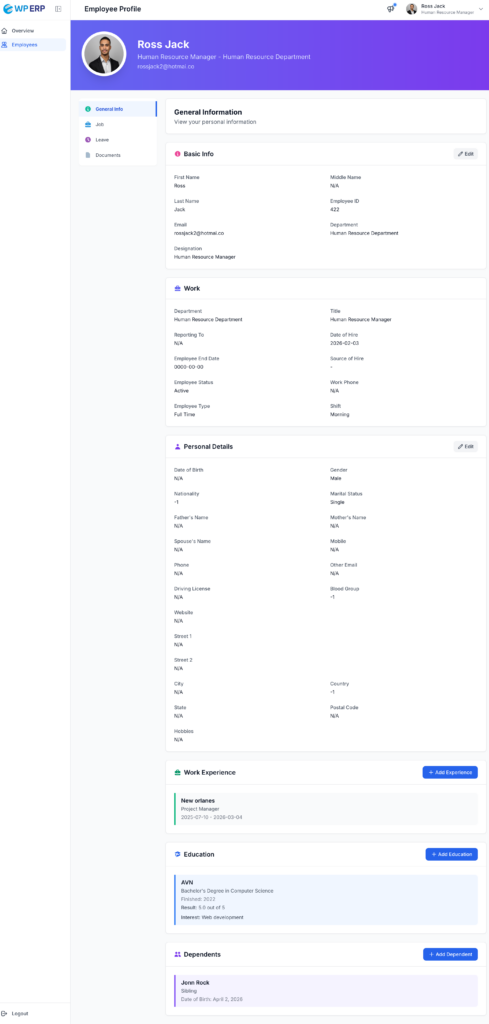
Employees can also view Employment Status, Compensation, and other Job Information under the Job tab.
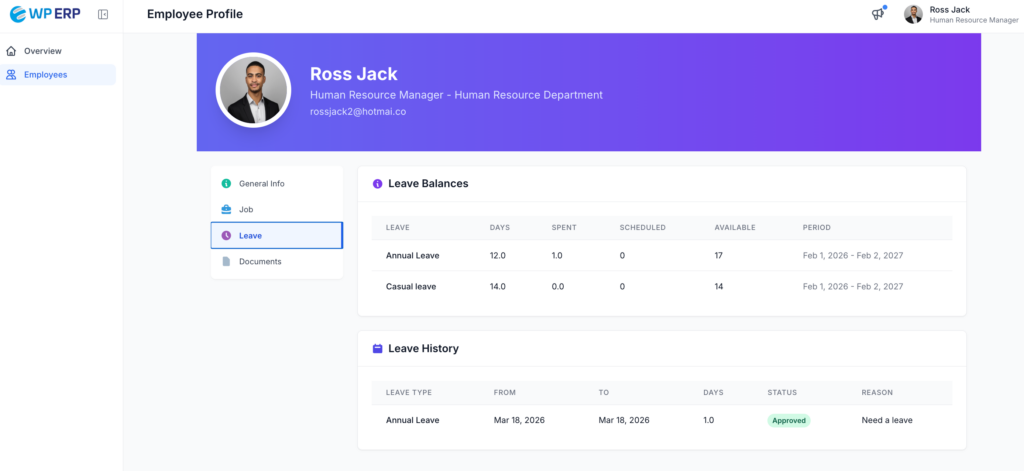
Under the Leave tab, employees can view all kinds of details relating to vacations, holidays, and out days.
Under Balances, employees can view:
- the name of the policy [Leave] and the number of leaves [Days] they are entitled to for each policy,
- the number of days that have been utilized [Spent],
- upcoming out days [Scheduled],
- the available number of days [Available], and
- the range of dates for which each type of leave applies [Period].
And, under History, employees can view:
- when [Date] they have taken leaves
- what type of leaves [Policy]
- why [Description], and
- for how long [Days]
3. Taking Leave
Employees can navigate to their HR Dashboard > Overview and click on the
“Take a Leave” button.
When an employee clicks on Take A Leave a pop-up will open, like the following:
The above pop-up is the leave request form. Employees can select the leave type from the drop-down, leave dates, and leave reason.
Finally, hit the Send Leave Request button and wait for a confirmation message from the administration.
List View vs Grid View
Both admins and employees can choose to view the layout of their tabs in List View or Grid View.
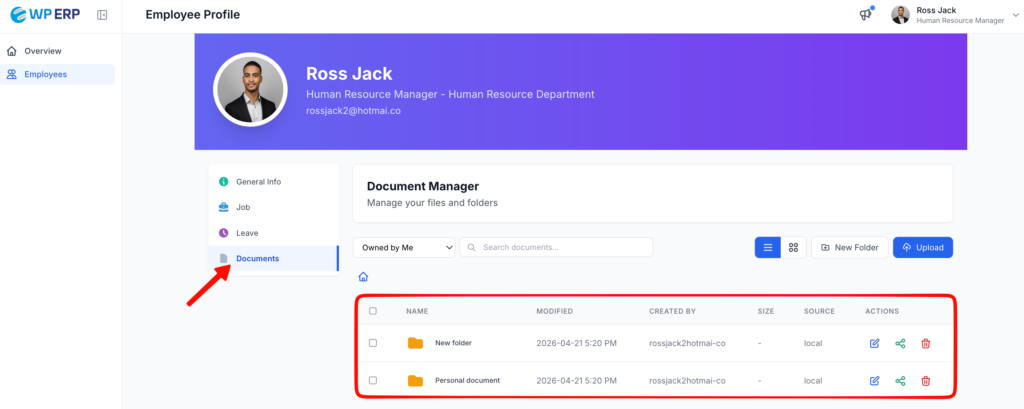
Integration With Document Manager
If you have both the Document Manager plugin and HR Frontend extension enabled, then you can access Document Manager from the HR Frontend. Employee can easily upload, create, and share documents from their profile.
That’s all for HR Frontend!