Recruitment
The Recruitment extension of WP ERP is one of the best WordPress job board plugin out there. With this solution you can recruit new employees to your HR system directly from your WordPress site. With the power of WP-ERP, you can now create questionnaire for your candidates and take screening tests onsite with that form. In addition, the form also supports fields for biographic details pre-loaded and selectable.
Reset Permalinks!
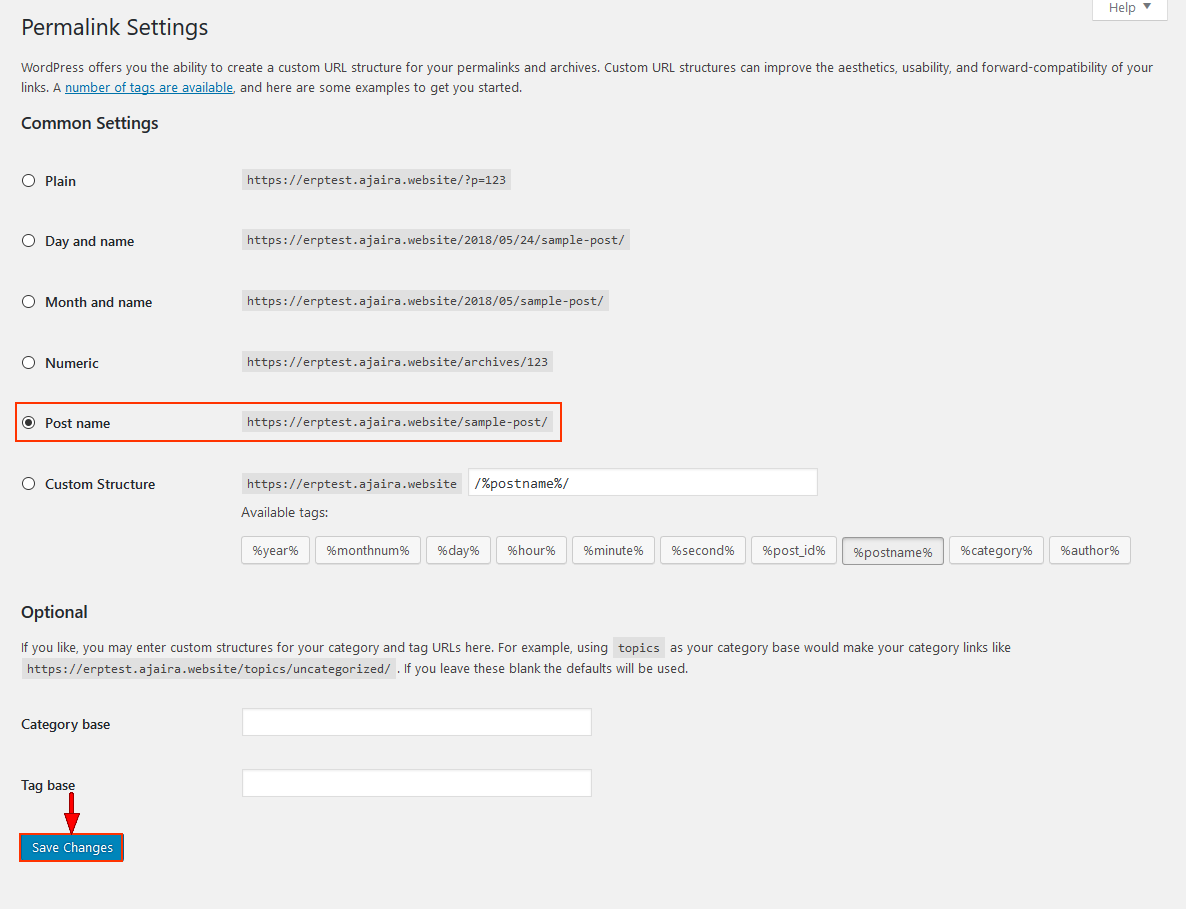
As we have a frontend interface, we have some templates that loads depending on the request URL. Please navigate to WP Admin Dashboard → Settings → Permalinks and select Post Name and click Save.
If you have already set the permalinks to Post Name, then only clicking Save will do the trick.
If you deactivate and reactivate the plugin, then this process is required again.
Creating a new Job Opening using the wizard
Go to WP Admin Dashboard → WP ERP → HR → Recruitment → Job Opening
Click on Add Recruitment. Most of the steps are self-explanatory. We have added notes where it may be confusing.
Step 1 – The basics

Enter Title and basic description.
Step 2 – Making a workflow
These steps tell you how you should proceed with this recruitment.Also, it will come really handy when this recruitment is active. You can Drag and drop these steps or a new step of your choice.

Step 3 – Adding details
This is a very important step. Here, you get to assign who will the new recruit will be assigned to, so that he can proceed with the related updates.
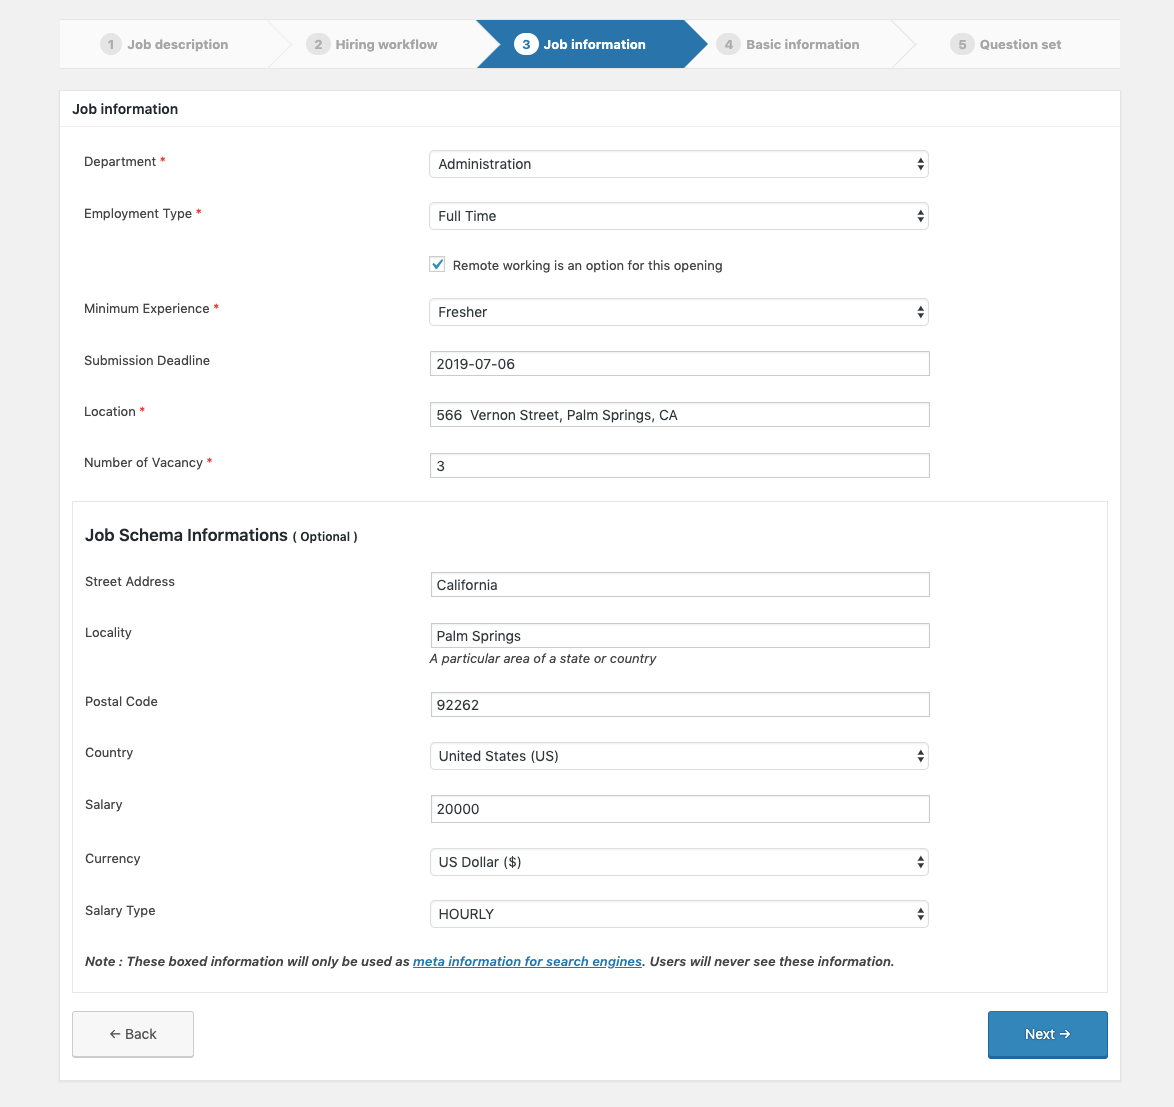
You can also fill out the “Job Schema Information” so that your job opening easily appears on the SERPs (Search Engine Result Pages) list. This section is optional but it is pretty helpful for the SEO (Search Engine Optimization).
Step 4 – Choosing fields
Pick up the fields you need for the form. The first 4 are already picked up for you and they are mandatory. You can click the “This field is required” checkboxes to make that field mandatory for the candidates.
**If you are using the custom field builder add-on for an extra field in your HR module, the field(s) generated from that add-on will also be displayed in this form. For example, the “disease” here has been available due to that add-on.

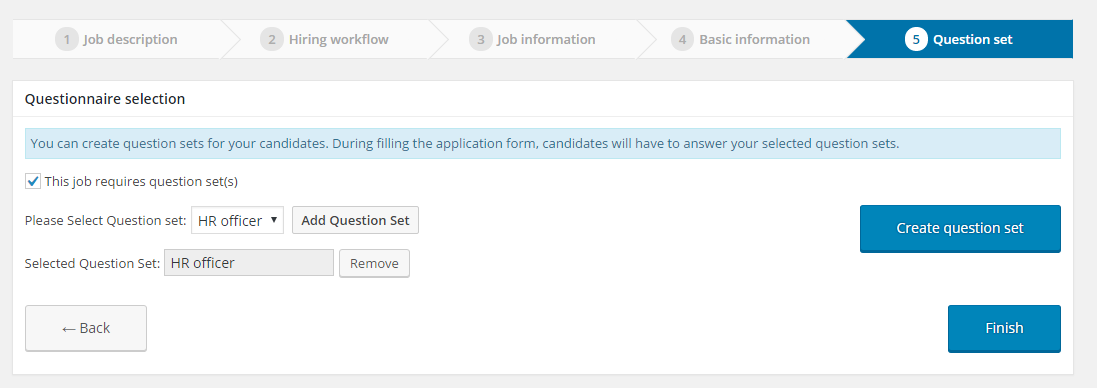
Step 5 – Adding a questionnaire
*It is better if you create a questionnaire first before you make the recruitment form.
Just select the questionnaire form from the drop-down menu or click on Create New Questionnaire, although this will take you away from the wizard, and you will have to add the questionnaire from the edit more.
When you click on the Finish button, you will see your job with the publish date along with it.

Publishing job openings
[erp-job-list]
This is the shortcode you must paste on a page, post, menu or anywhere to display all the published and available jobs for your company. You cannot generate individual shortcodes for individual openings.

Candidates
Checking recruitment overview
Go to Dashboard → WP ERP → HR → Recruitment → Candidates.
Here you can see the entire current status of all ongoing recruitment, candidate life stages and their progress.

Adding a Candidate manually
Go to Dashboard → WP ERP → HR → Recruitment → Candidates → Add candidate → Choose the job opening you want to add a candidate to.

Candidate profiles
You can use individual candidate profiles to add more review details from your side. This profile can later be imported into the HRM system.
Rating
You can rate the candidate in a scale of 5. HRM/CRM managers and Admins who have the proper access to the recruitment add-on backend will be able to vote on the rating.
To rate, go to the candidate profile, scroll down, and find the section Rating.
Creating tasks
When you need to get some tasks done for recruitment, you can easily assign an employee from your HRM system.
To create a task, check the top of the candidate profile for the button “New To-do“.

Creating an interview
You can assign interviewers directly using this feature and they all, including the candidate will receive an email notification about the interview.
To create an interview, check the top of the candidate profile for the button “New Interview“.

Download or view CV
A preview of the CV can be viewed directly from the candidate profile page. The preview pane is created using Google Docs API so it is excellent. You can view multiple pages at once and also print or download the file.
Exam detail
This panel shows the answers submitted for the questionnaire form you attached with the recruitment.
Comments
Your interviewers or other users with permission can comment on the candidate and share their views here.

Reporting
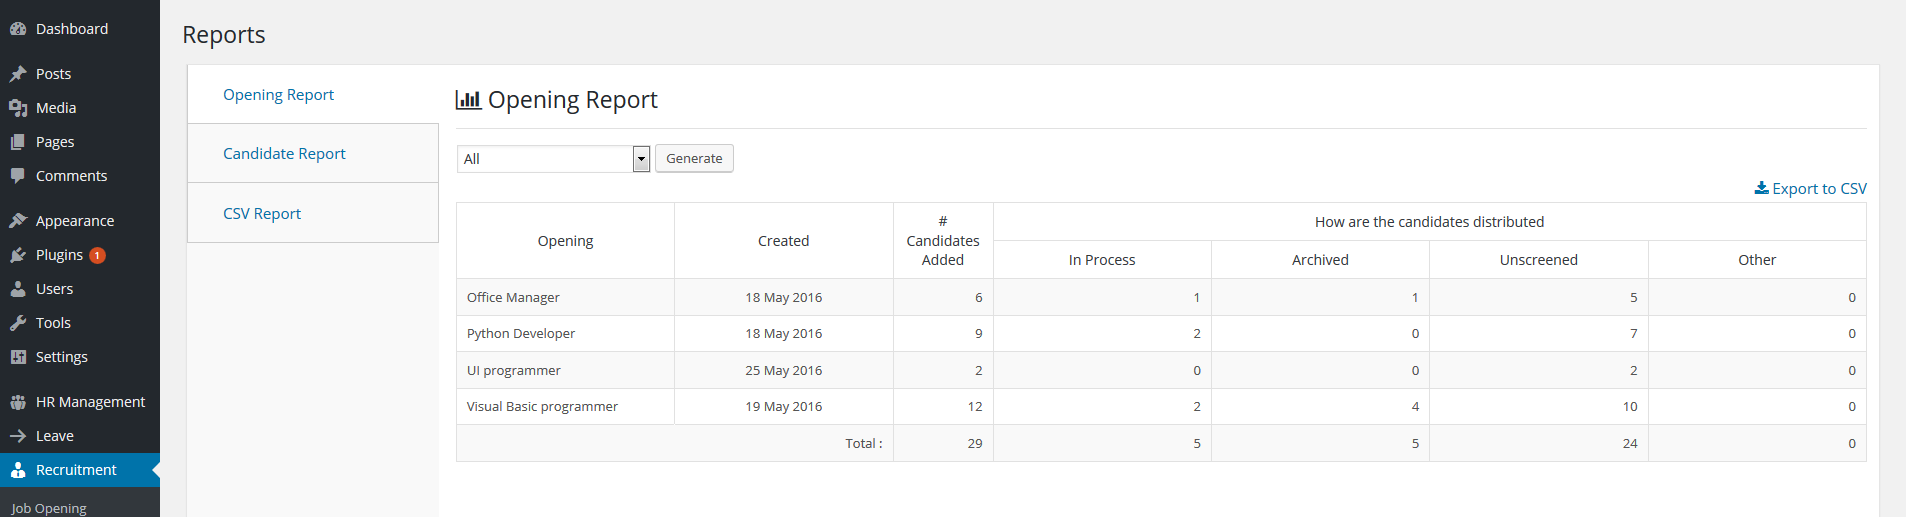
Opening report
The opening report gives you data about all the job openings you have made and those which are active. You can download the report as a CSV file. There is a drop down menu to select an opening to change the focus of the report.
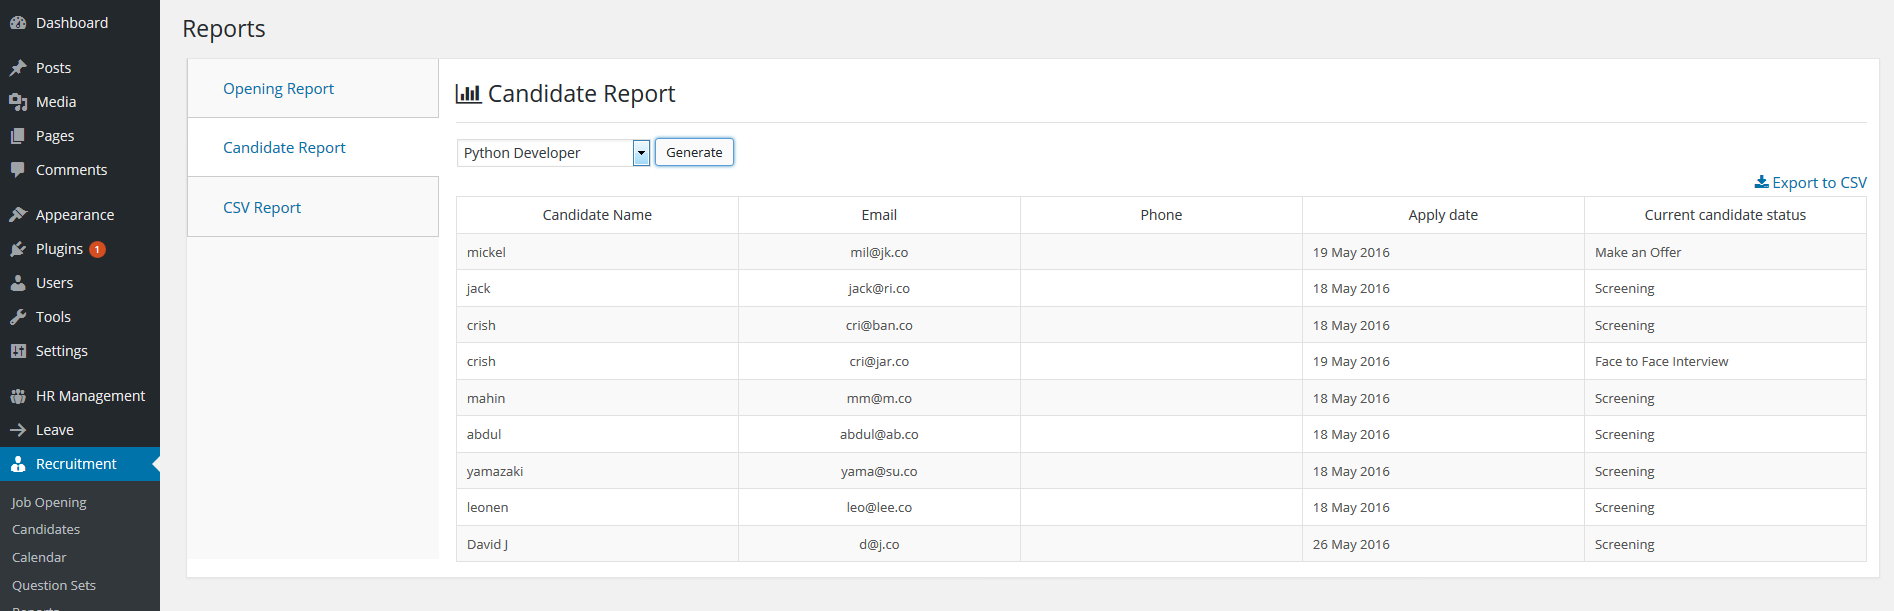
Candidate report
The candidate report gives you data about all the candidates running on your system. There is also a drop-down menu for this report to filter it according to openings. You can download the report as a CSV file.
CSV report
What ever the report is, filter it from the drop down menu and click Generate. A copy of the report will be sent to your or the admin mail.

Editing mode
You can re-select fields from our recruitment form and then you can add / change a questionnaire you have created.
To edit a recruitment, go to WP Admin Dashboard → WP ERP → HR → Recruitment → Job Opening. Under Action you will find the edit option.

The fields on the Recruitment Settings are mostly for internal use and only a few of them will be displayed on the frontend.
In that case, all the selectable fields under the Applicant Personal Fields if enabled will be displayed in the frontend. These fields can be selectively made mandatory. If the mandatory fields are not completed by the candidate, the submission will be disabled.
Here are a few details about the fields in this form which might sound complicated.
Select Hiring Lead: This field is for admin use only. This field assigns a personnel for the recruitment procedure for the announcement. Typically it is the department leader.
Location: It is possible for a company to have several offices in a city. This field allows to choose the actual location of the workplace for the post.
Internal Job Code: This is an optional job code maintained by the management if they use any for tracking individual recruitment postings.
Expire Date: With this field you will be able to set an expiry date or deadline for the job opening. After the defined time, the post will be displayed no more on your site and candidates will not be able to make submissions.
Copy Job Openings: You don’t have to worry about creating the same kind of job all over again. If you click this button the job will automatically copy on the dashboard. The publish date will be set from the system.

Selecting a Questionnaire with the form
At the end of the page, you will find a drop-down menu titled Set Question For This Job from where you can select a question set. If you haven’t created any questionnaire sets already, the instructions are below.
Adding an HR Questionnaire
- To access the menu, WP Admin Dashboard → WP ERP → HR → Recruitment → HR Questionnaire
- Click on any existing entry to view the questions set up inside it.
- Click Edit to make changes to that set of questionnaires.
- Press Add HR Questionnaire to create a new set of questions.

Under the tab Questionnaire Settings, you will be able to add as many questions as you want. You can answer your question in a Text box. However, you can add as many as multiple choice answers you want.
This module supports 5 methods currently (Text, Text Area, Radio, Checkbox, Drop-down). Only the checkbox method allows multiple selection; the others only allow one answer per question.
Global API
This new feature will help you publish your job openings directly to your company’s website. All you have to do is copy the API code on the backend of your website and all the job openings will be published on the website automatically.
Navigate to WP ERP-> Settings-> HR-> Recruitment. There you will find the Global API key.

That’s it for now to configure the recruitment extension.
