Creating Leave Requests
You can easily create and manage leave for employees using WP ERP.
Employee side
- Employees must be logged in to request leave.
- Go to WP Admin Dashboard → HR → Overview, then click Take a Leave.
- If you are using the HR Frontend extension(Pro feature) for WP ERP, employees can also submit leave requests directly from the frontend.
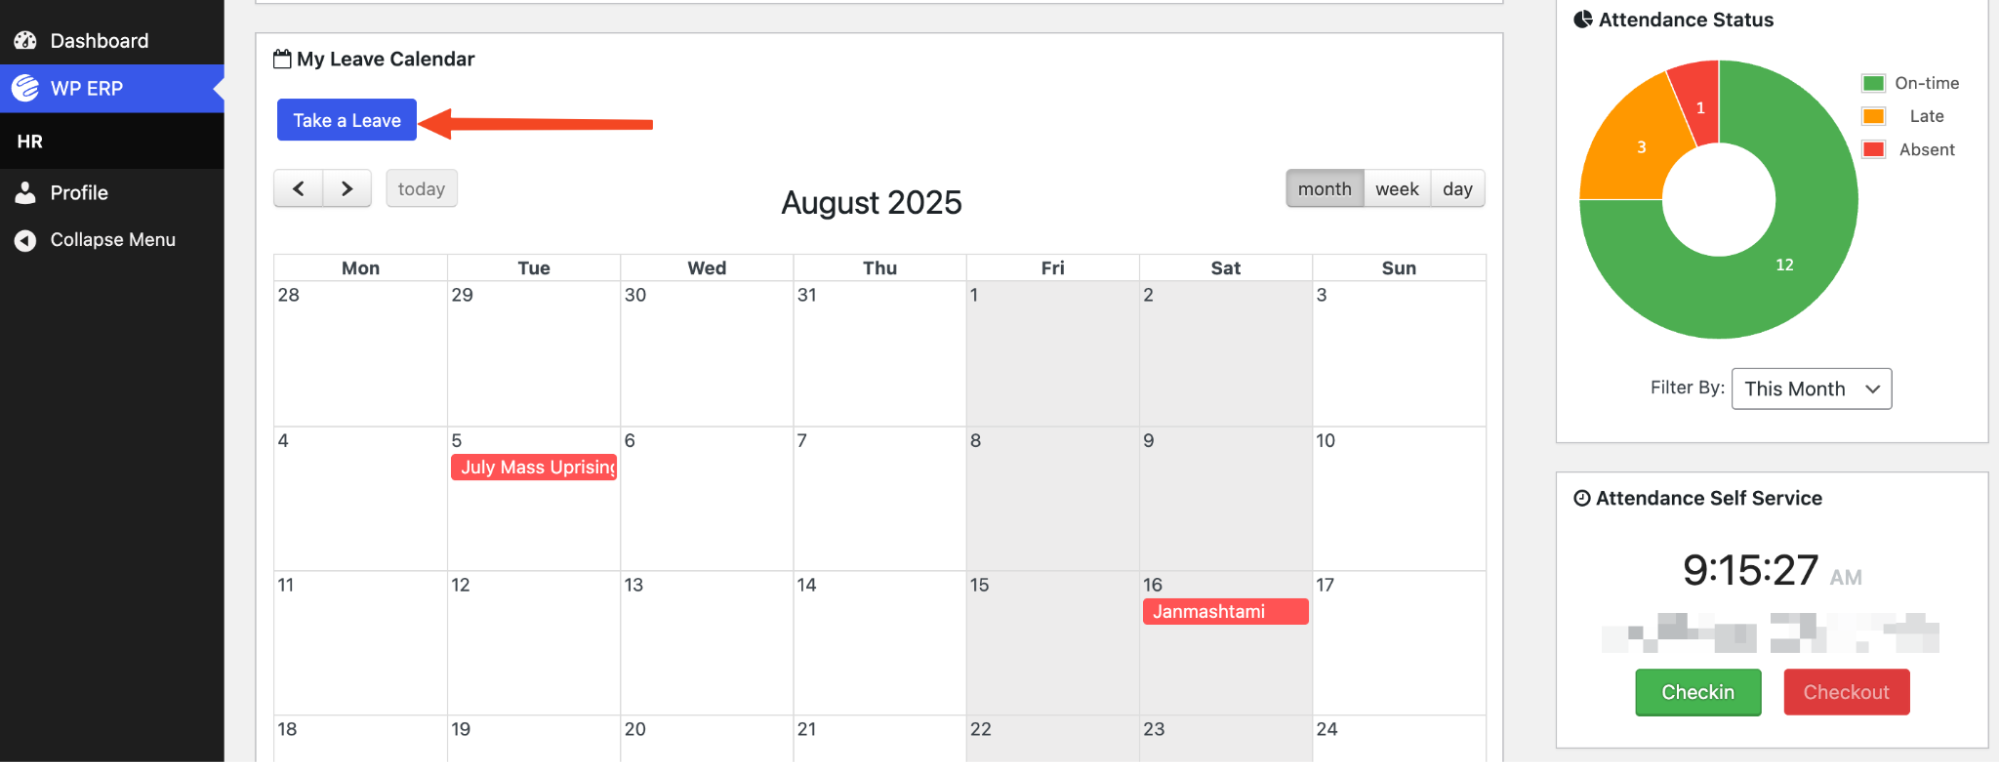
A modal window will appear, showing the employee’s available leave balance.
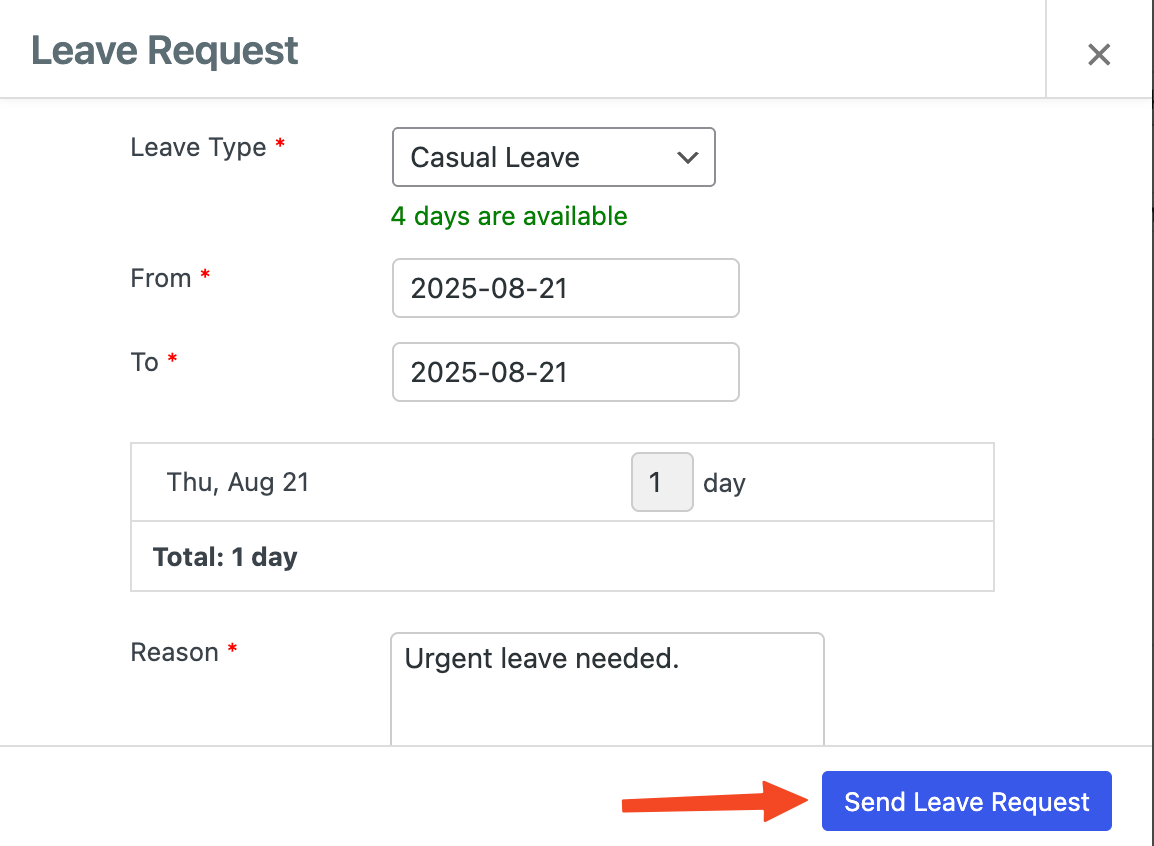
From here, the employee can:
- Select the Type of Leave
- Choose the Date Range for the leave period
- Provide a Reason for the request to keep it documented
- Attach supporting documents, such as a doctor’s note, if necessary.
- Once the form is completed, the employee must click Send Leave Request.
After submission, the request will be marked as Pending until reviewed and approved by the HR manager. (Details on approval are covered in the next documentation article.)
Admin Side
- Admins can also create leave requests on behalf of individual employees.
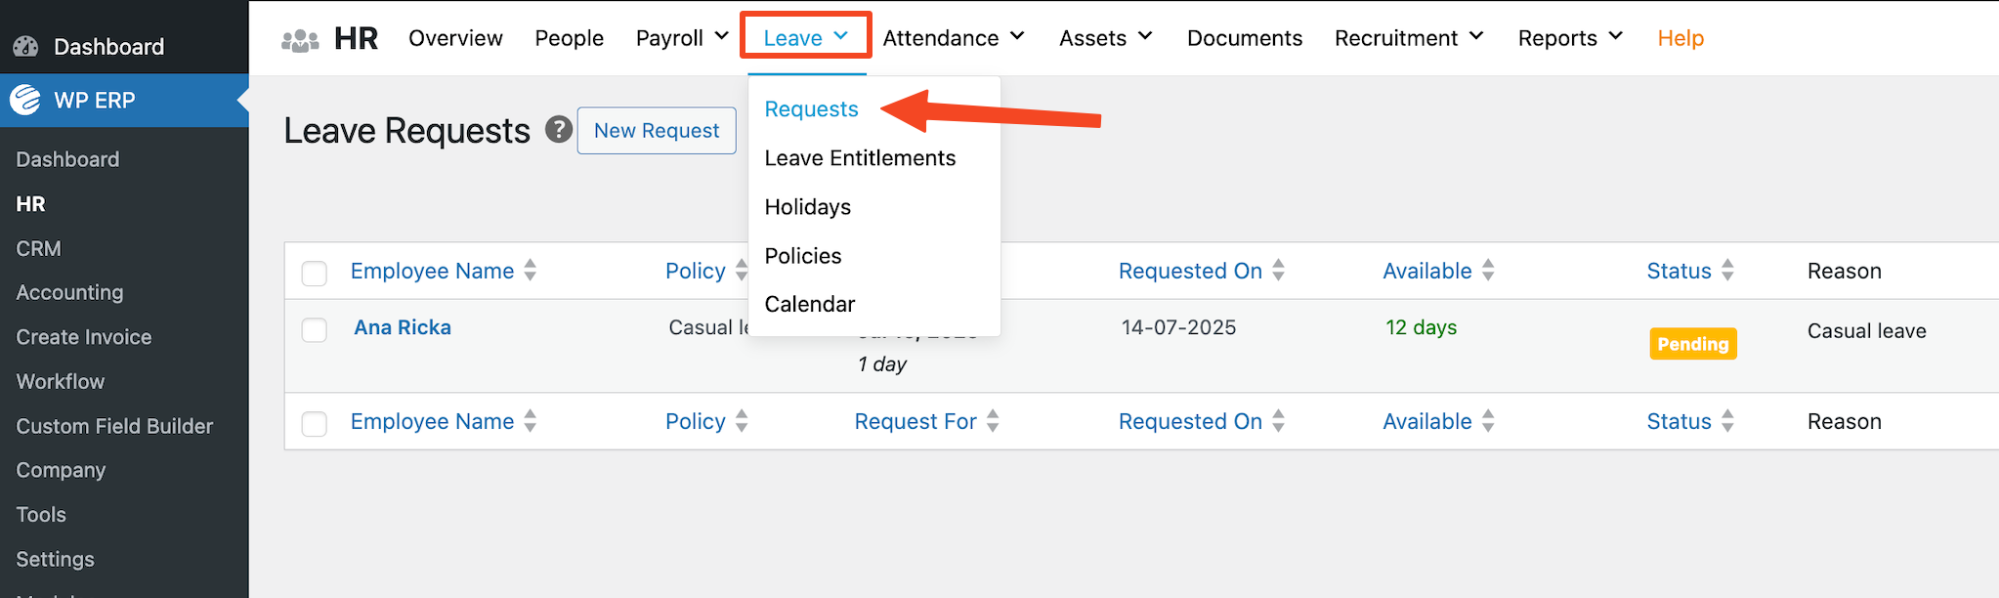
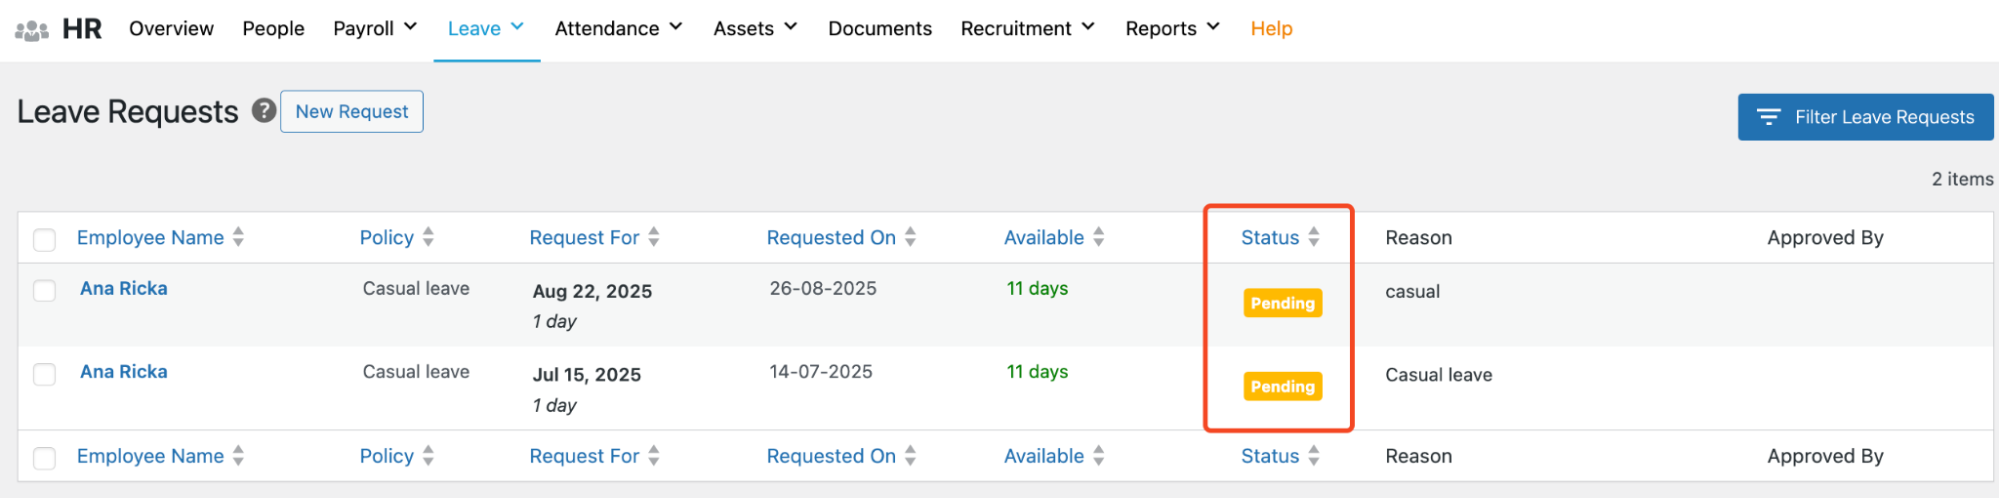
- All requests, whether created by employees or admins, are stored in the HR →Leave → Request tab.
- To access related features, go to WP Admin Dashboard → WP ERP → HR → Leave → Request.
- You can filter requests to view Approved, Pending, or Rejected statuses.
This page displays a list of all leave requests submitted by users, and you can also create new requests directly from here.
With enhanced sorting options, you can easily organize leave requests by various fields, such as Employee Name, Status, and more.

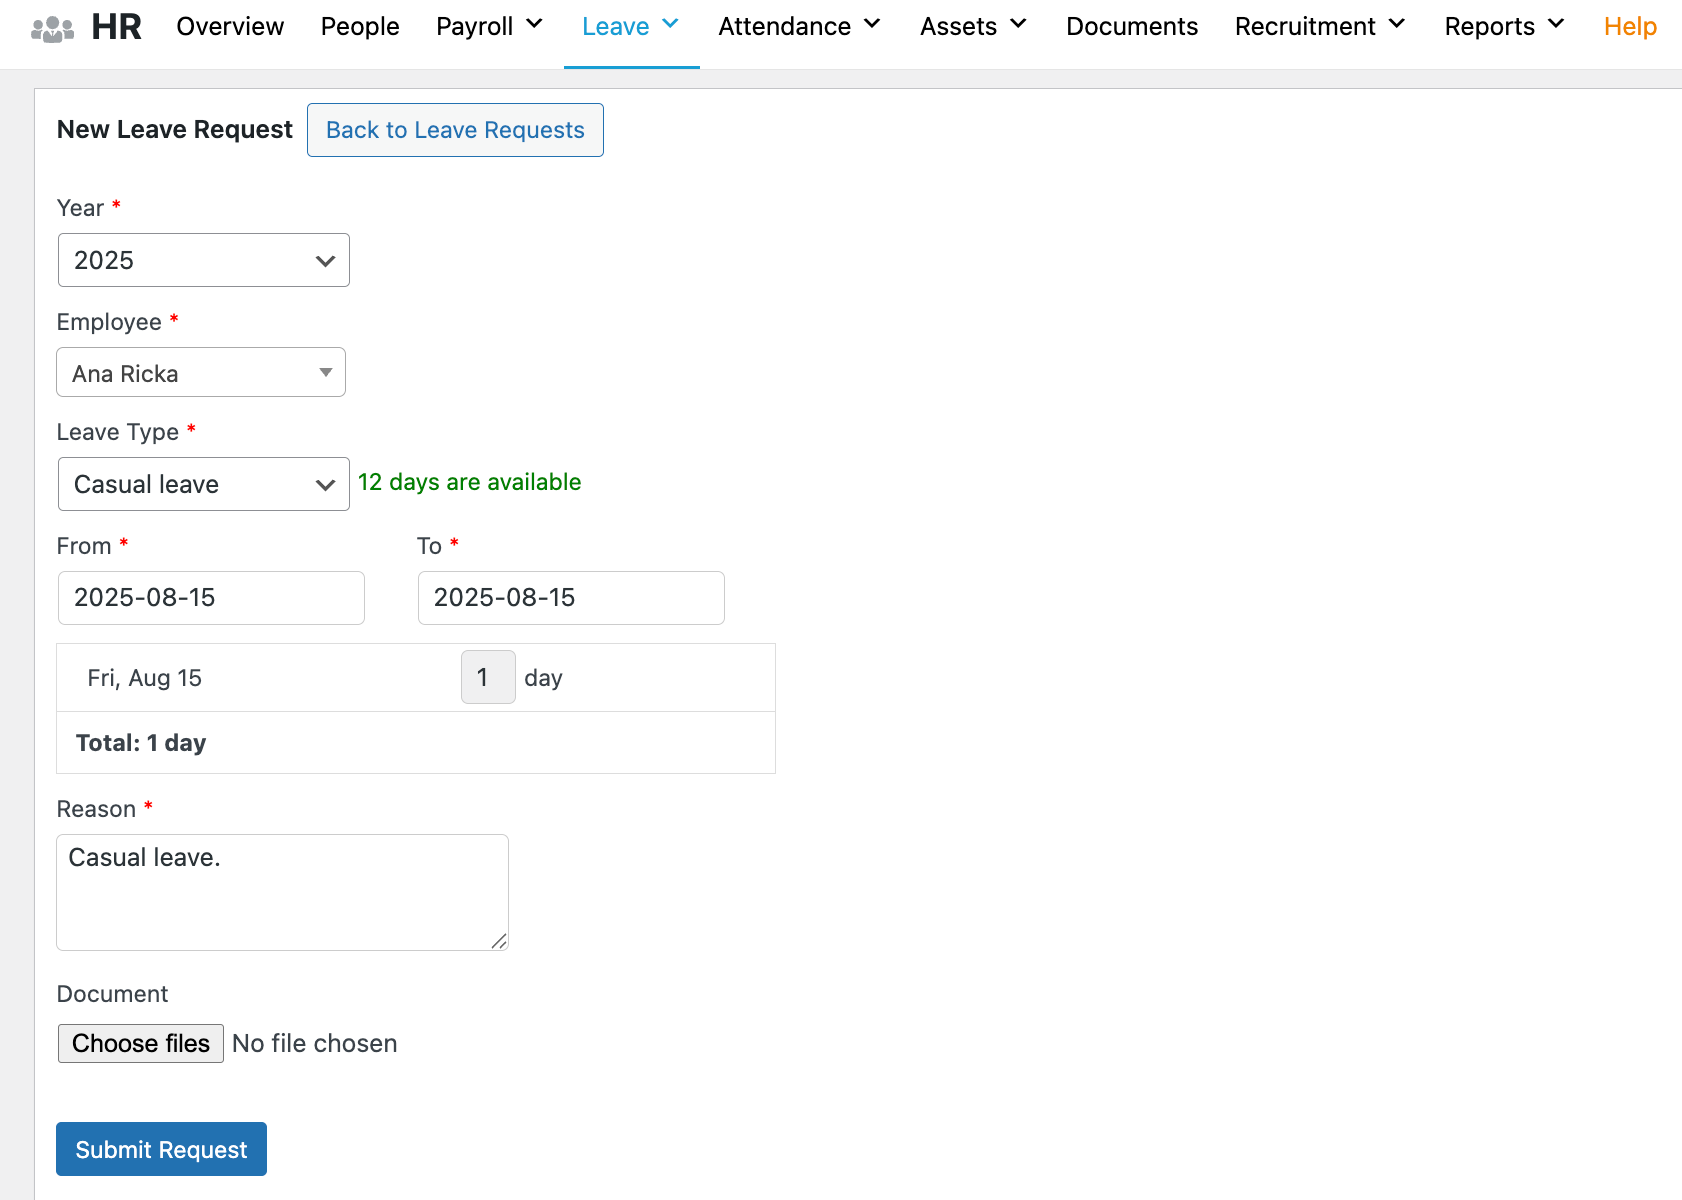
Create a Leave Request
- Click on New Request, and you will be redirected to a Leave request form as shown below.
- Fill out the form with the necessary details and click Submit Request.
You can also attach supporting documents, such as medical notes or other relevant files, along with the leave request.
- Once submitted, a request cannot be edited anymore, and they are set to pending status. You can view all the requests and their details under the Levae →Requests tab.
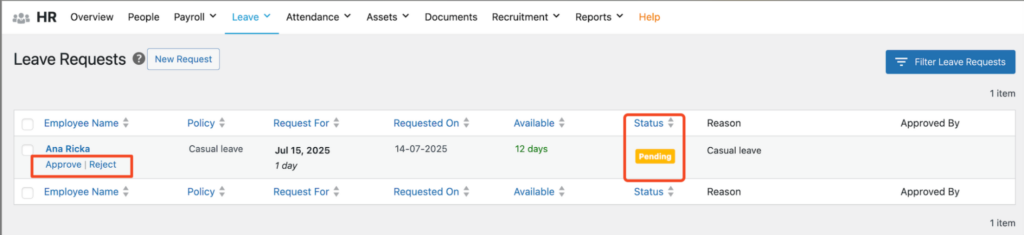
- If the request is pending, it can be deleted, rejected, or approved.
If the status has been approved, then you can not change it back to the pending state.
Rather, you can only reject it.
- To change status, simply hover on the entry and choose Approve/Reject.
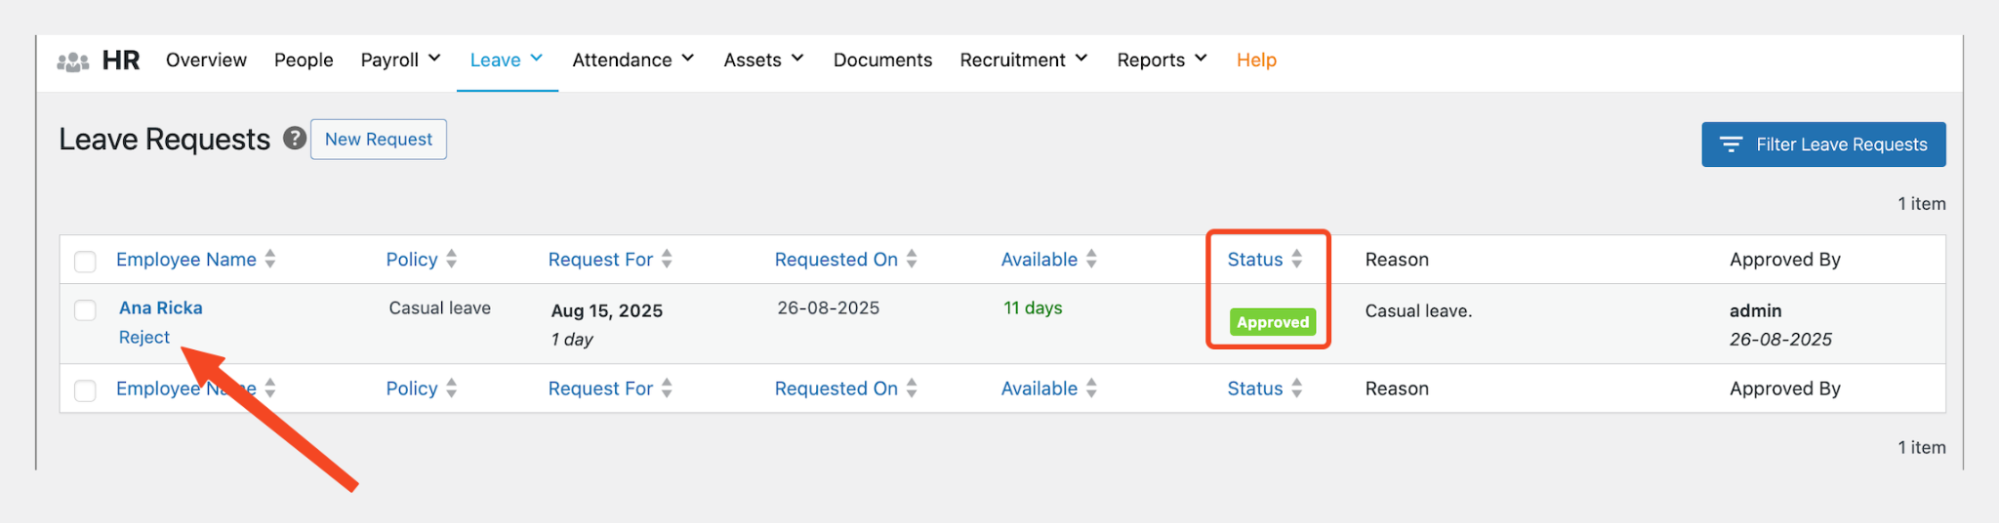
- The status will change as per your action.

This allows you to manage all your leave requests from a single, convenient screen!
