
Managing Requests
You can now manage all leave requests from a single screen, reducing the need to navigate between multiple sections.
1. To view leave requests, go to: WP Admin Dashboard → WP ERP → HR → Leave → Requests.

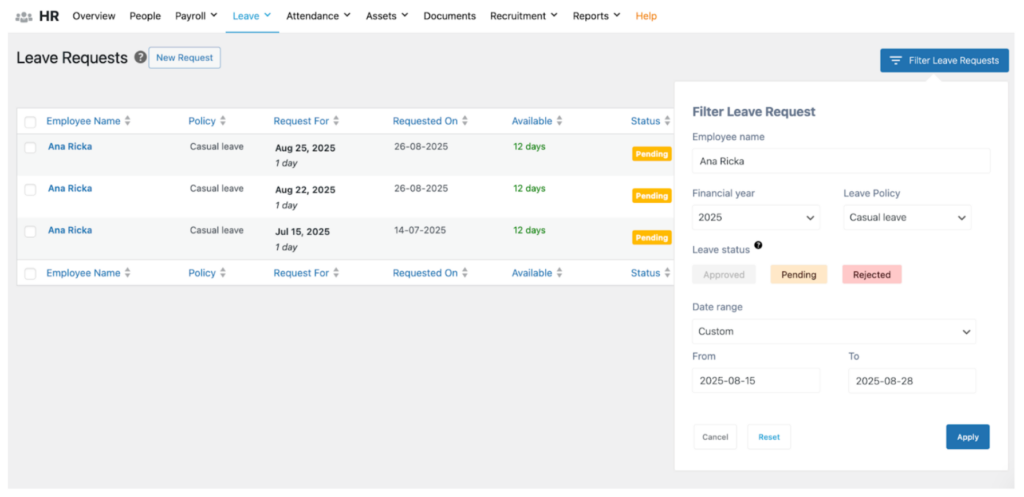
We’ve introduced a new filter tab to help you manage leave requests more efficiently. As an Admin or HR Manager, you can now filter requests using the following options:
- Employee Name: Enter at least 3 letters, and the full name, along with their designation, will appear.
- Financial Year: Select the financial year. (Configured under WP ERP → Settings → HR → Leave Years.)
- Leave Policy: Choose the leave policy you want to filter by.
- Leave Status: Select the leave status you wish to view. You can filter by a single status, multiple statuses, or leave it blank to see all statuses.
- Date Range: Filter by predefined ranges such as last week, last month, or last three months, or set a custom date range.
- Custom: Choose a specific date or a range of dates within the date frame.
2. Change the status of requests: On the top bar, you can bulk-select leave requests by clicking the checkbox next to the employee names, as shown in the snapshot below

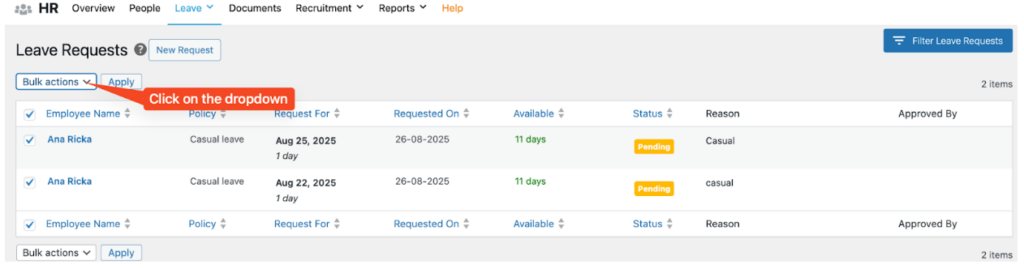
First, check on the employees and then click on the bulk actions, then Apply
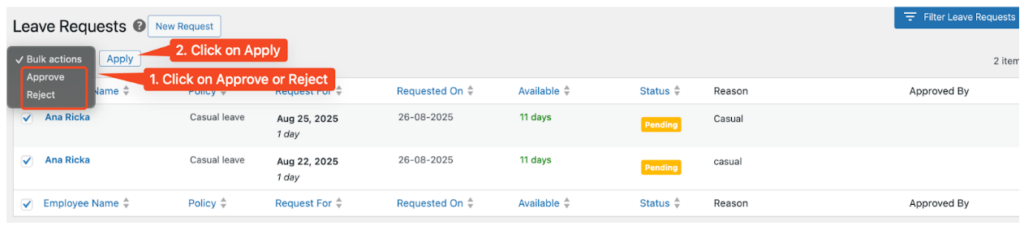
3. Approve or Reject a request
Just hover over the requested employee name and select whether you want to Approve or Reject the request.
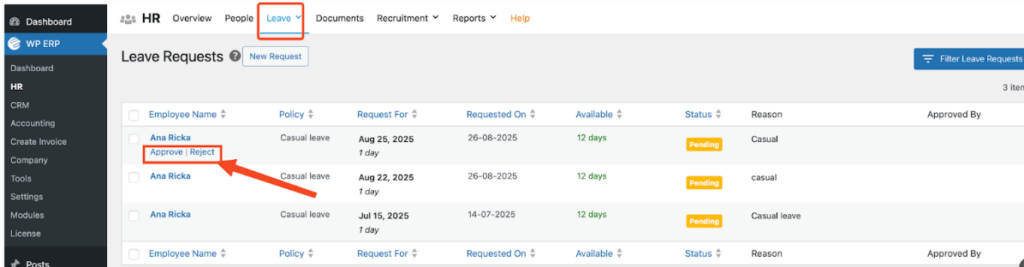
The status panel shows the status of the request. If it’s Pending, you have the choice to
4. Check the legitimacy of the request
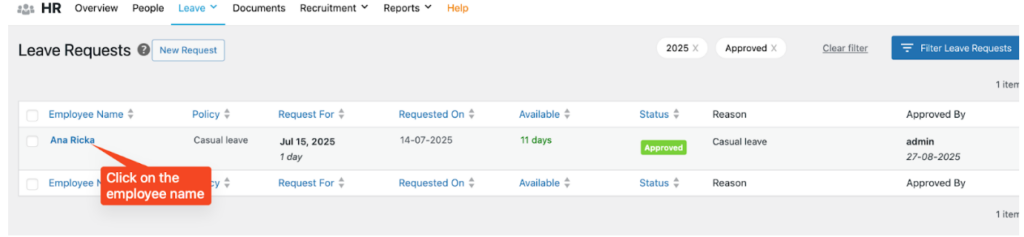
By using the Leave Reason and Available Days columns, you can quickly assess whether a request can be approved, as shown below.
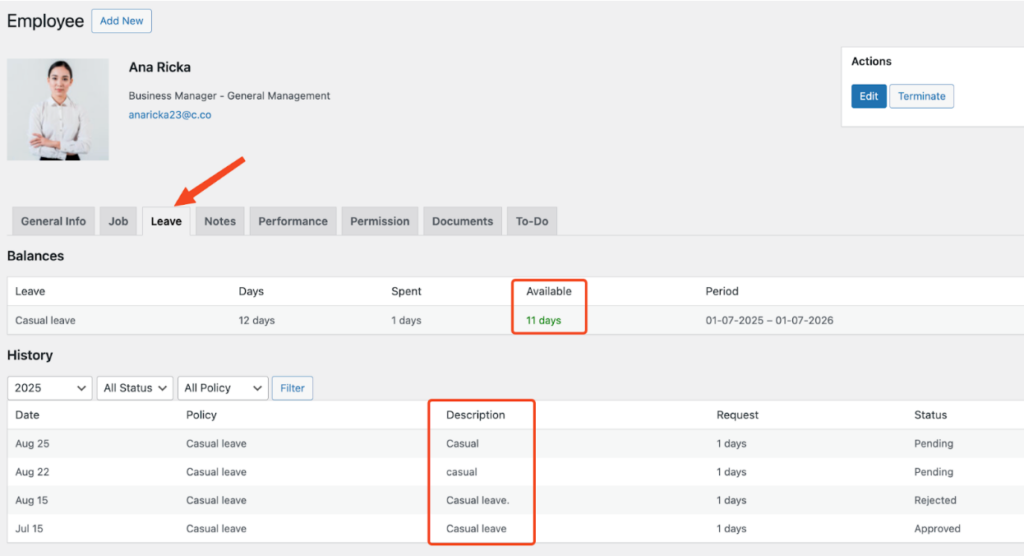
Additionally, clicking on the employee’s name will take you directly to their profile, allowing you to review further details if needed.
This is how you can manage all leave requests from a single screen!