
Document Manager For CRM
With the extension of WP ERP called ‘Document Manager,’ you can upload pictures, PDFs, Word files, ZIP files, spreadsheets and more of any format. Also, you can upload documents for your contacts or create files as well.
For CRM – As an Admin/Manager
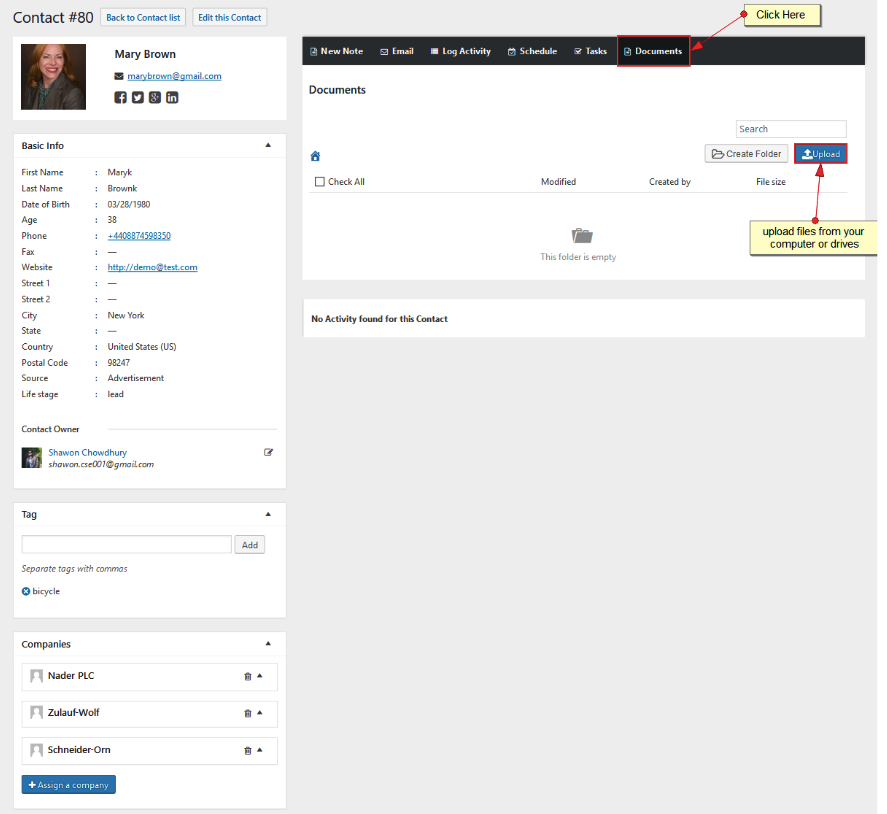
Navigate to WP Admin Dashboard → WP ERP → CRM→ Contacts/Companies→Select a contact/company. Click open a profile. You will see a Documents tab on the far right.
Click on the Documents tab. Click on the Upload button, then select one or multiple files to start uploading on the profile.
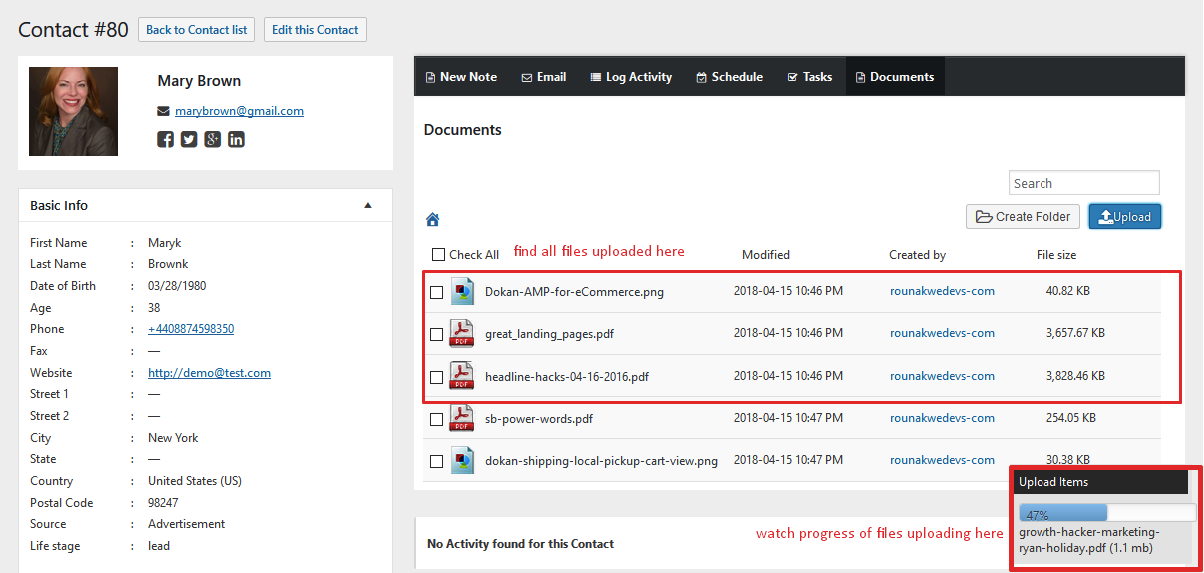
You can watch the progress as you upload your documents.
You can also view a list of everything you upload in chronological format.
This list shows you the name of the file, when it as uploaded, who created, and the size of the file.
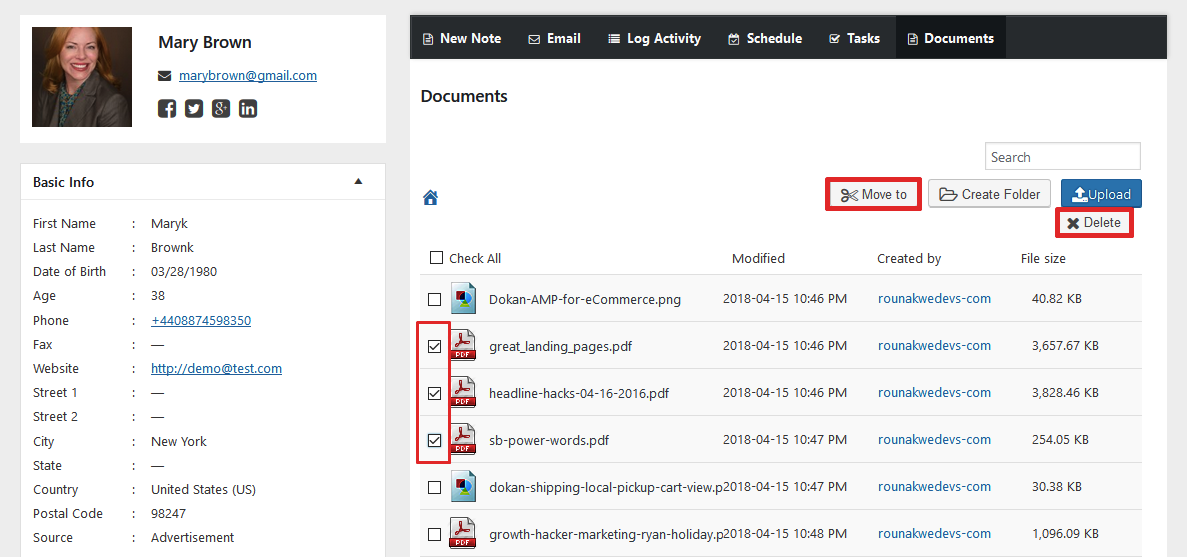
You can also select one or few documents with check-boxes and move them to another folder or delete from the user’s profile.
Create Folders
You can also create separate folders to store several files together that belong to the same topic or category.
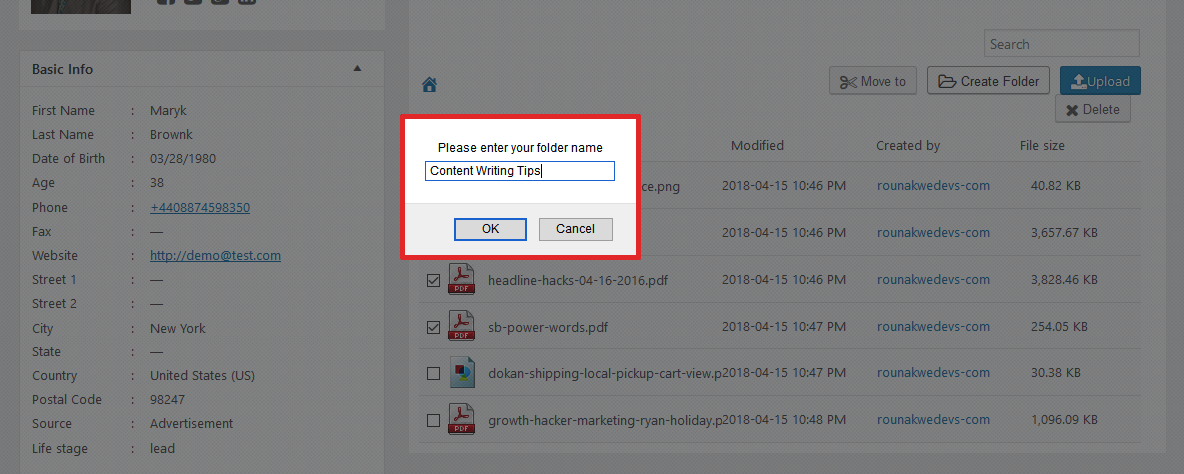
Simply click on Create Folder.
You will be asked to enter the name of the folder.
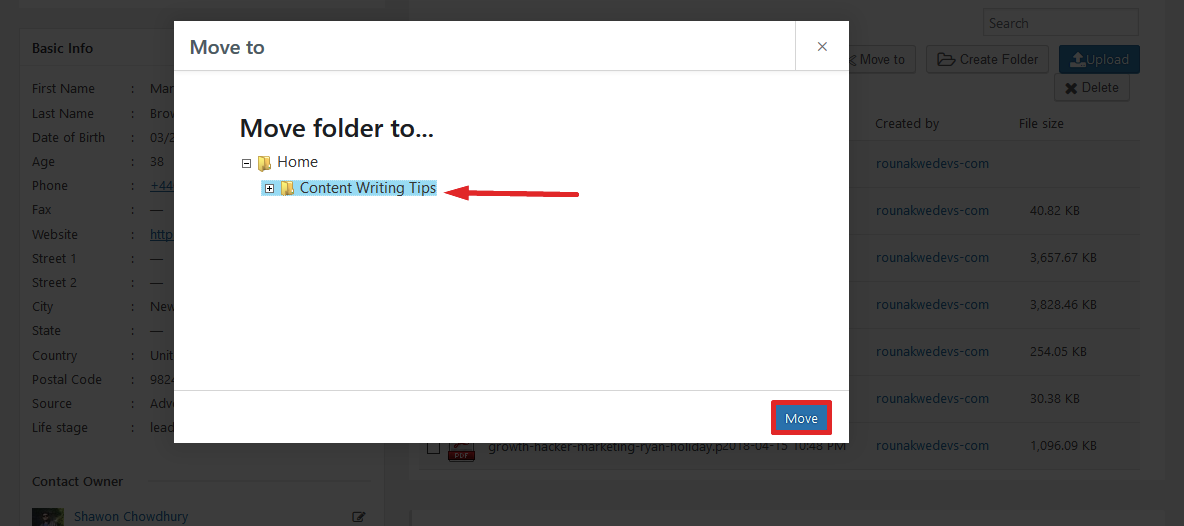
You will find the new folder above the list. Now you can select the files you want in this folder and move them.
To do this, select the files from this list and click on Move To. Here select the folder where you want the files to be, click on Move, and it will be automatically shifted.
Or you can also upload new files inside the folder.
Click on the folder to open and click on Upload.
You can also create unlimited sub-folders inside folders, just like Google Drive.
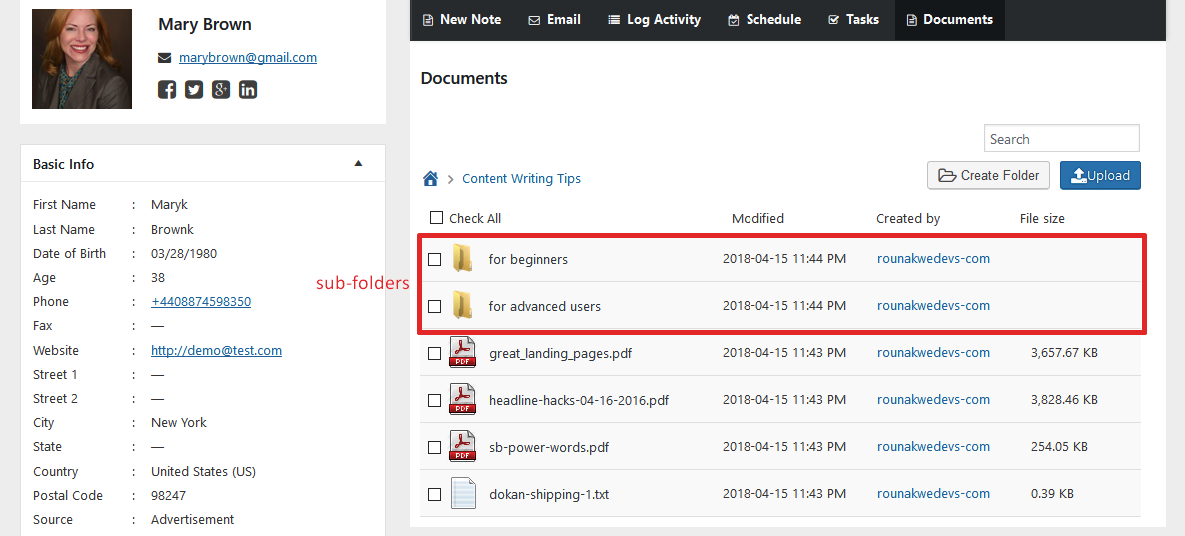
You can even create folders within sub-folders.
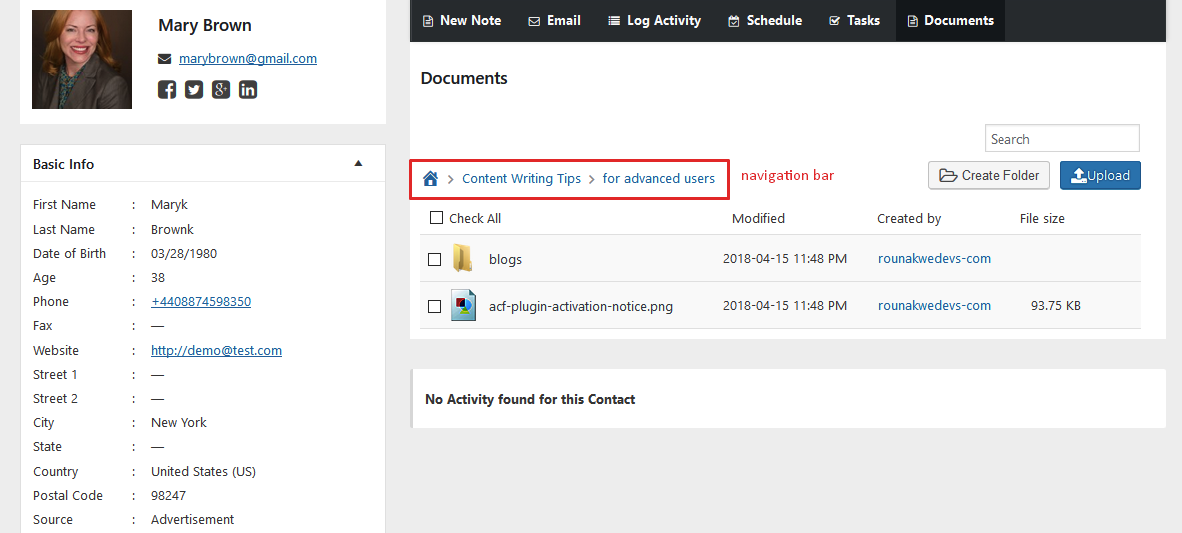
You will also see a navigation bar just like your Mac or Windows system on top of the files to jump between locations.
That’s it!