Document Manager Feature
Now you can store your Employee & CRM contacts’ detail or any other information through the Document Manager feature of WP ERP.
Using this feature within your WordPress site, you can perform the following things below:-
- Supports all file format
- Displays logos according to file type
- List and Grid view available
- Limit upload file size from WP settings
- Simultaneously upload multiple file
- Progressbar
Upload pictures, PDFs, Word files, ZIP files, spreadsheets, and more in any format with WP ERP Document Manager extension.
Activate Document Manager Extension
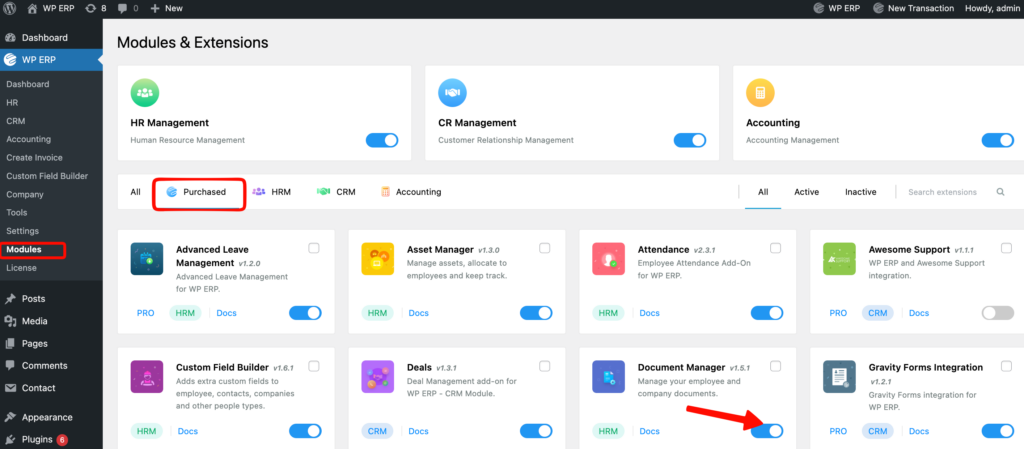
To start using the Document Manager extension, you need to activate it first. To do that navigate to WP ERP → Modules → Purchased → Document manager → Toggle on.
So you’re all done with the initial stage.
Upload & Create Your Documents
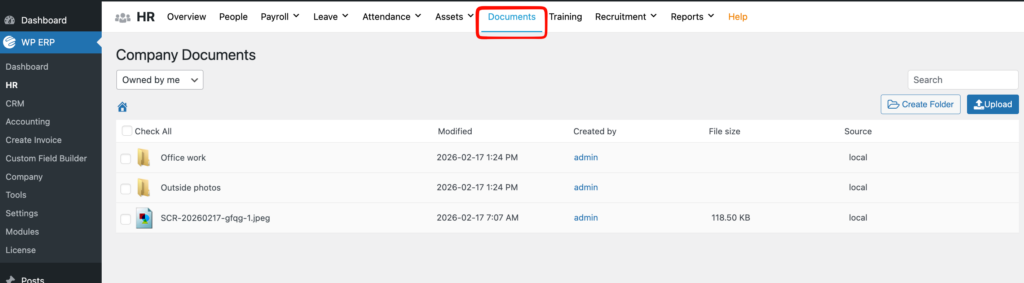
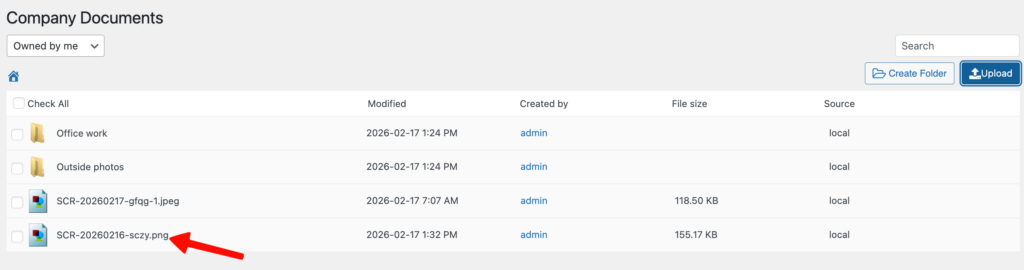
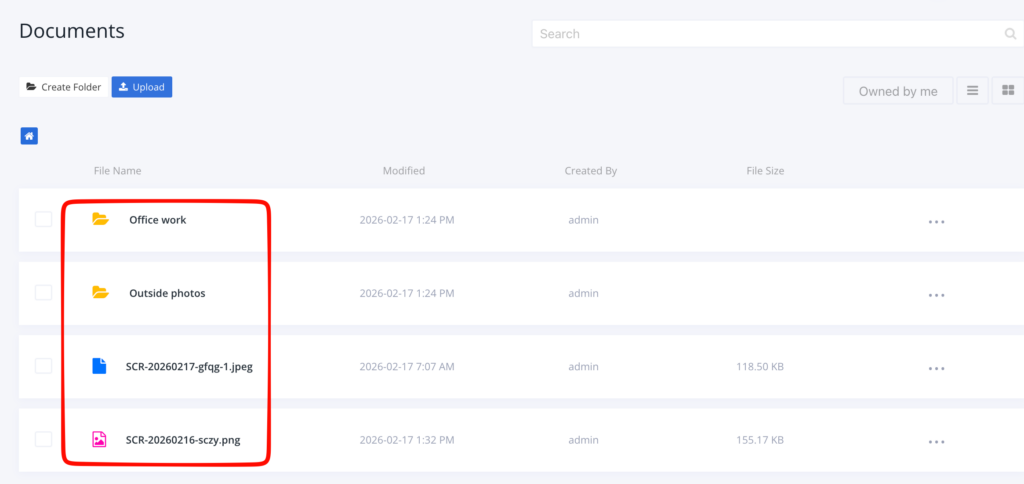
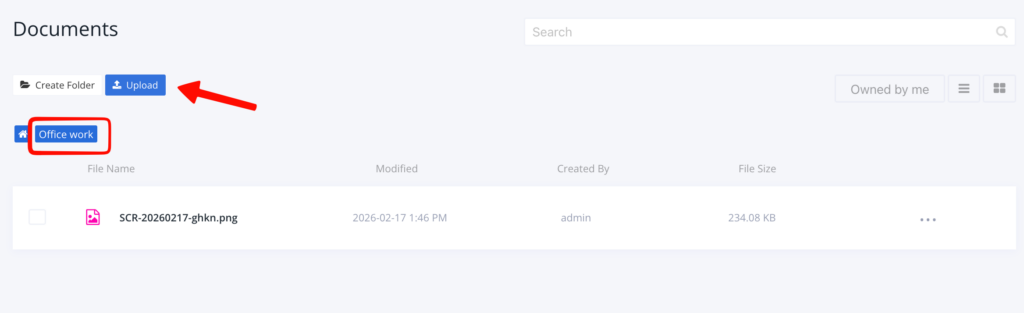
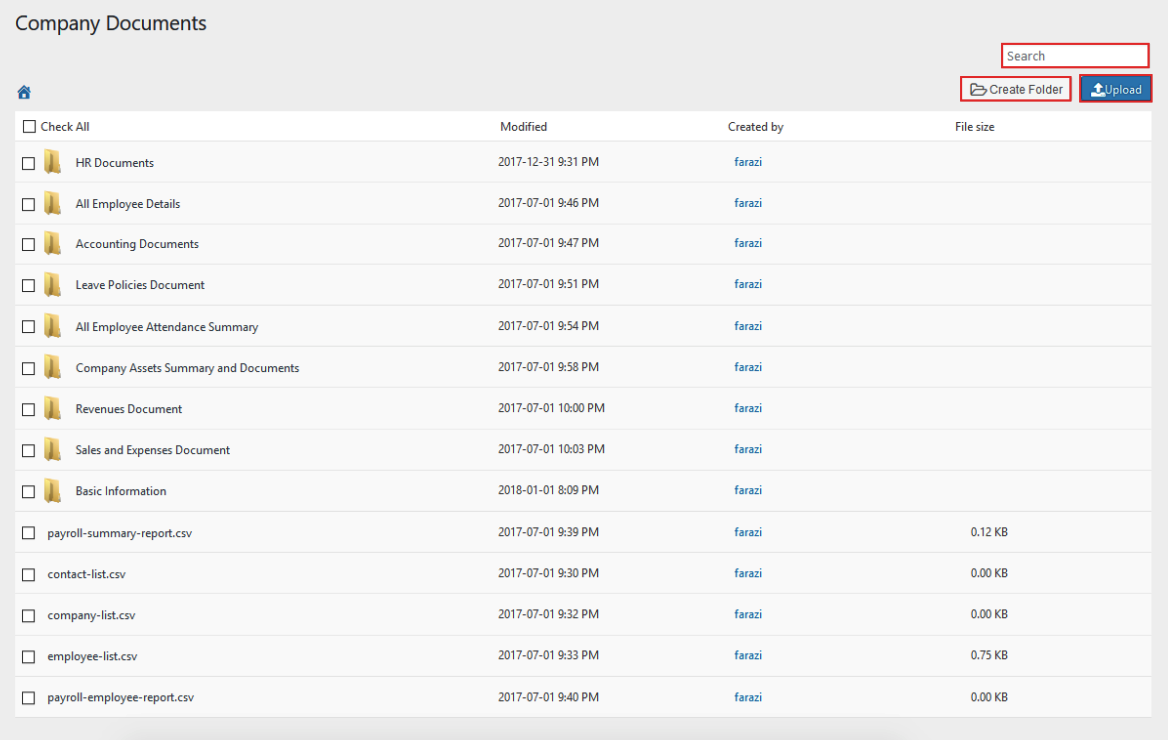
To store all HR-related and company files, navigate to WP Admin Dashboard → WP ERP → HR → Documents. Here you can see the name of the files and folders, when it was created or modified, who created, and the file size.
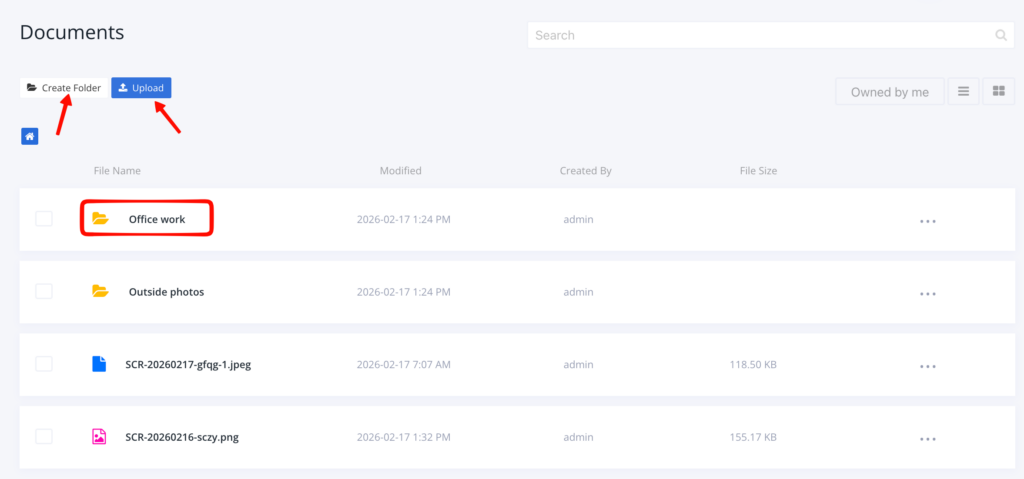
To create a folder, click on the Create Folder button. Set a folder name and hit Ok. Your folder will be created.
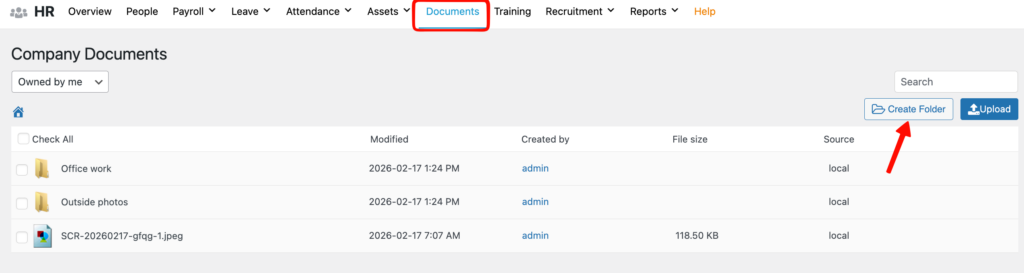
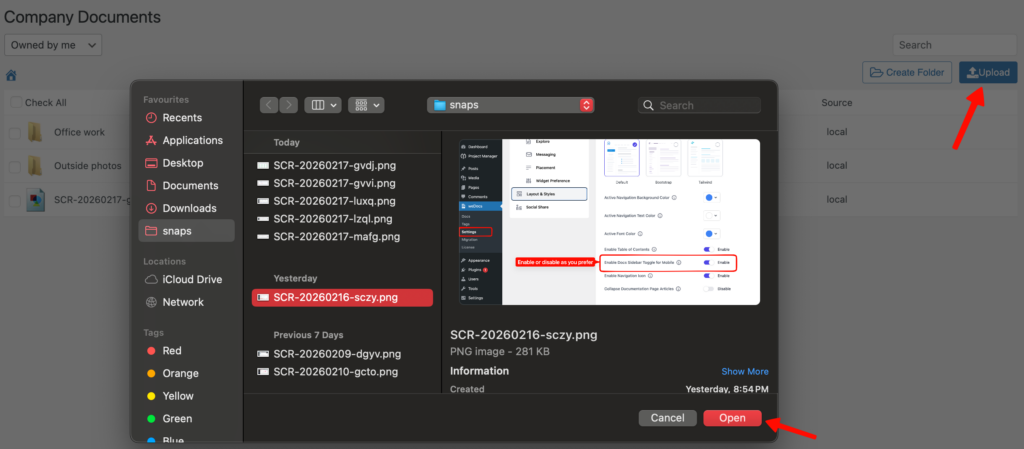
If you want to upload any folder, just click on the Upload Folder button and select a file from your file manager on your device.
You can preview the file from the dashboard. Just click on the file,
You can preview the file from within.

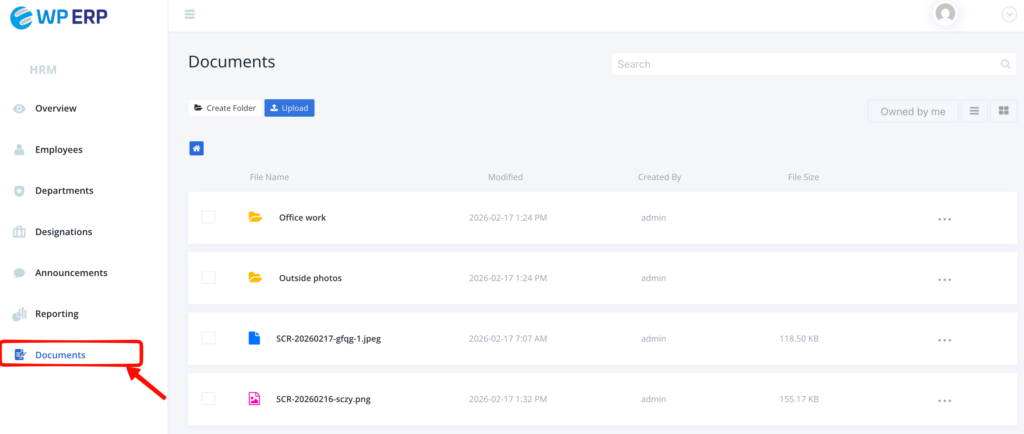
Document Manager & HR Frontend Integration
Now, you can view the Document Manager from the HR Frontend module. But do make sure you have Document Manager and HR Frontend, both modules, activated. Otherwise, you can’t access Document Manager from the HR Frontend.
If you have any previous documents created from the Backend, you will now be able to view them from the Frontend.
So now upload or create documents also from the Frontend. Just click on the Create New Folder to create a folder. To upload, click on the Upload button.
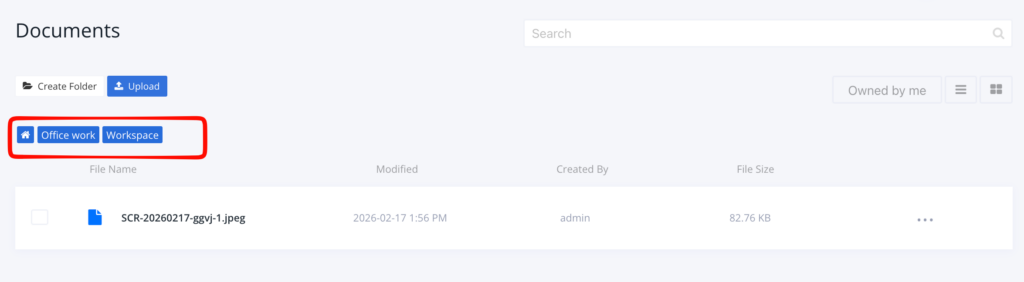
There is an option to create or upload a folder within the folder. Therefore, you can create unlimited subfolders per your need.
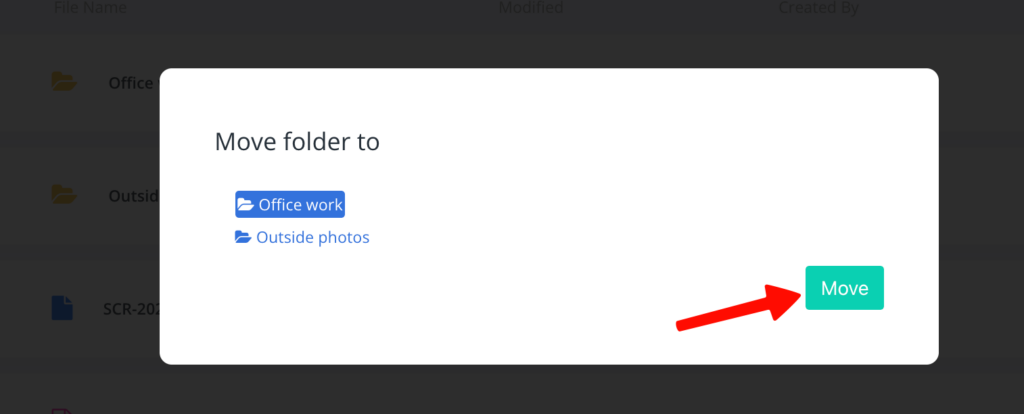
Move, Trash, Share Documents
You can easily move, delete/trash, and share any file or folder.
Select the file or folder and click on Move/Delete/Share
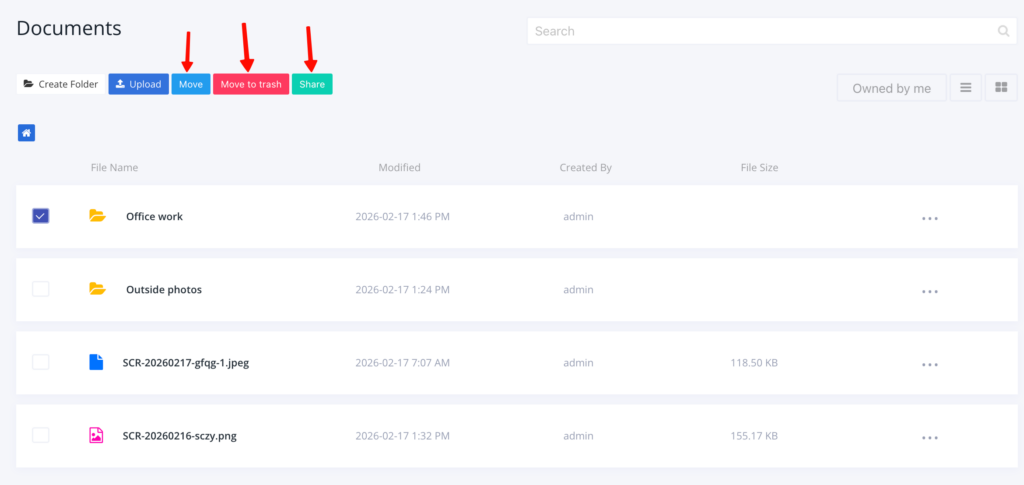
While moving a folder or file, you will get the option to choose from.
While creating subfolders, if you are worried about navigation, you can easily see the navigation bar on top. Making it easy to find out where you are and also jump between locations.
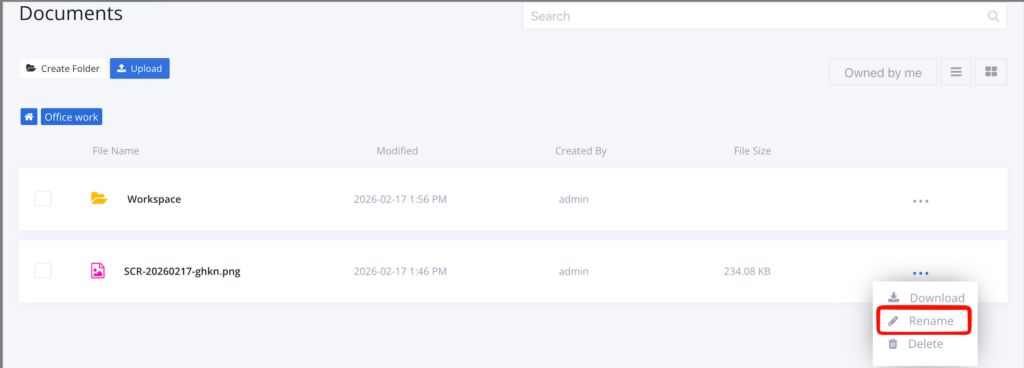
Rename Your Folder
To rename a folder, hover over the three dots and rename your folder/file.
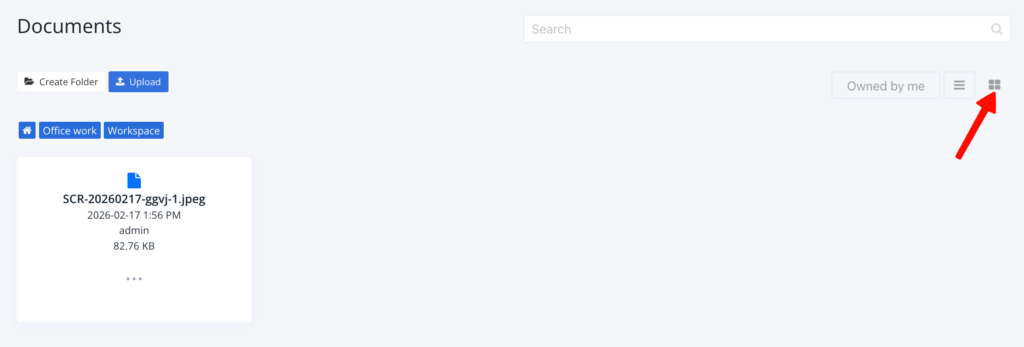
Grid & List View
You can view your documents in Grid or List view. The default view is the list view. But you can change it to Grid view.
Dropbox Integration
WP ERP Document Manager lets you integrate Dropbox to enhance communication functionalities.
First you need to activate and configure its API token, settings, and set the permissions.
Integrate Dropbox
WP ERP Document Manager has integration with Dropbox. So, now you can easily create files in the Document Manager and it will be saved in Dropbox automatically and vice-versa. It’s a 2-way integration.
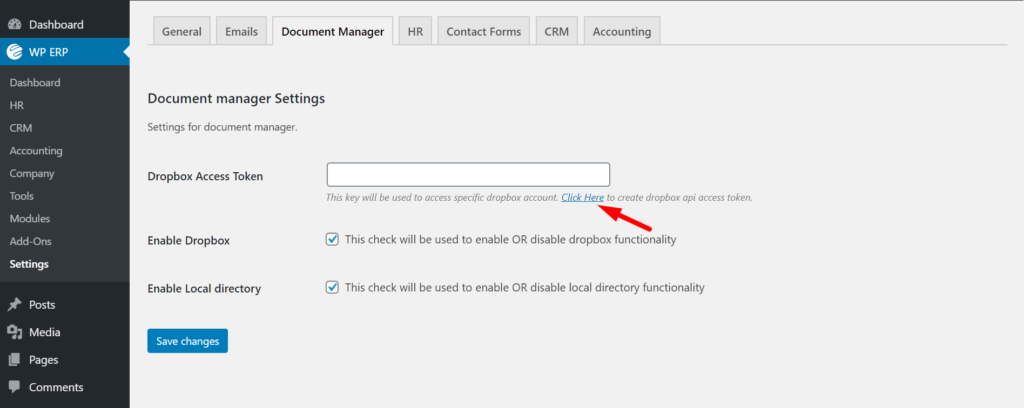
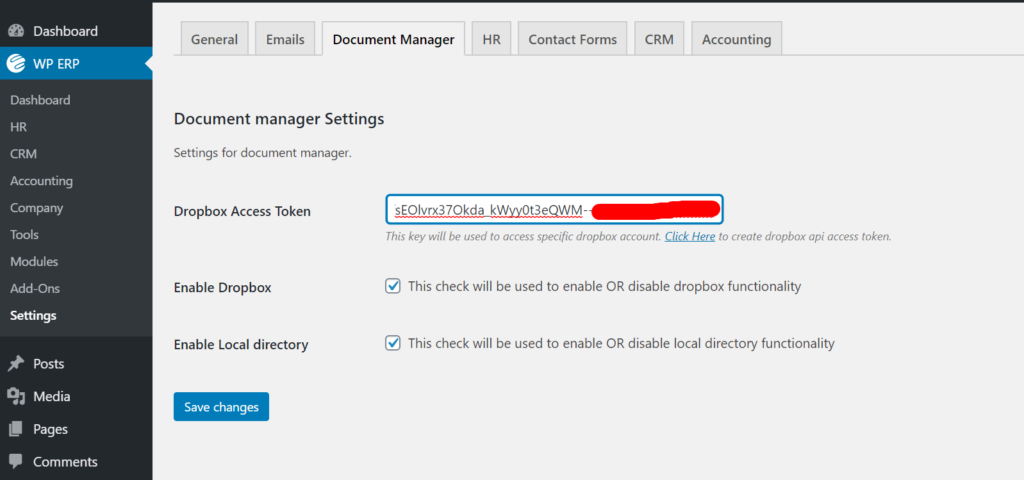
To get started, go to WP Admin Dashboard → WP ERP → Settings → Click on Configure

There you will find options to integrate Dropbox. You need to get the access token from your Dropbox account. Just click on the link.
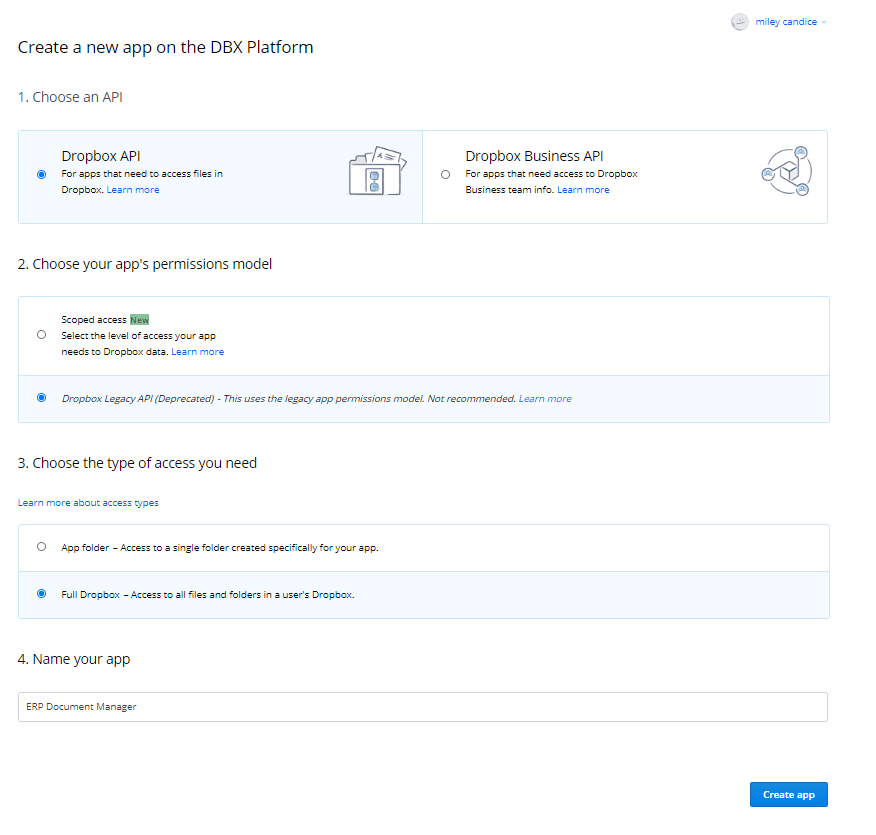
Creating A Dropbox App
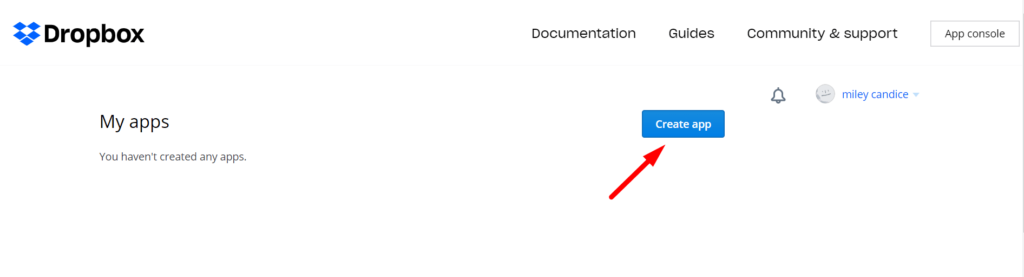
Once you click on to the link, you will be redirected to the Dropbox developer page. There you have to create an app in order to integrate with Document Manager.
To create an app, click the Create app button.
Now, choose the options exactly like the below screenshot. Hit the Create app to finish.
Provide permission before you proceed
Before you insert the API token, do make sure that you’re giving the right amount of permission to that file. So if your file is going to be operated by other users, then set up the permission according to that.
So whenever you set the new permission you’ll need to create individual API token for that. Now how you can do that. right? It’s easy and you don’t need to be panic, in this case.
Just click on the permission button
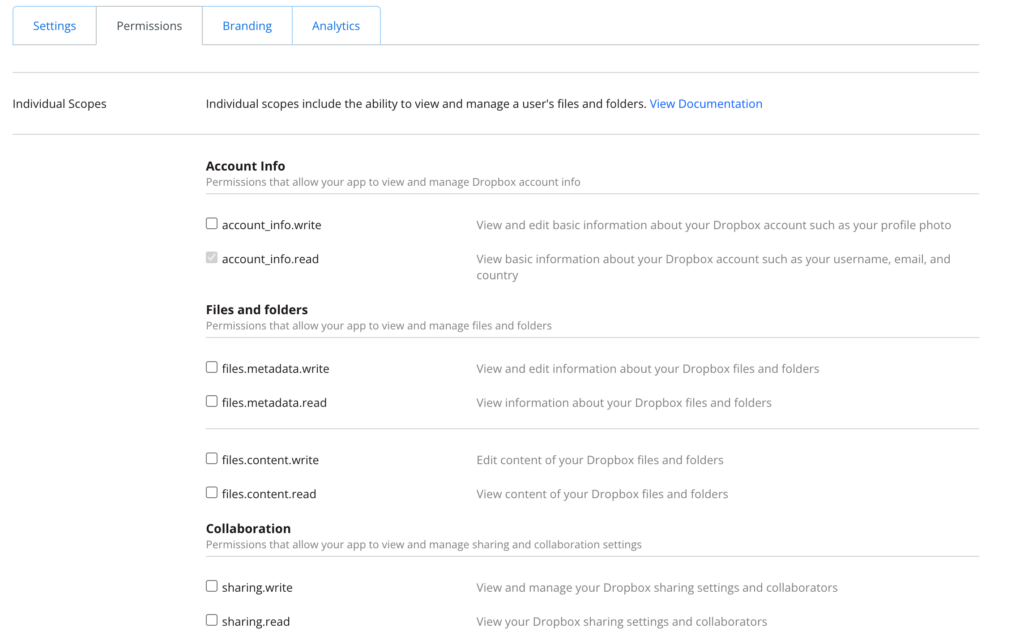
After giving the preferred permission, again you can create the API, or you can let it as it is. Next, follow the same process.
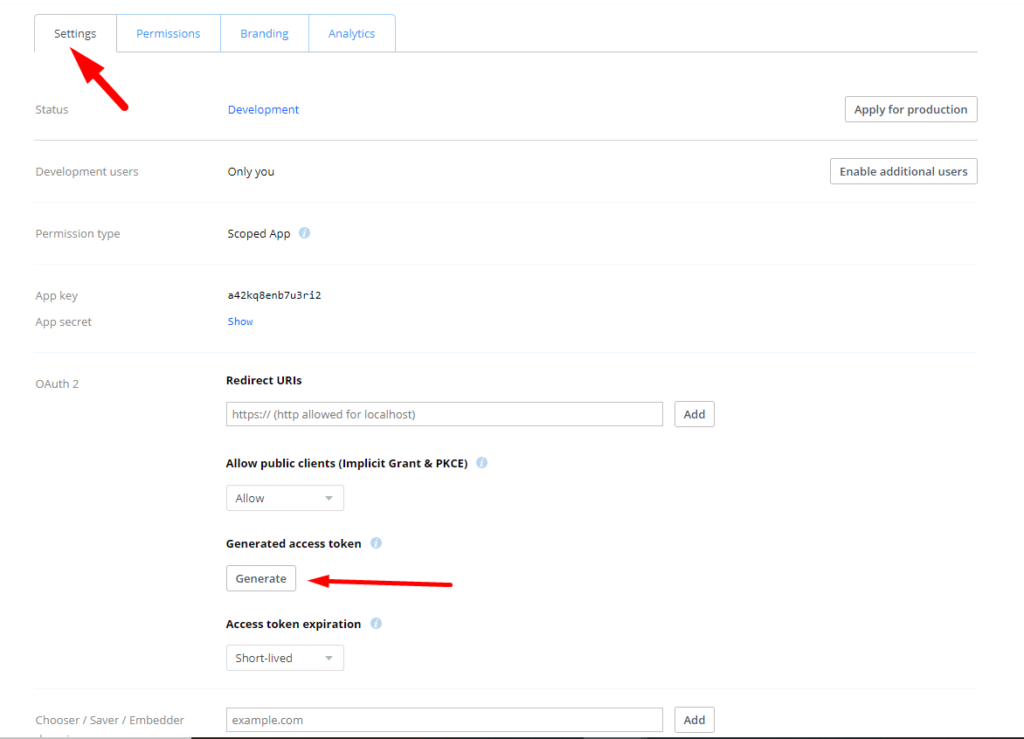
Now, go to the Settings page. Add your admin page URL. If you have a site xyz.com, then add xyz.com/wp-admin as a domain URL. Click on Generate to get your access token. Copy the whole token.
Copy Access Token & Test Connection
Now, paste the access token onto the access token box and hit Save Settings.
After you hit Save Settings, you can test the connection to see whether you have successfully integrated with Dropbox or not. Push the Dropbox connection test button.
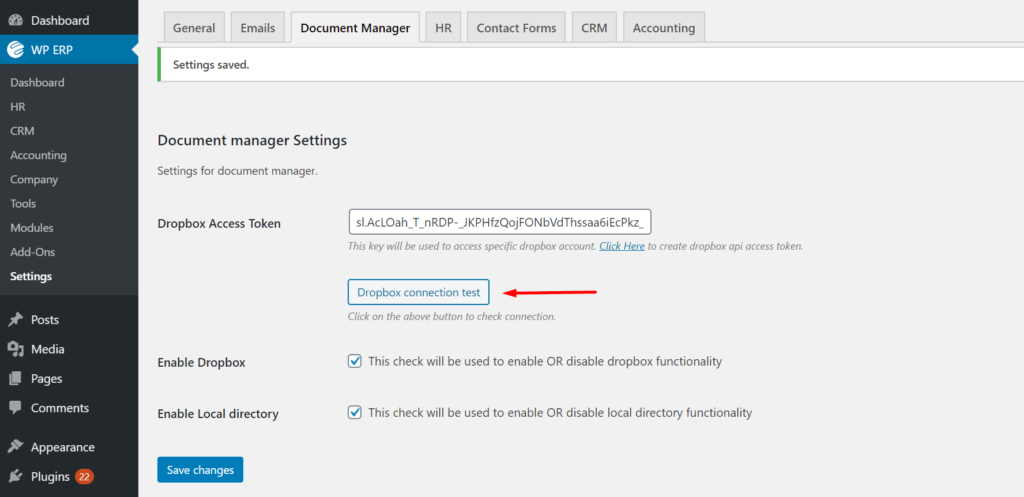
If your connection is successful you will get a pop-up message.

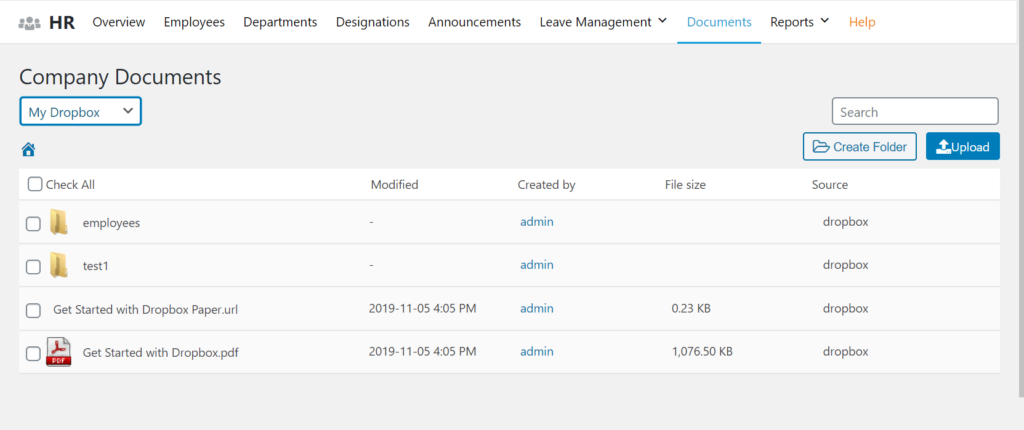
After that, go to WP Admin Dashboard → WP ERP → HR → Documents, you should be able to see a new option “My Dropbox” on the drop-down menu bar. Both are in the HR Frontend & the Backend.
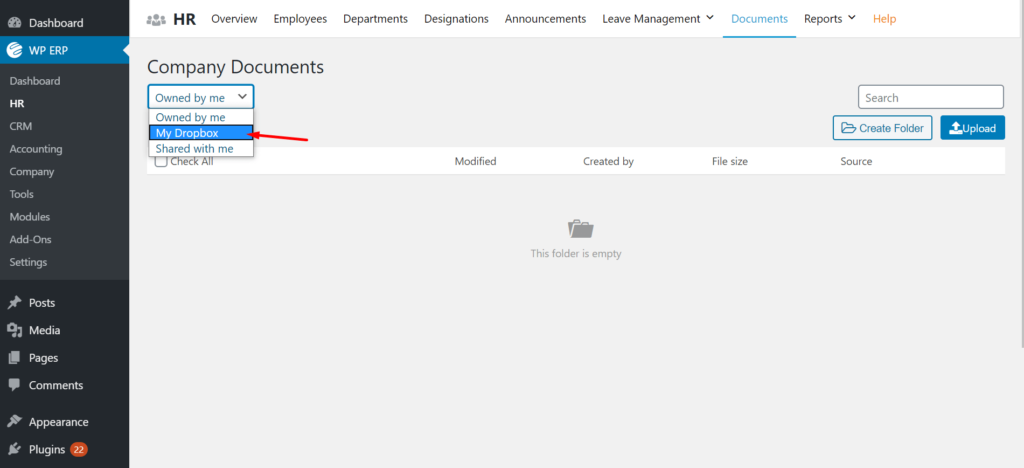
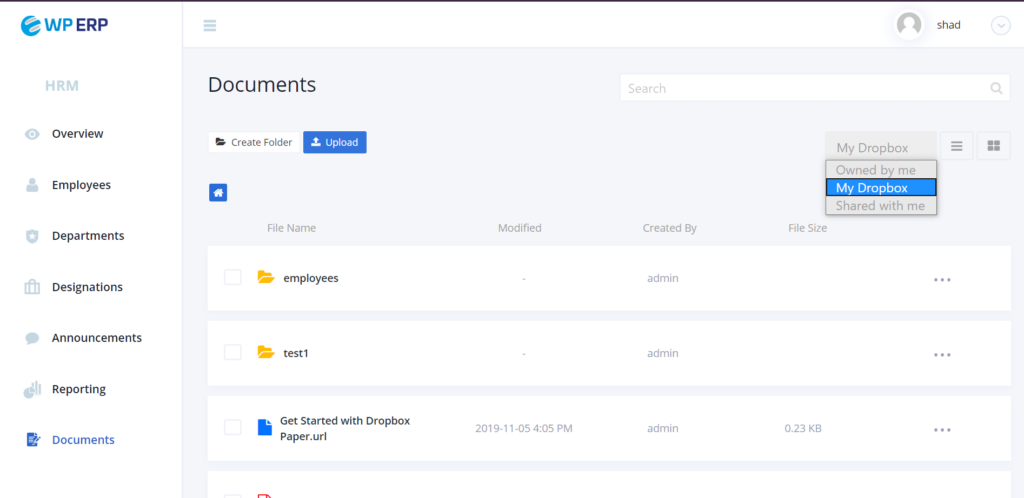
If you click on the option you will be able to see all the documents from your Dropbox account.
Share Documents With Other Employees
You can share any documents with the existing employees through the Document manager.
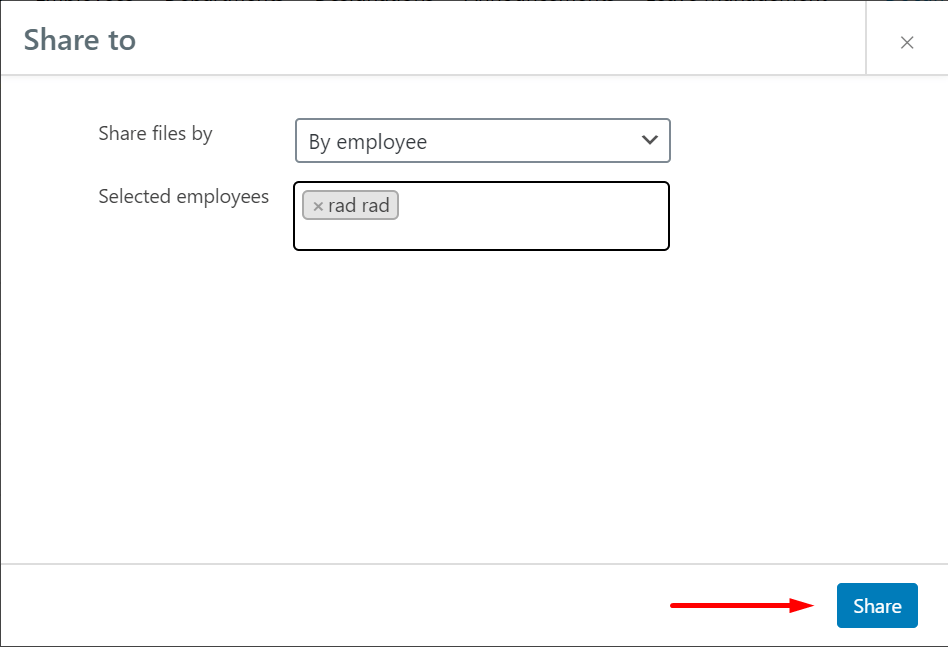
Select the checkbox beside the file you want to share, you will see two new options appear “Share With“, “Delete“. Click the Share With option.
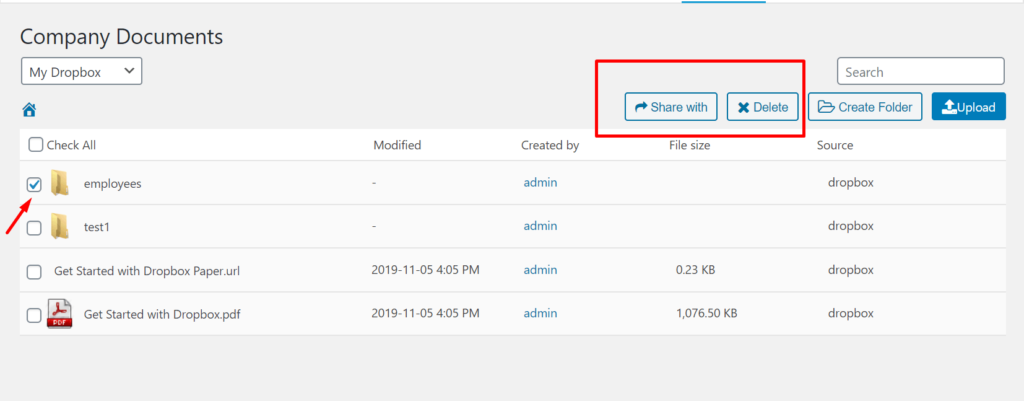
A pop-up will appear. You can share files by,
- Employees
- Department
- Designation
- Employee

For example, you can choose an employee and hit the share button. The file will be shared.
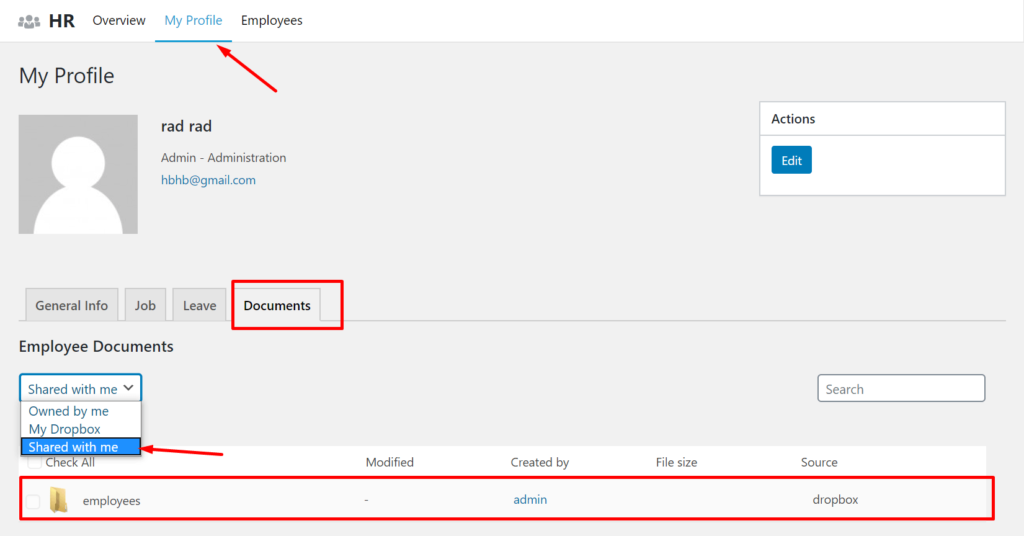
Now, as an employee, if you go to Employee Profile->Documents and choose Shared With Me from the drop-down menu, you will see the file.
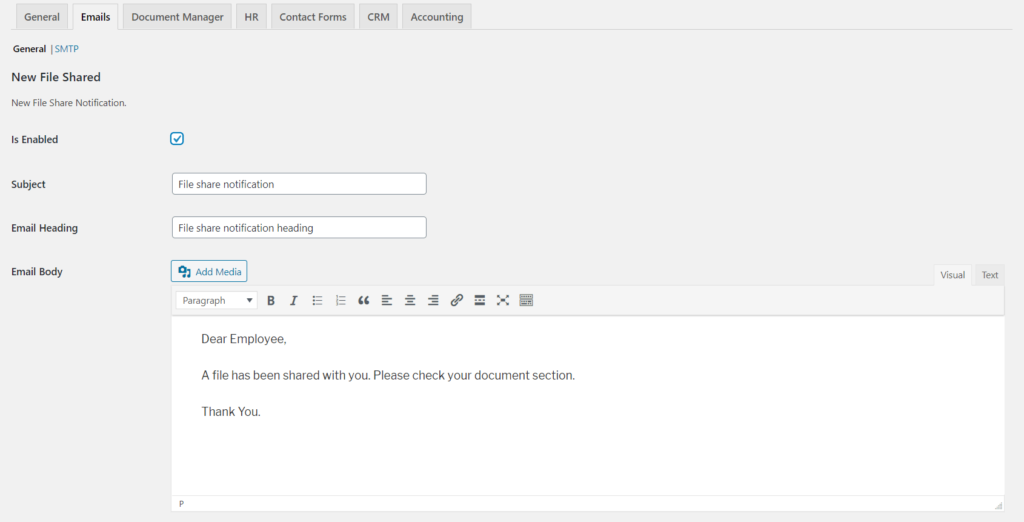
Send Email Notification After Sharing A File
You can send email notifications after sharing a file.
Go to WP ERP -> Settings-> Emails to configure emails.

There you can choose the New File Shared template and configure it.

You can configure as you like.
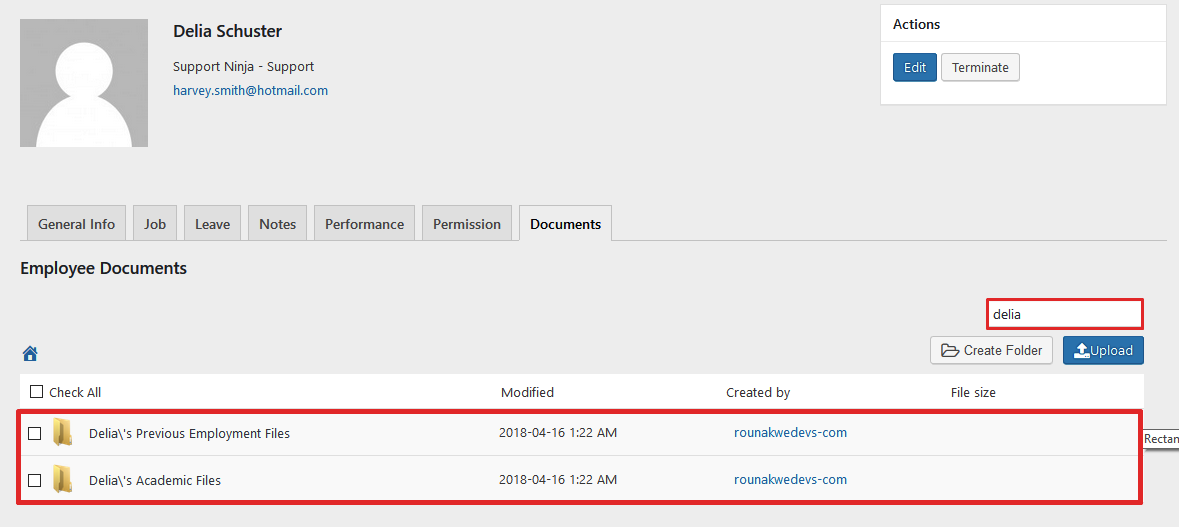
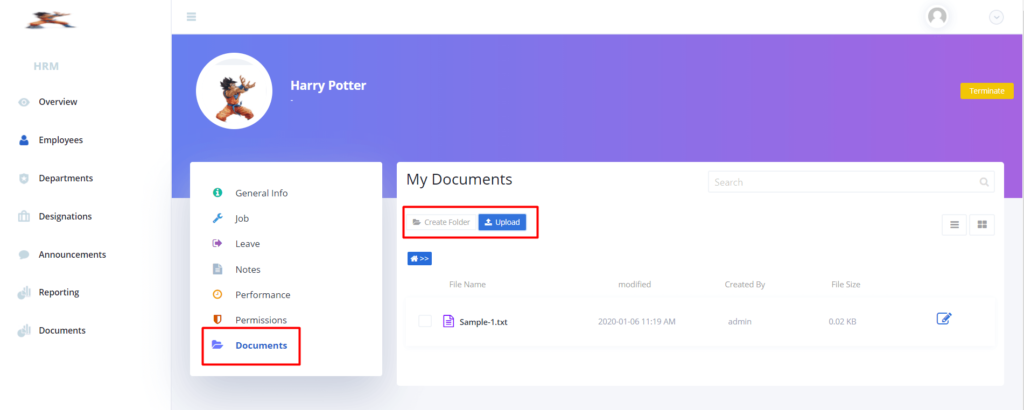
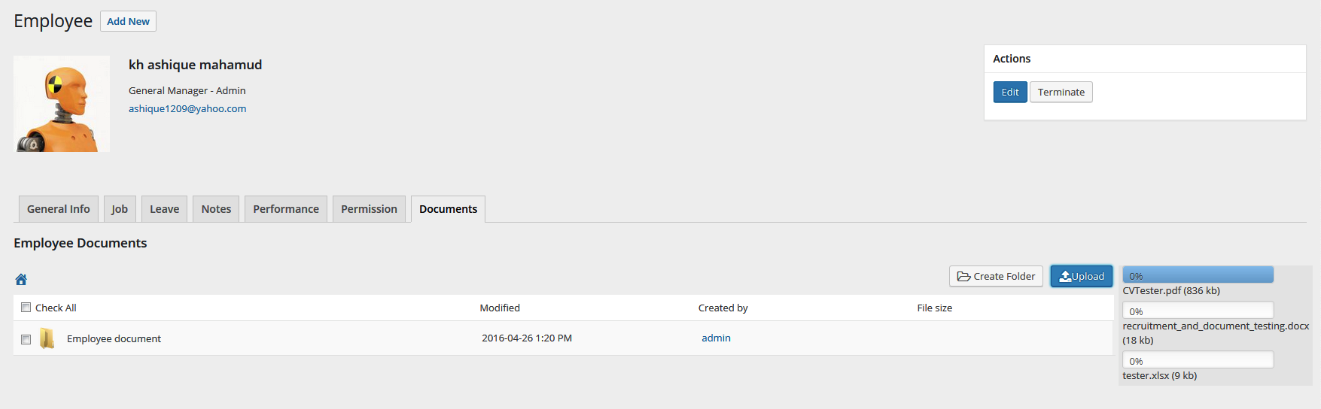
Upload & Create Documents For Employees
You can upload documents for a particular employee as well. navigate to WP Admin Dashboard → WP ERP → HR → Employee → Select and employee → Documents.
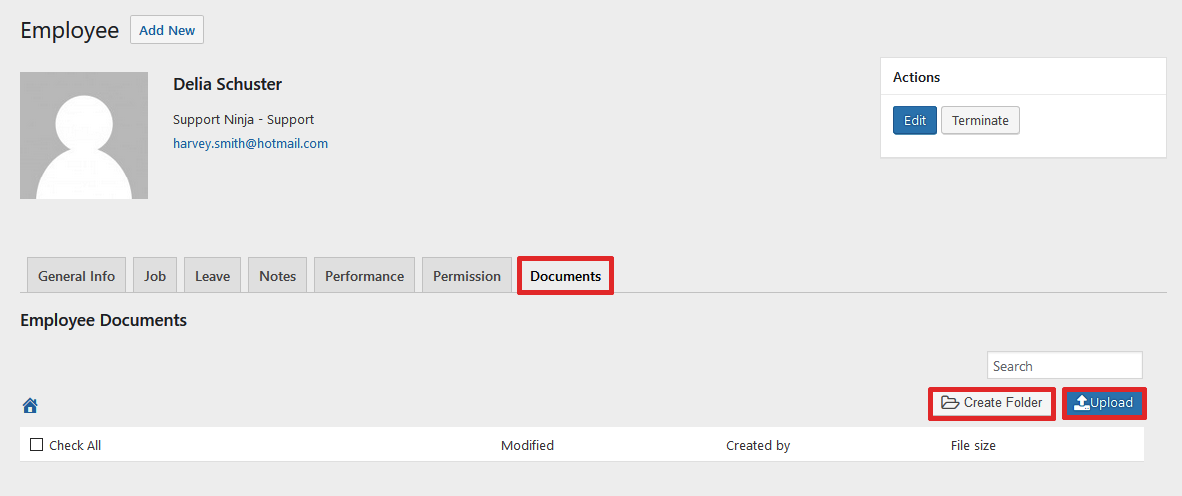
Upload as many files in multiples. Or creates as many folders as you like.
You can also search for files using the Search button.
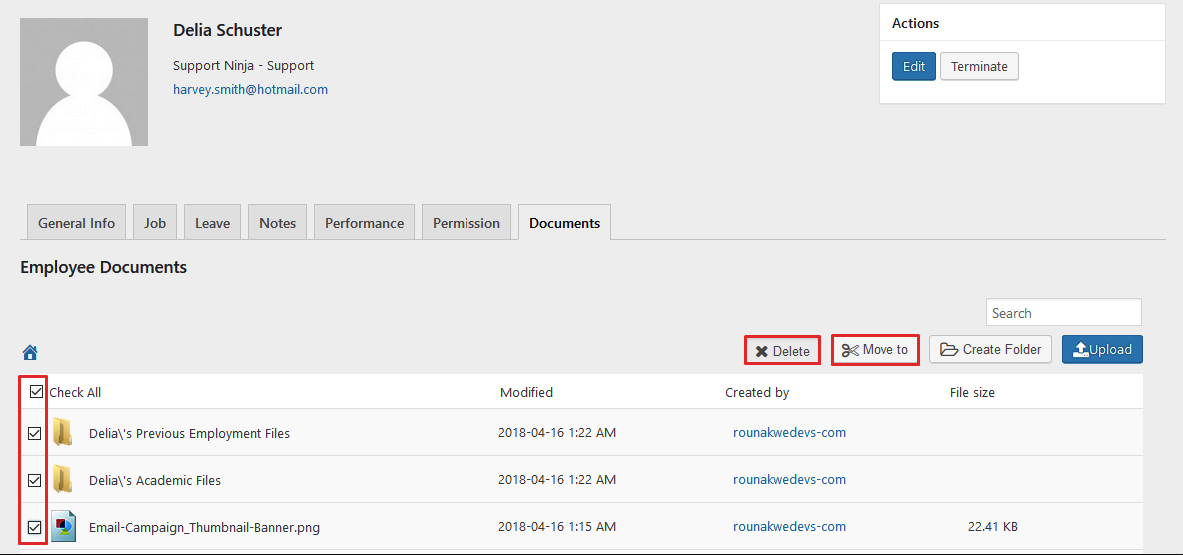
You can also select all or a few documents and choose to delete or move them together to another folder.
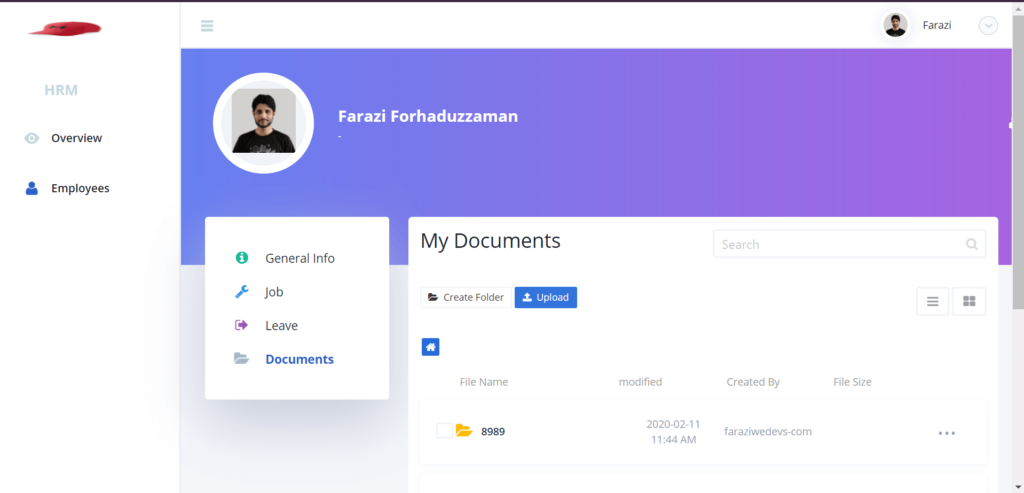
Upload Documents From The HR Frontend
Click on Employees section. Then, choose an employee for uploading or creating documents.

There you will get the buttons for creating or uploading documents.
As an Employee
All operations are basically the same. Files uploaded by the employee will have default ownership to the user.
Employee will also be able to see files uploaded (According to permission) & by admins in his/her profile.
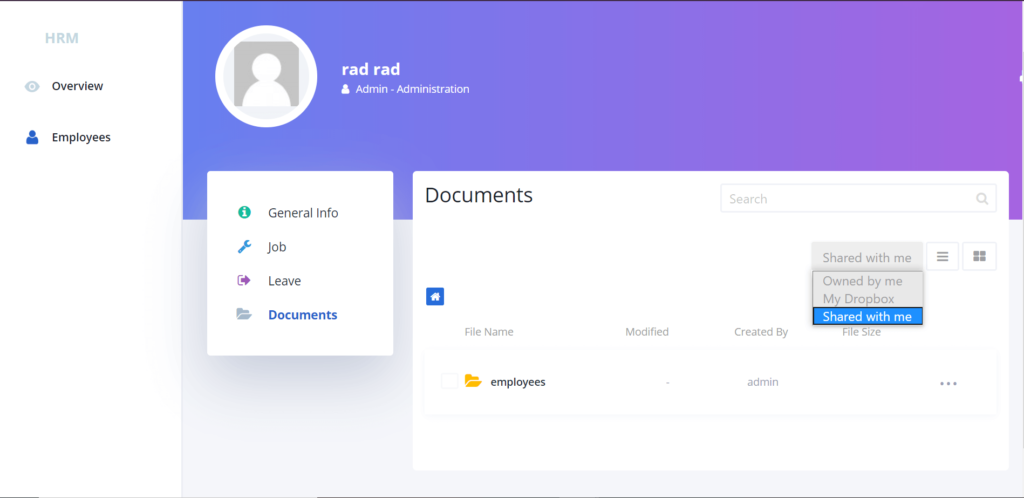
HR Frontend
Employees can upload or create files from the frontend as well. Navigate to your profile. Click on Documents. There you can upload or create documents for the employees. He/She can also see the documents created by the Admin/HR Manager.
Storing All Company Documents
You can use the Document Manager module to store all the necessary documents. So, the chances of losing or not finding any document will be close to Zero.
That’s all about configuring Document Manager for your HRM and CRM modules.
