
Reimbursement Requests
Employees can claim back money that they spent for the company, for example a taxi or a client lunch. HR managers approve the claim. Then they record the payment.
Before you start
- You must have WP ERP Pro with an active license, and the Reimbursement module must be on.
- The Accounting module of WP ERP must be on. Reimbursement does not work without it.
- To record payments, you must have a bank or cash account in Accounting.
Step 1: Choose if claims need approval
- Go to WP ERP → Settings → HR.
- Click the Miscellaneous tab.
- Select Require approval for reimbursement claims if a manager must approve each claim.
- Click Save Changes.
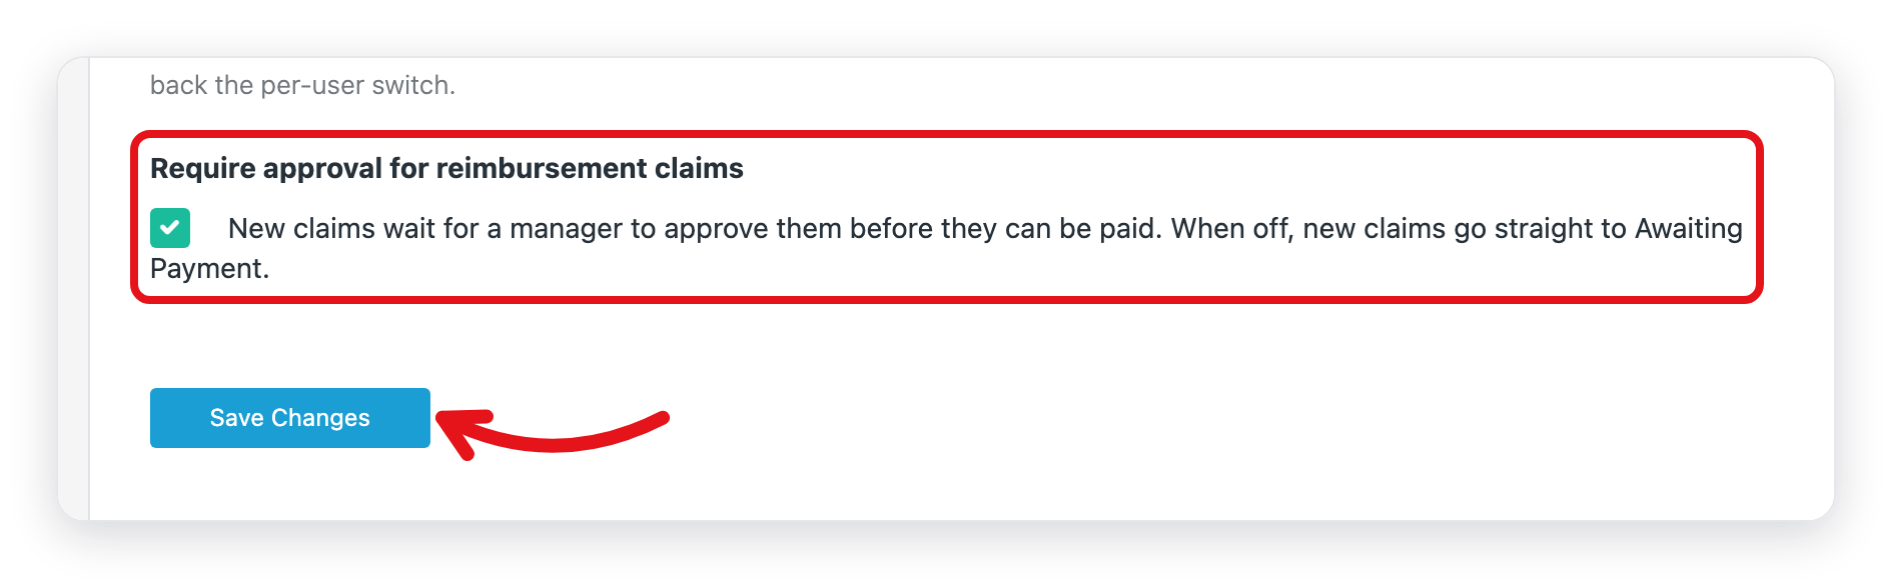
When this setting is off, new claims go directly to Awaiting Payment.
Step 2: Send a claim (employee)
- Log in as the employee.
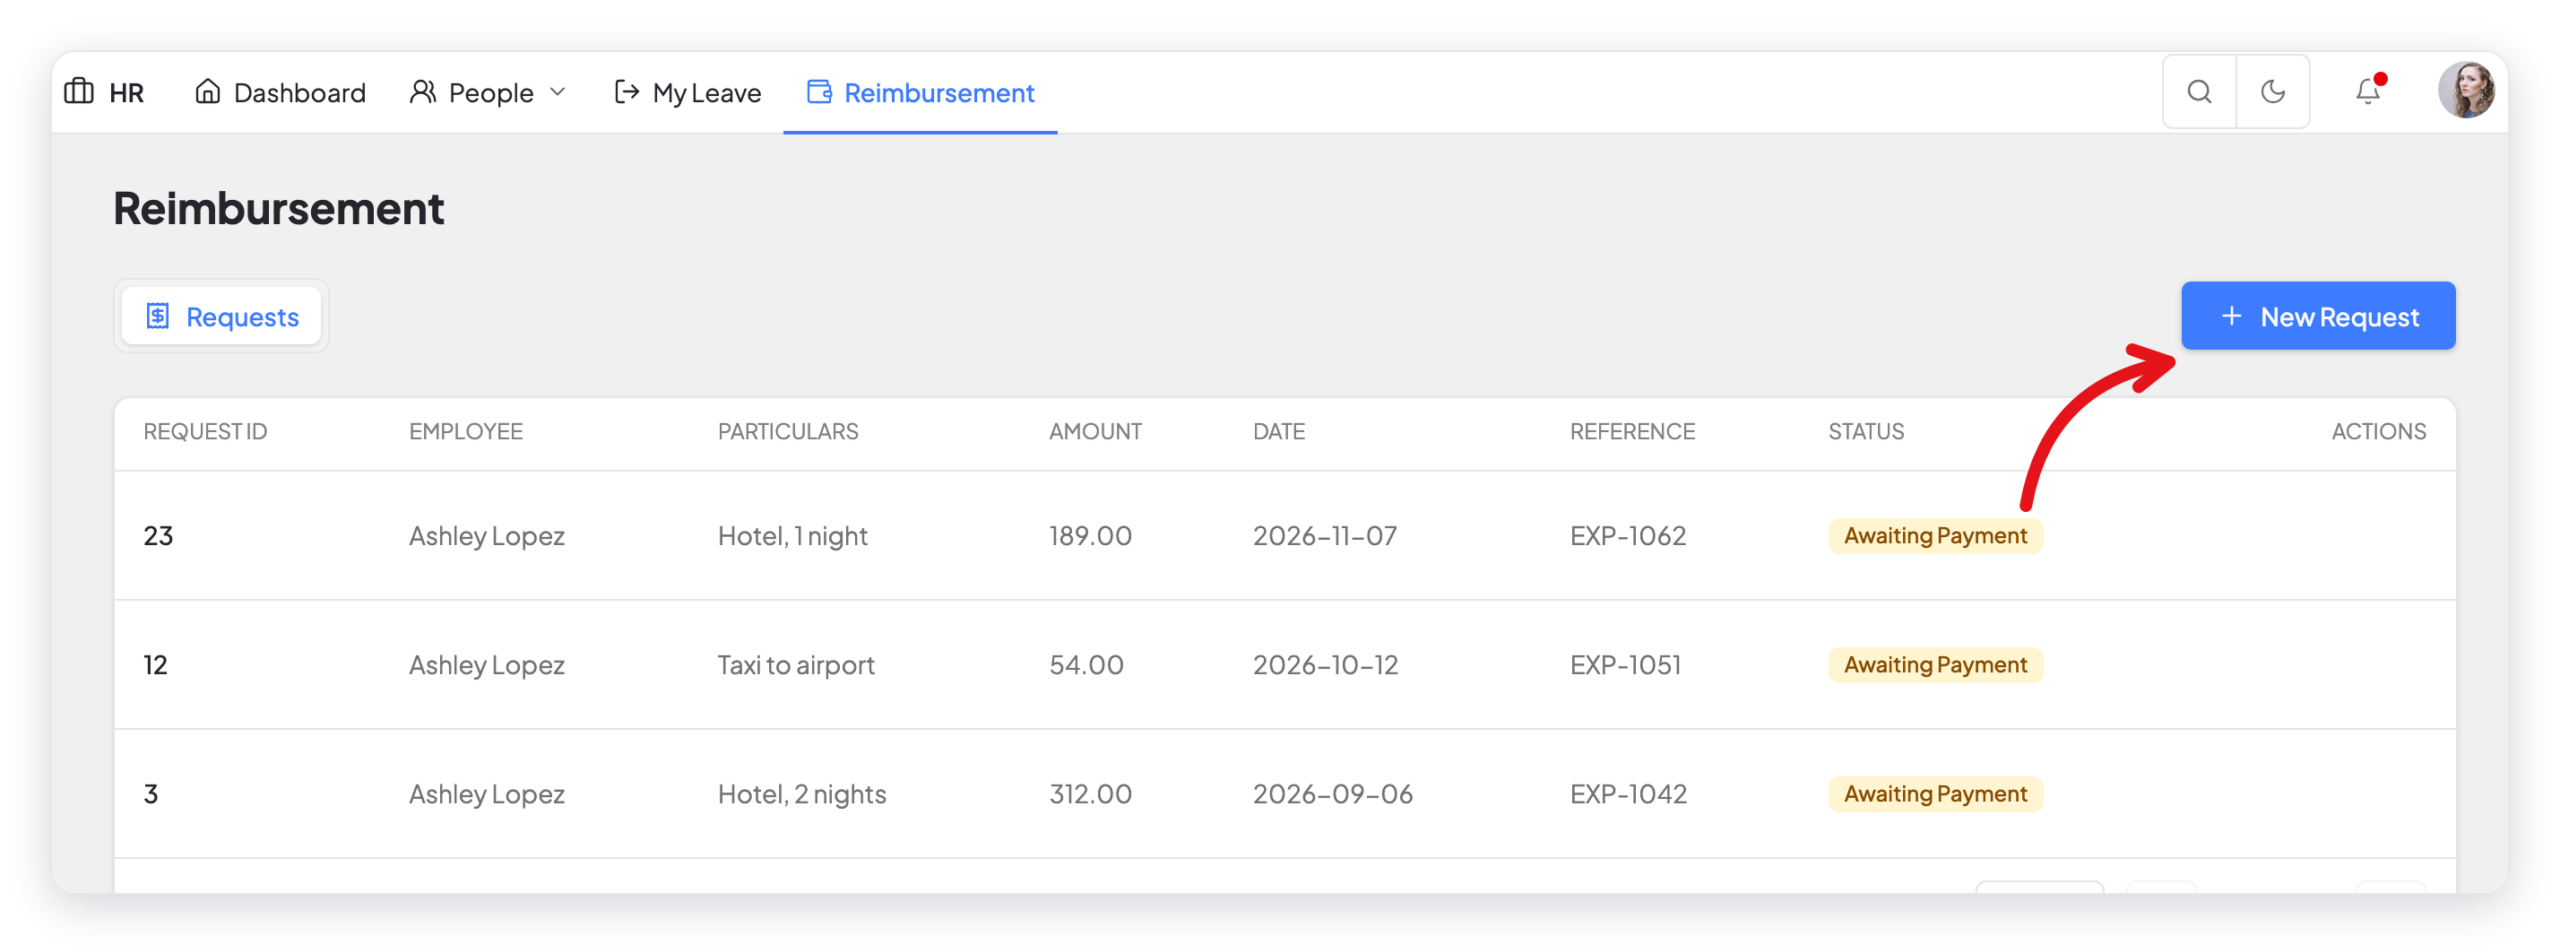
- In the top menu, click Reimbursement.
- Click New Request.
- Select the Date of the expense.
- Type a Reference if you have one, for example the receipt number.
- Under Line Items, type what you paid for and the amount.
- To add one more expense, click Add Line.
- Upload the receipts in Attachments. You can upload JPG, PNG, GIF, WEBP, PDF, DOC, or DOCX files, each up to 5 MB.
- Click Submit.
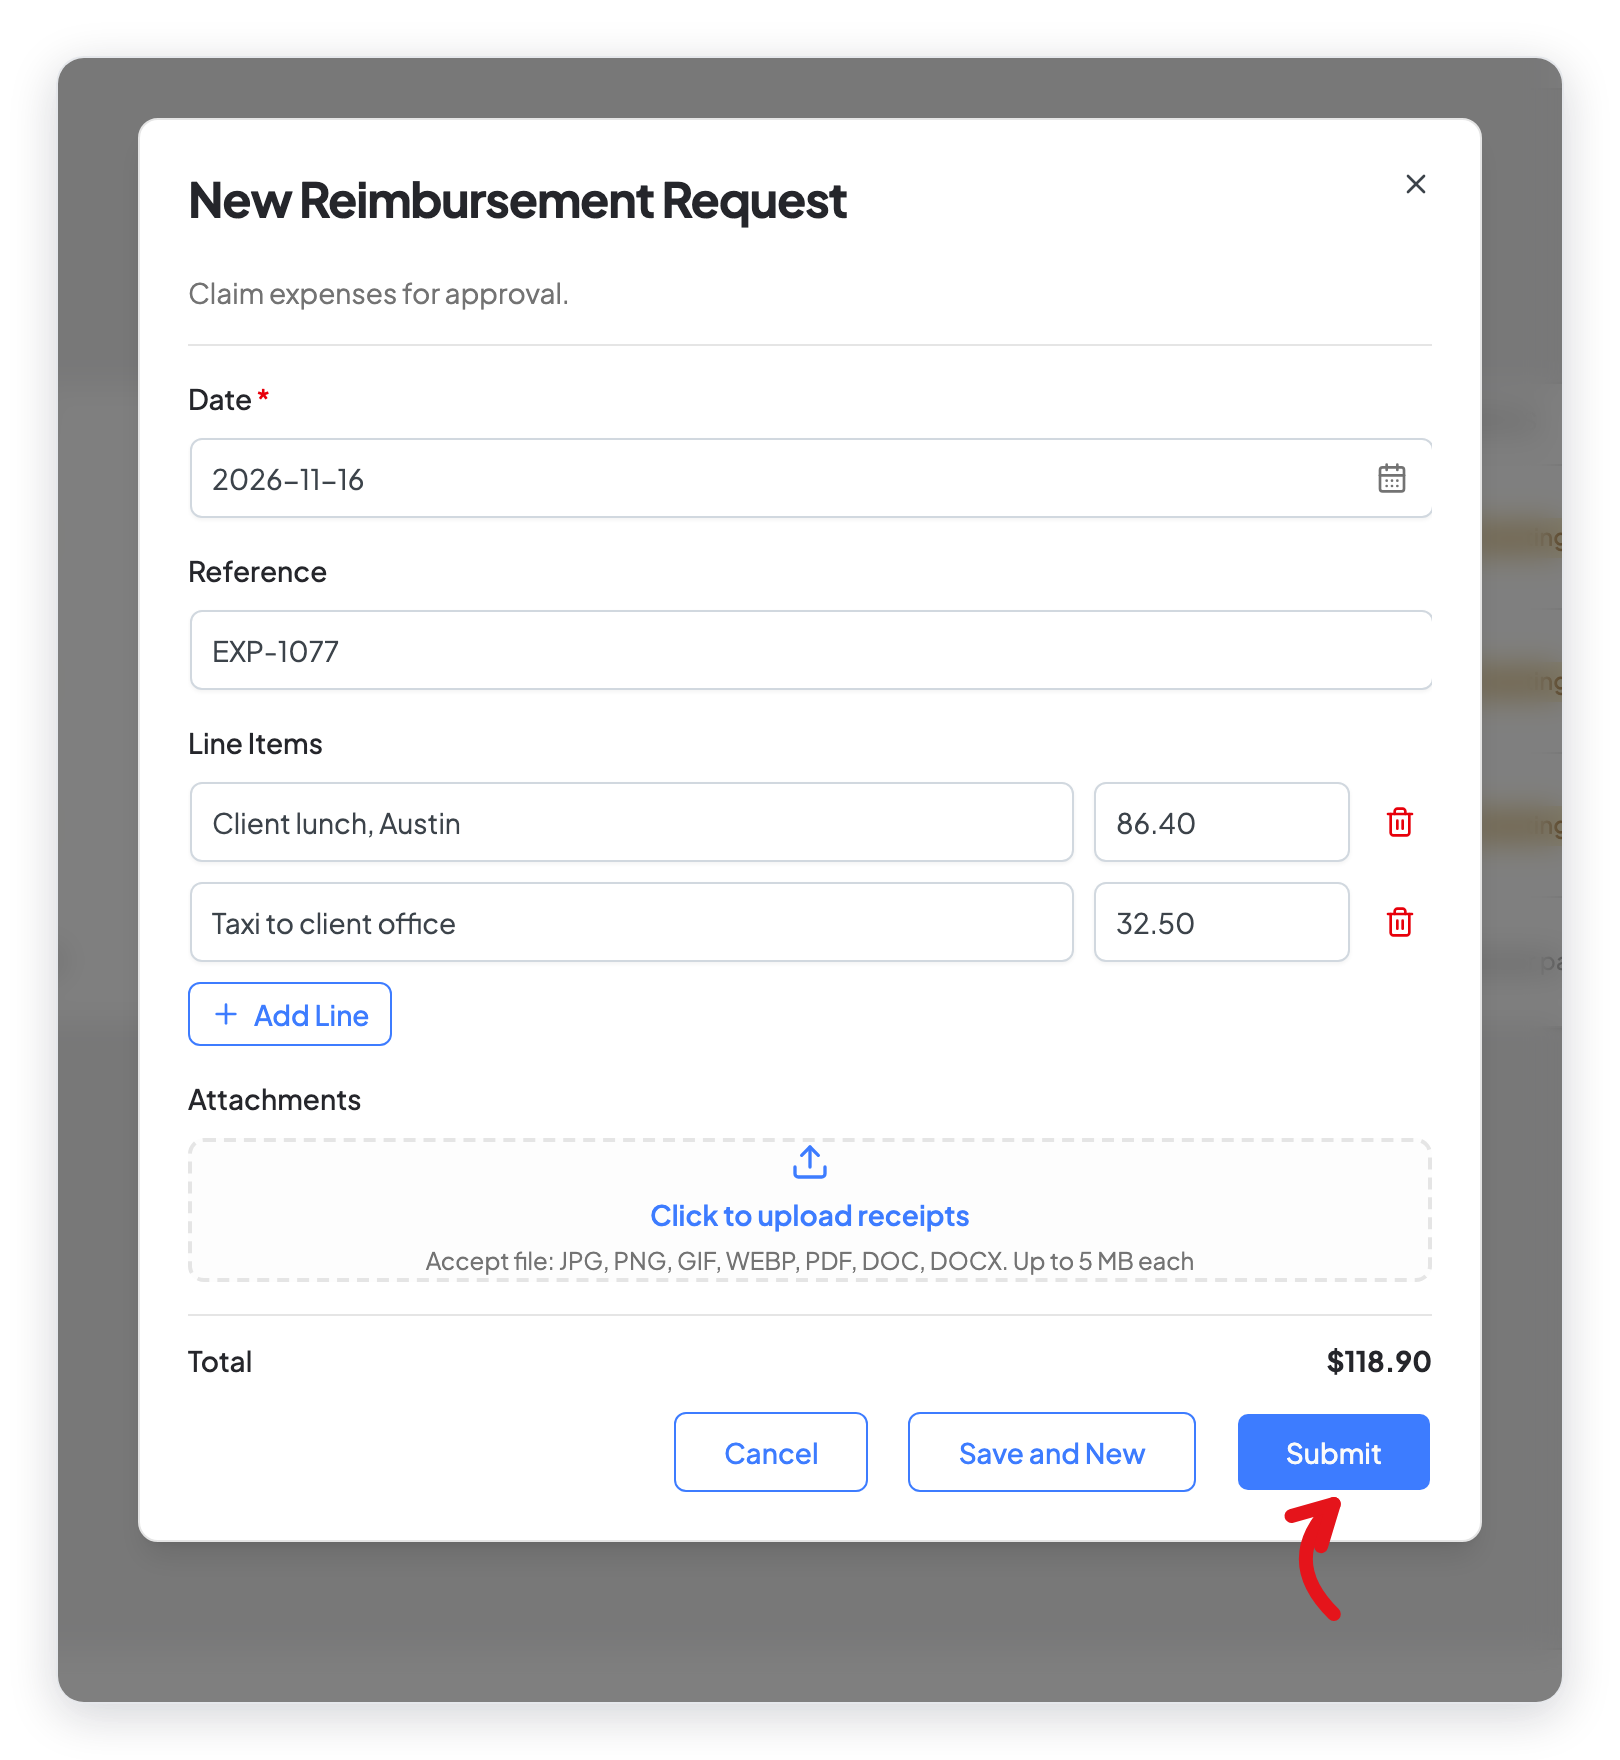
Save and New saves the claim and opens an empty form for the next claim.
Step 3: Approve the claim (HR manager)
- Go to WP ERP → HR → Reimbursement.
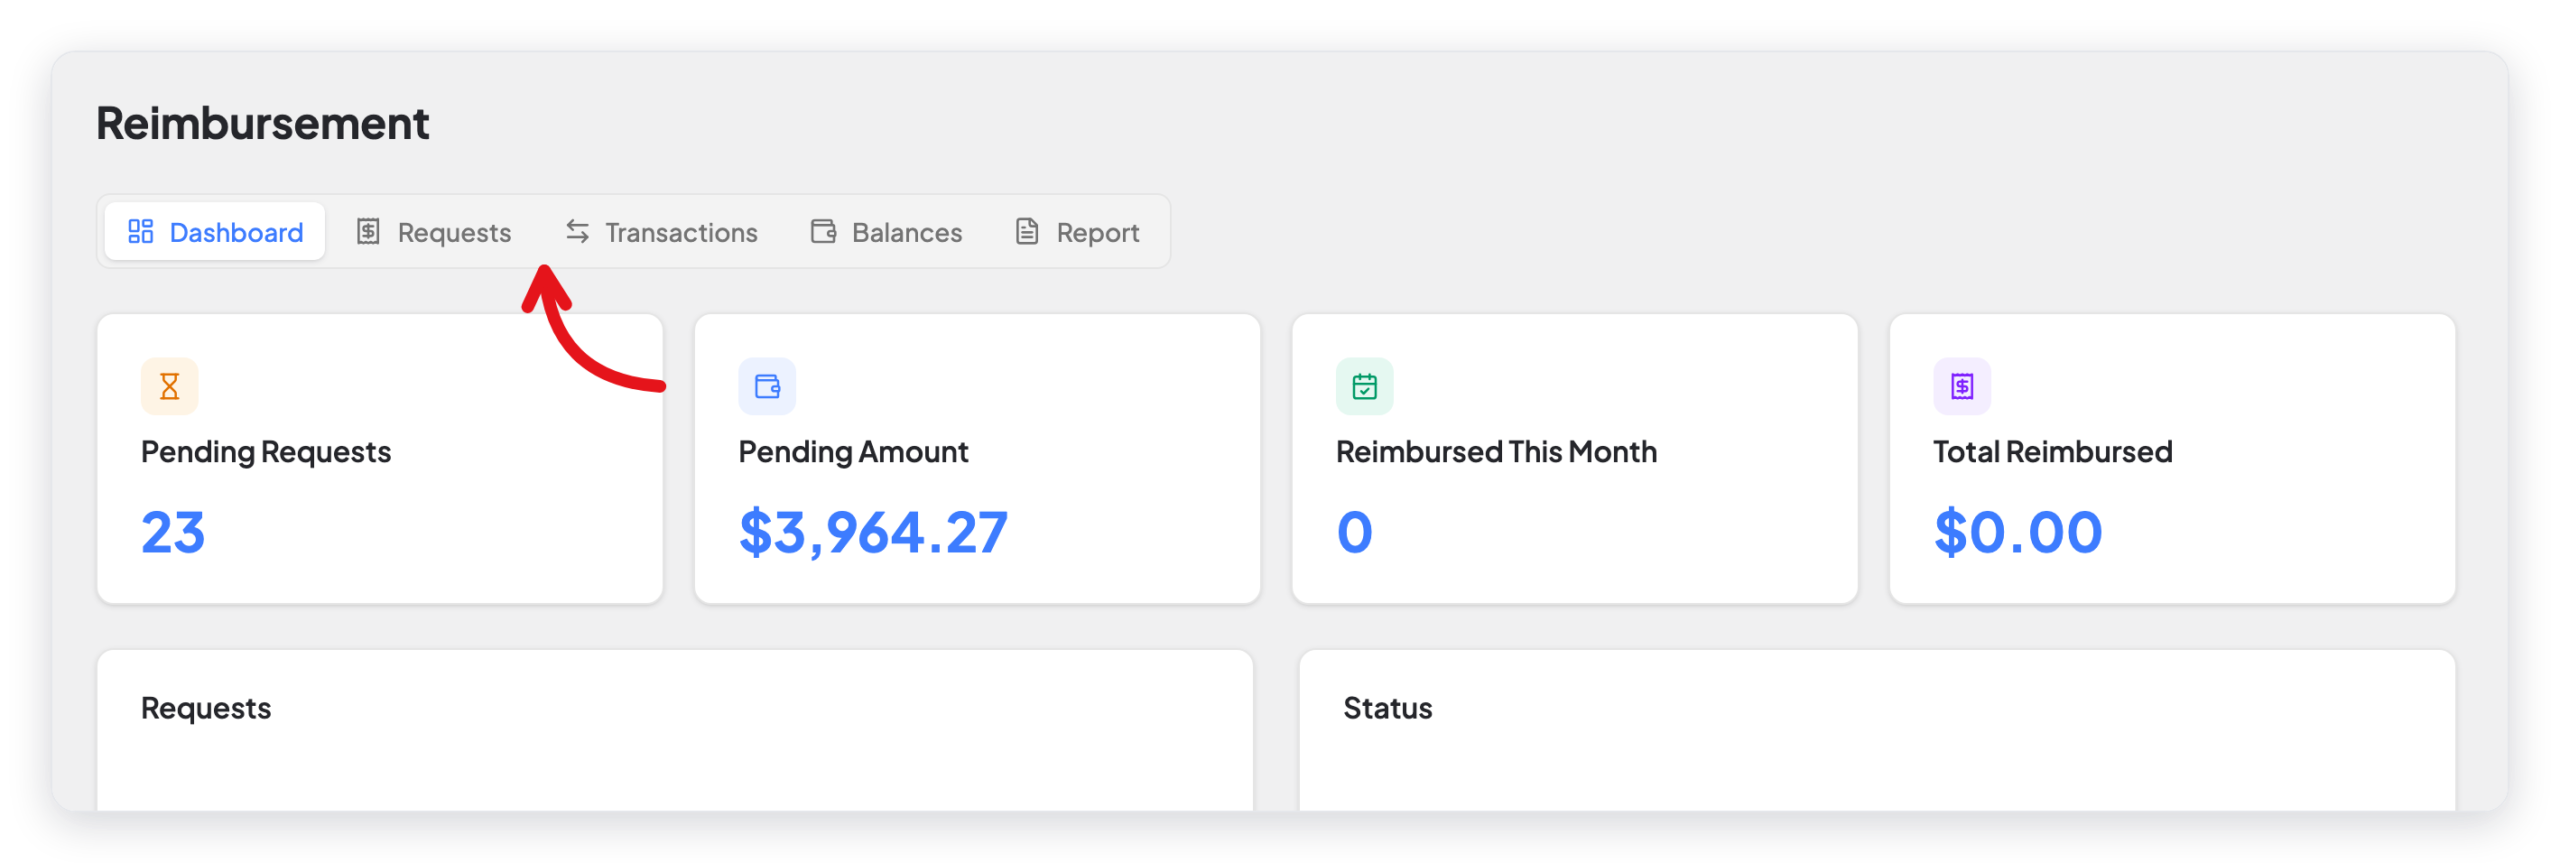
- Click the Requests tab.
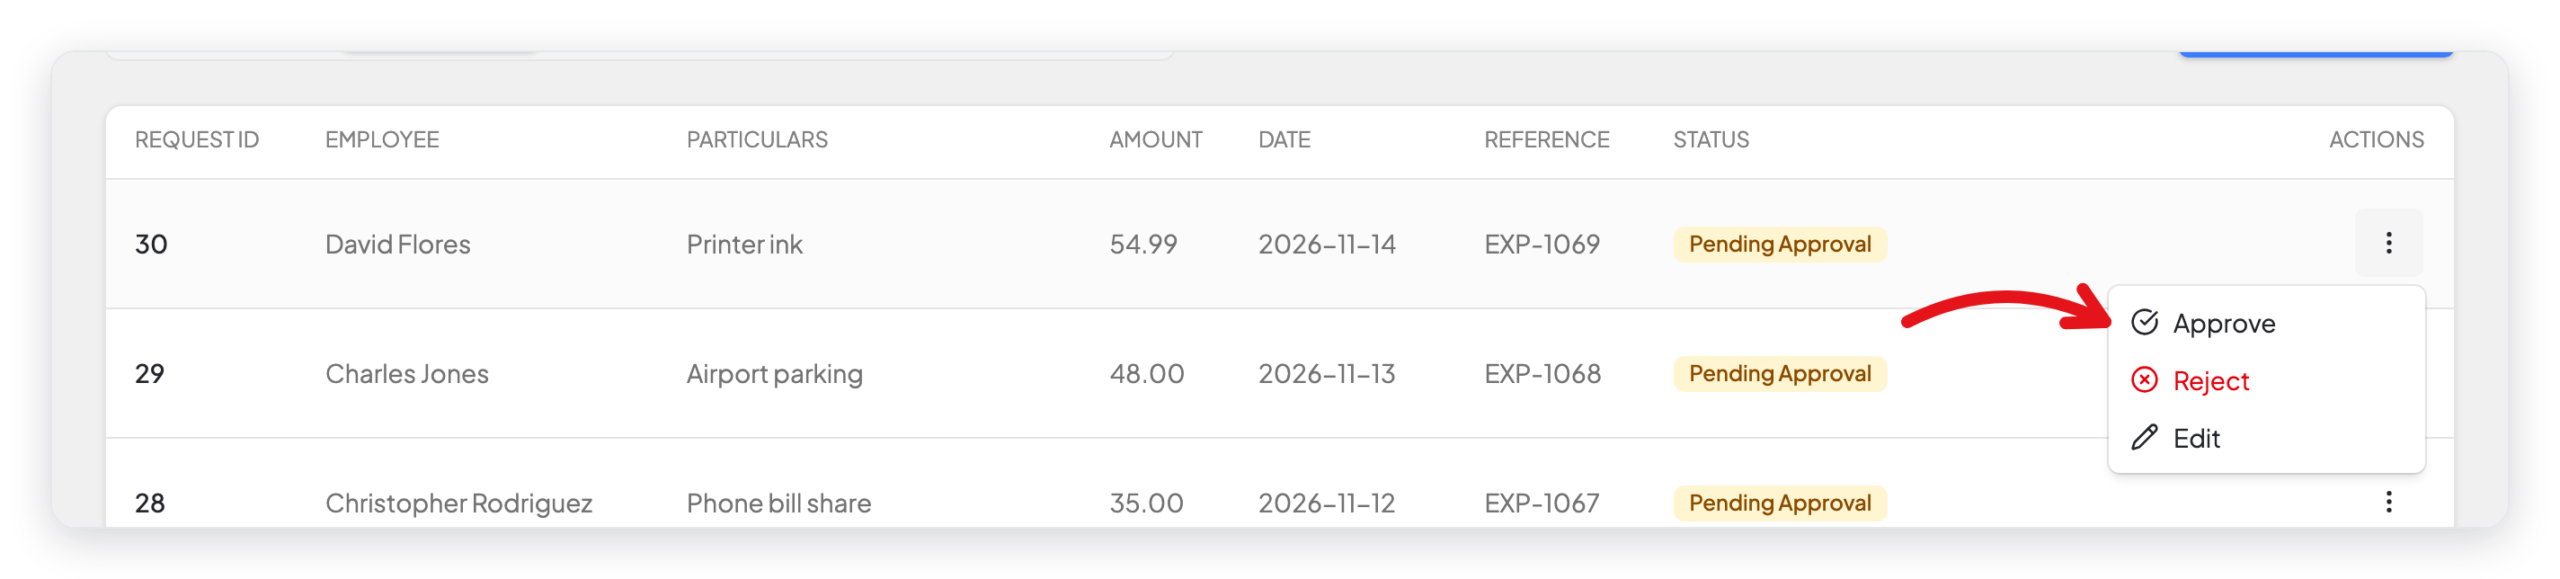
- Find a claim with the status Pending Approval.
- Click the ⋮ button, then click Approve.
- Click Approve again to confirm.
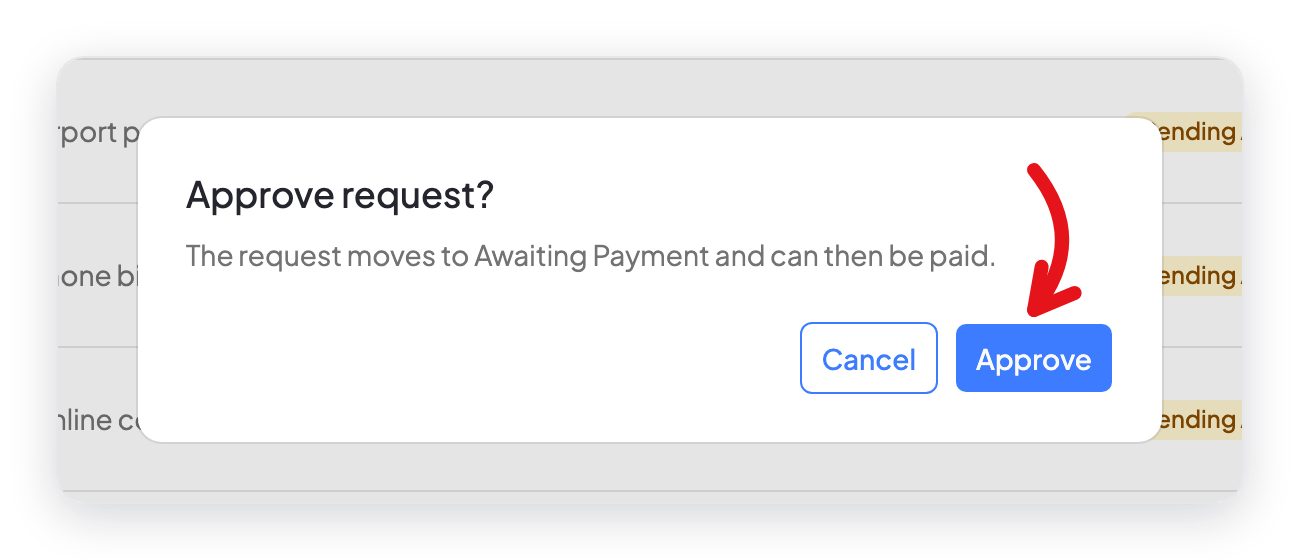
The claim moves to Awaiting Payment. To refuse the claim, click Reject and type the reason. The employee sees the reason in the list.
Step 4: Record the payment
- Find a claim with the status Awaiting Payment.
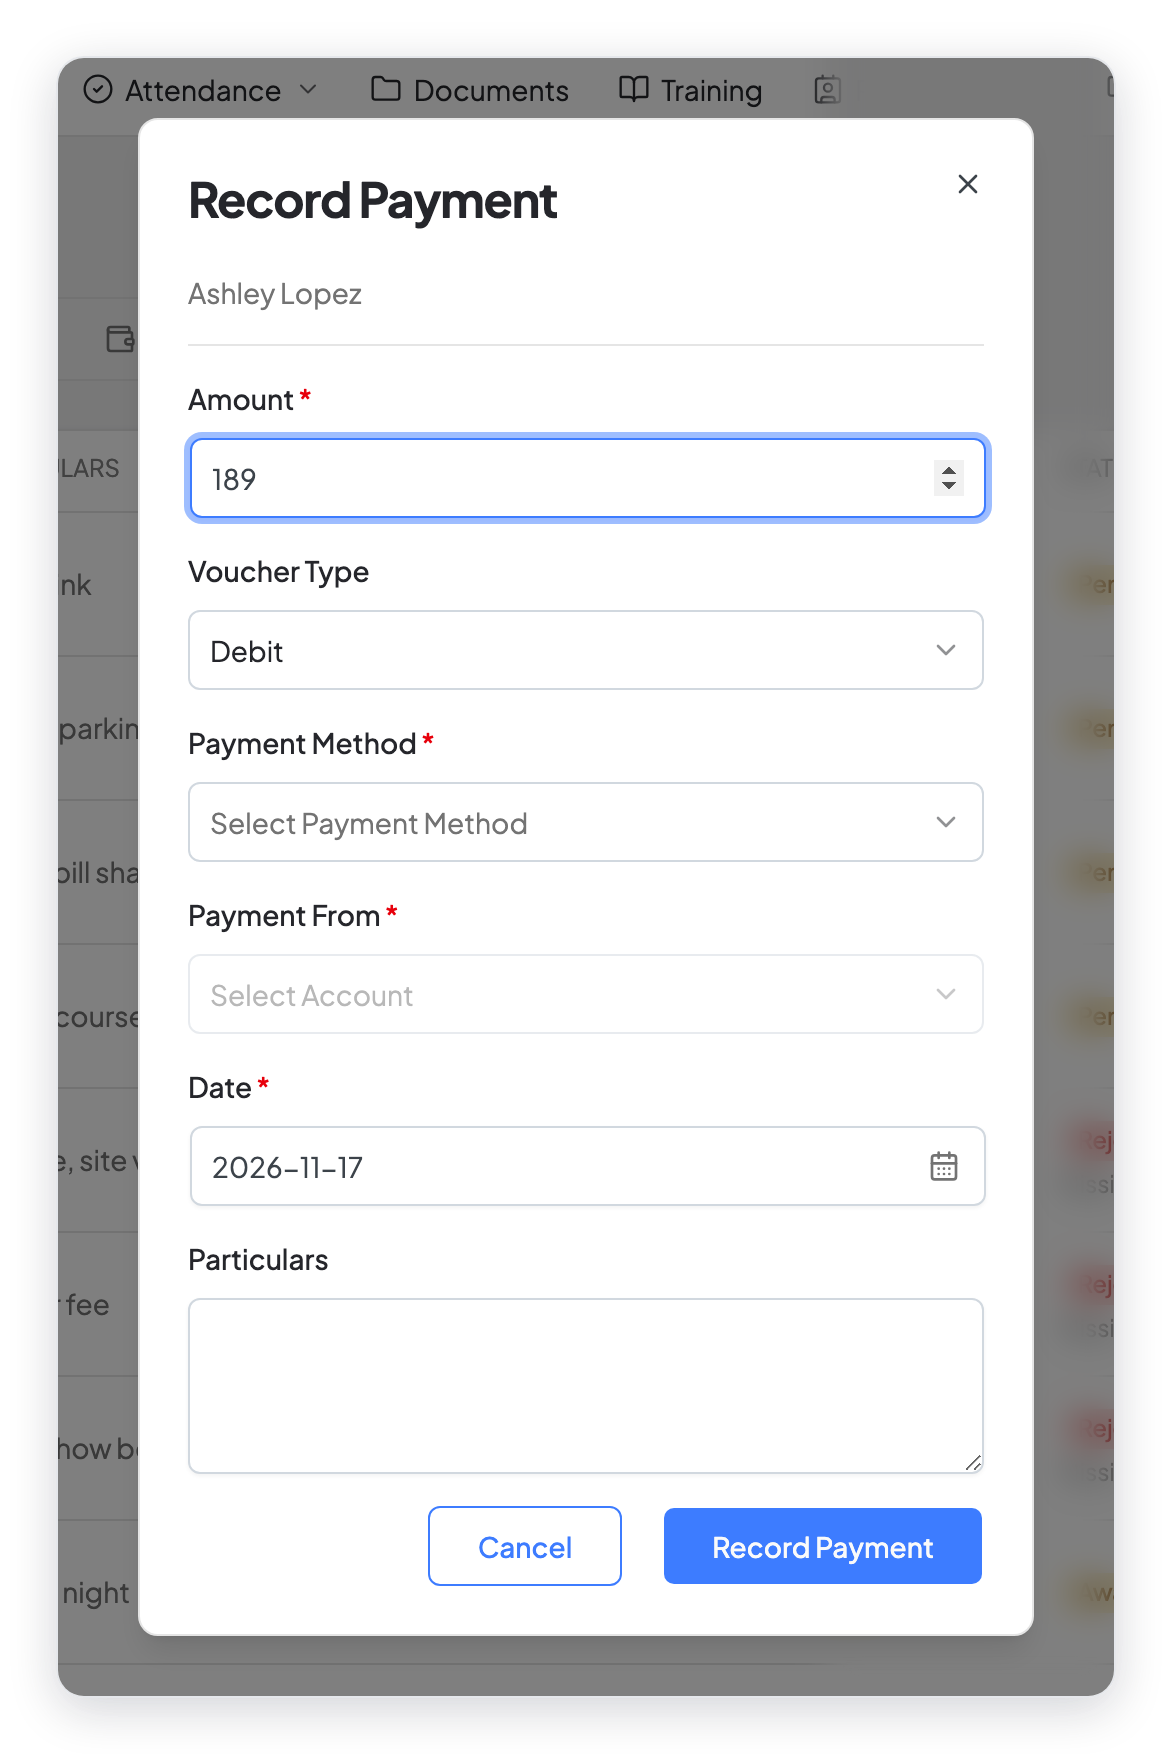
- Click the ⋮ button, then click Pay.
- Check the Amount.
- Select the Payment Method and the account in Payment From.
- Select the Date and click Record Payment.
Result
The paid claim shows on the Transactions tab. The Dashboard tab shows the number of claims that wait for action and the total amount.
The tabs
| Tab | What it shows |
|---|---|
| Dashboard | Pending claims, the pending amount, and the amounts paid this month and in total. |
| Requests | All claims and their status. Use New Request to add a claim for an employee. |
| Transactions | The approved claims and the payments made for them. |
| Balances | The employees who must still get money, with a button to pay them. |
| Report | The history of one employee for a date range. You can print it. |
The statuses
| Status | What it means |
|---|---|
| Pending Approval | The claim waits for a manager. |
| Awaiting Payment | The claim is approved, or approval is off. It waits for payment. |
| Rejected | A manager refused the claim. |
What changed in 2.0
- Reimbursement now has its own page with five tabs: Dashboard, Requests, Transactions, Balances, and Report.
- The old New Receipt form is now New Request, with line items, receipts, and Save and New.
- Approval is now optional. Turn it on with Require approval for reimbursement claims on Settings → HR → Miscellaneous.
- Pay opens a Record Payment window. You do not go to the Accounting voucher screen any more.
- The old Send Mail step from the voucher page is not part of this flow now.