

Set Up FlyHR App (Custom Order)
If you are here this means you ordered the FlyHR app from https://wperp.com/flyhr/
The app included with the Scale plan uses the standard ERP branding; a custom-branded build is its own purchase.
You can now customize the FlyHR mobile app to carry your own name, logo, and colors?
This guide covers placing the order, submitting your brand details, and setting up the app once it is built.
Before you start
Make sure your site has:
- ERP Free active
- ERP Pro active
Step 1 — Place your order
Order the custom-branded app here:
After purchase it looks like this, credentials (license and zips to download) are always available in My Account)
Step 2 — Submit the App Build Request form
After ordering, open your wperp.com account and fill in the App Build Request form. We use these details to build your app, so enter them carefully:
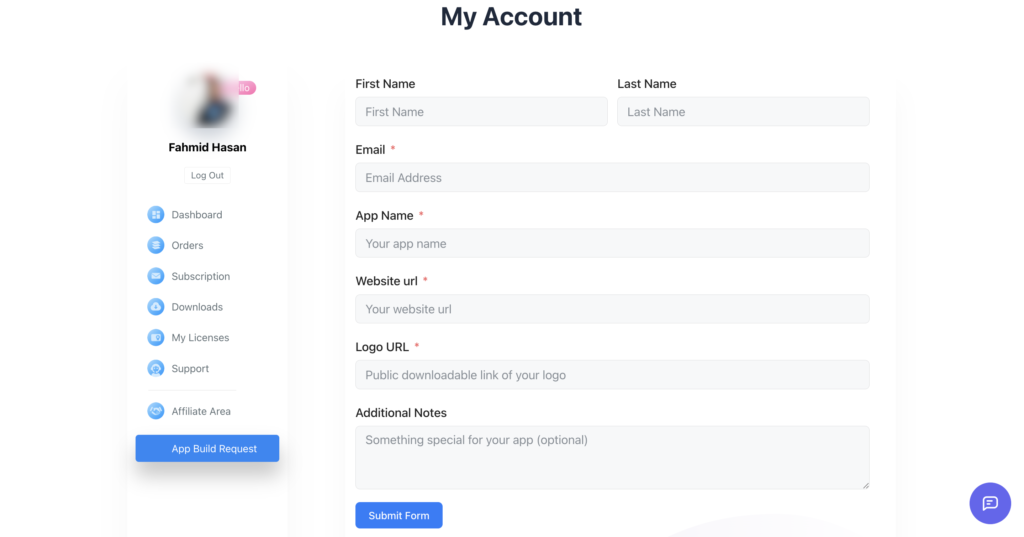
- App name — the name shown on the app and in the store listing
- Website URL — the site the app connects to
- Logo URL — a link to your logo file
- Additional Notes — the colors you want the app to use, or any little things you want to customize that doesnt require separate charge for development.
Submitting the form opens a support request on our side, and our team starts building your app.
Step 3 — Get your app license
When your FlyHR app order is processed, your app license key is already generated under My Account → My Licenses.
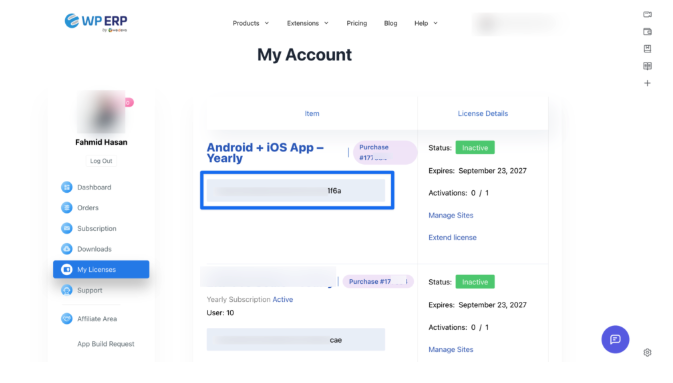
You will use this key in Step 5.
Step 4 — Install App Bridge
Download the App Bridge plugin from your account, also added in My Account > Downloads when the order was processed.
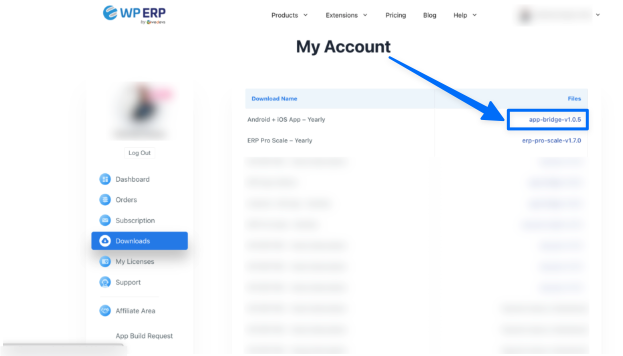
- In your WordPress admin, go to Plugins → Add New → Upload Plugin.
- Upload the App Bridge file, install, and activate it.
- Open App Bridge and select ERP as your plugin.
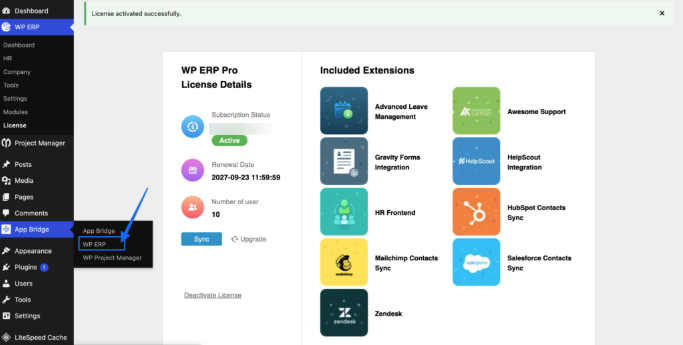
Step 5 — Activate your app license
- In App Bridge, go to App Plan and choose the Plan (for app, not plugin) from dropdown.

- Then go to License menu.
- Paste your app license key (from My Account → My Licenses).
- Save to activate.
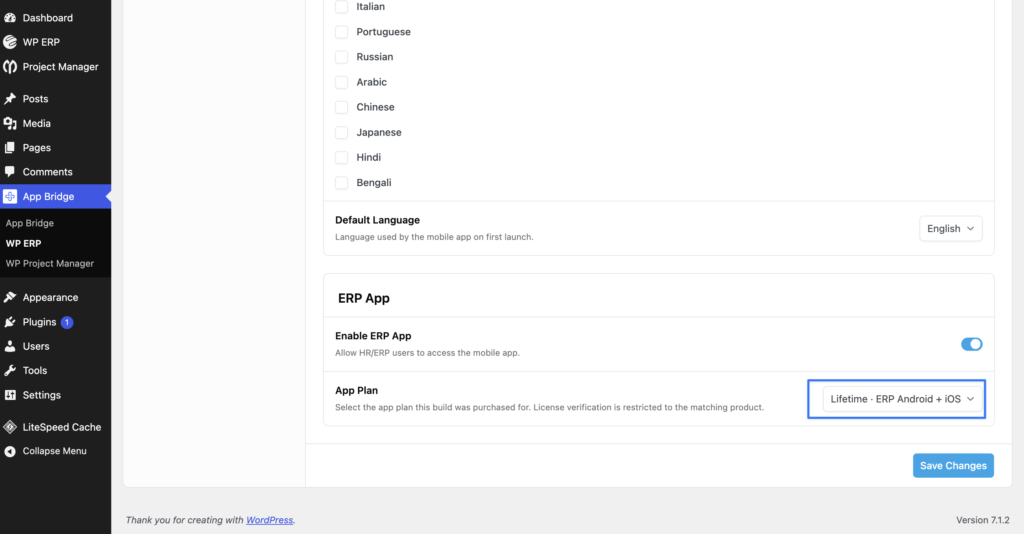
Step 6 — Download the app and sign in
Once your custom app is published (contact us for publication-related help), install it and your/your employees sign in with your WordPress account.
From your phone you can now check attendance, approve or reject leave, and run day-to-day HR — under your own branding.