
Self Check-in for Employees
Employees can check in and check out from their own HR dashboard. You turn this on one time in the attendance settings.
Before you start
- Each employee must have a WordPress login and an active employee profile.
- Each employee must be on a shift for today. See Shifts.
Step 1: Turn on self check-in
- Go to WP ERP → HR → Attendance → Settings.
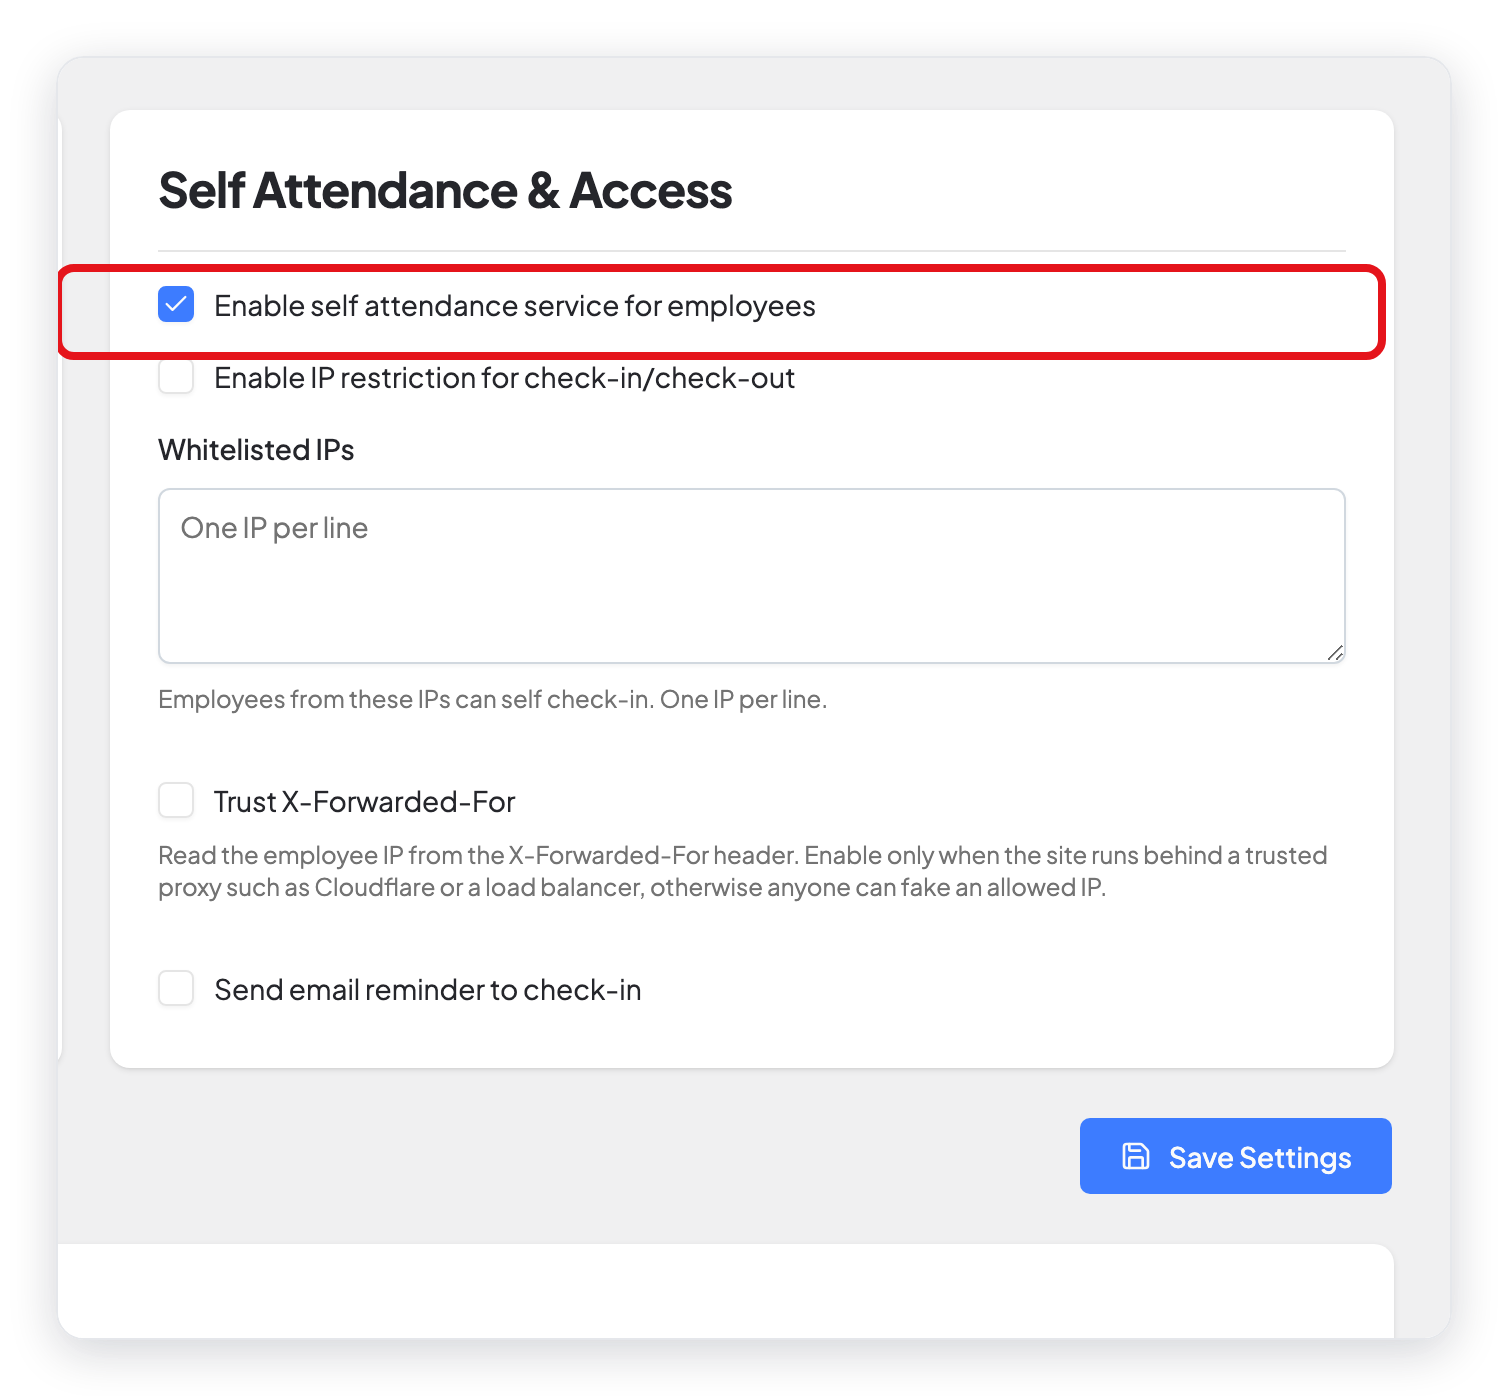
- Select Enable self attendance service for employees.
- If employees must check in only from the office network, select Enable IP restriction for check-in/check-out. Then type the IP addresses of your office in Whitelisted IPs, one on each line.
- Click Save Settings.
Step 2: Employees check in and check out
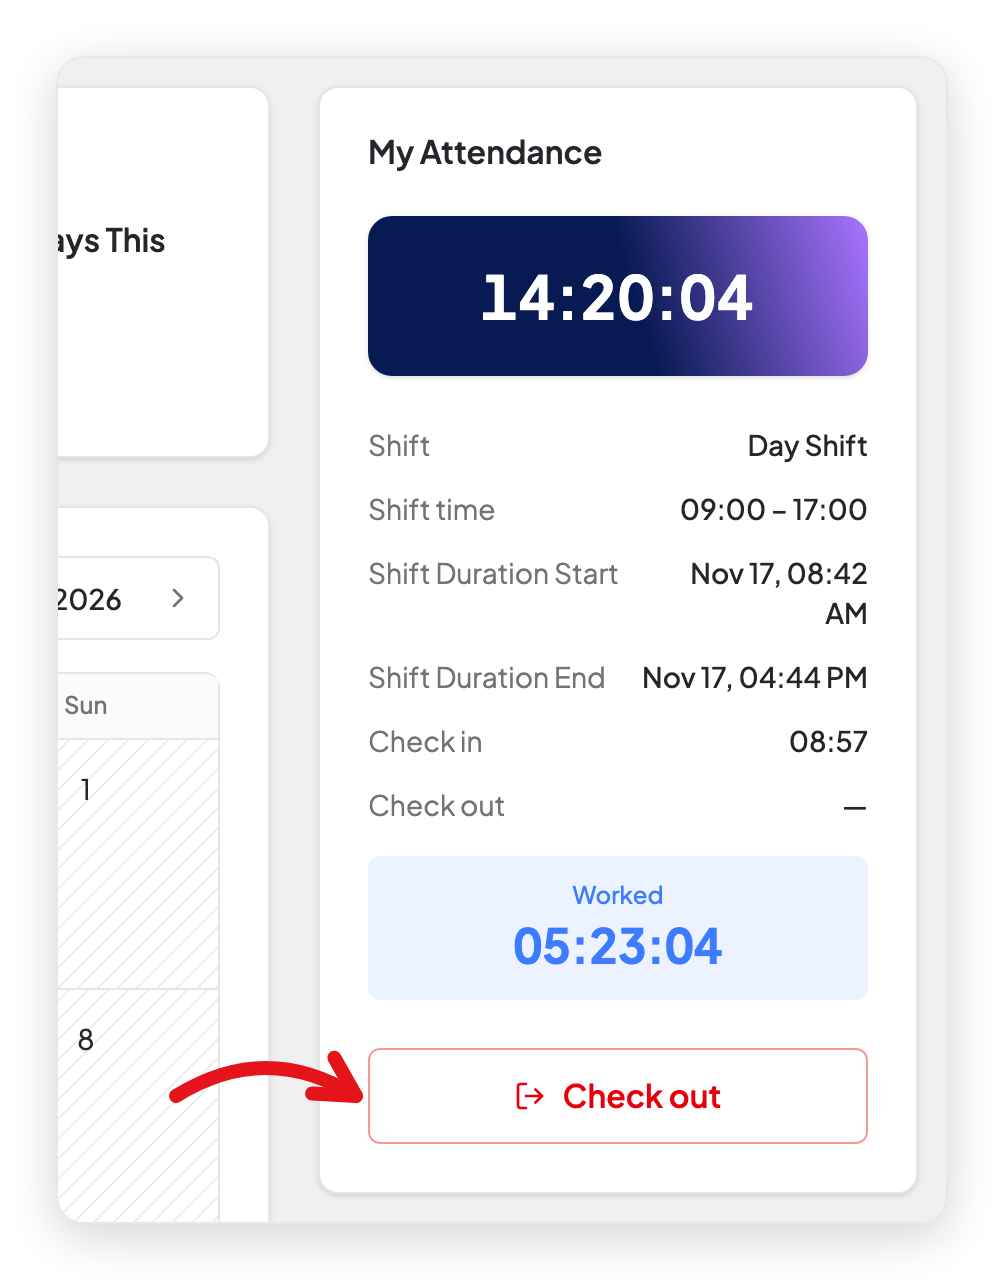
When an employee logs in and opens WP ERP → HR, the My Attendance box shows:
- the current time,
- the name and the time of their shift,
- the check-in time and the check-out time,
- the time worked today.
The employee clicks Check in at the start of work and Check out at the end.
If the employee has no shift for today, the box shows "No shift is assigned to you for today." The employee must ask an HR manager to assign a shift.
If IP restriction is on and the employee is not on an allowed network, WP ERP does not accept the check-in.
See the attendance of one employee
HR managers and the employee can see the attendance on the employee profile:
- Open the profile of the employee.
- In the menu on the left side, click Attendance.
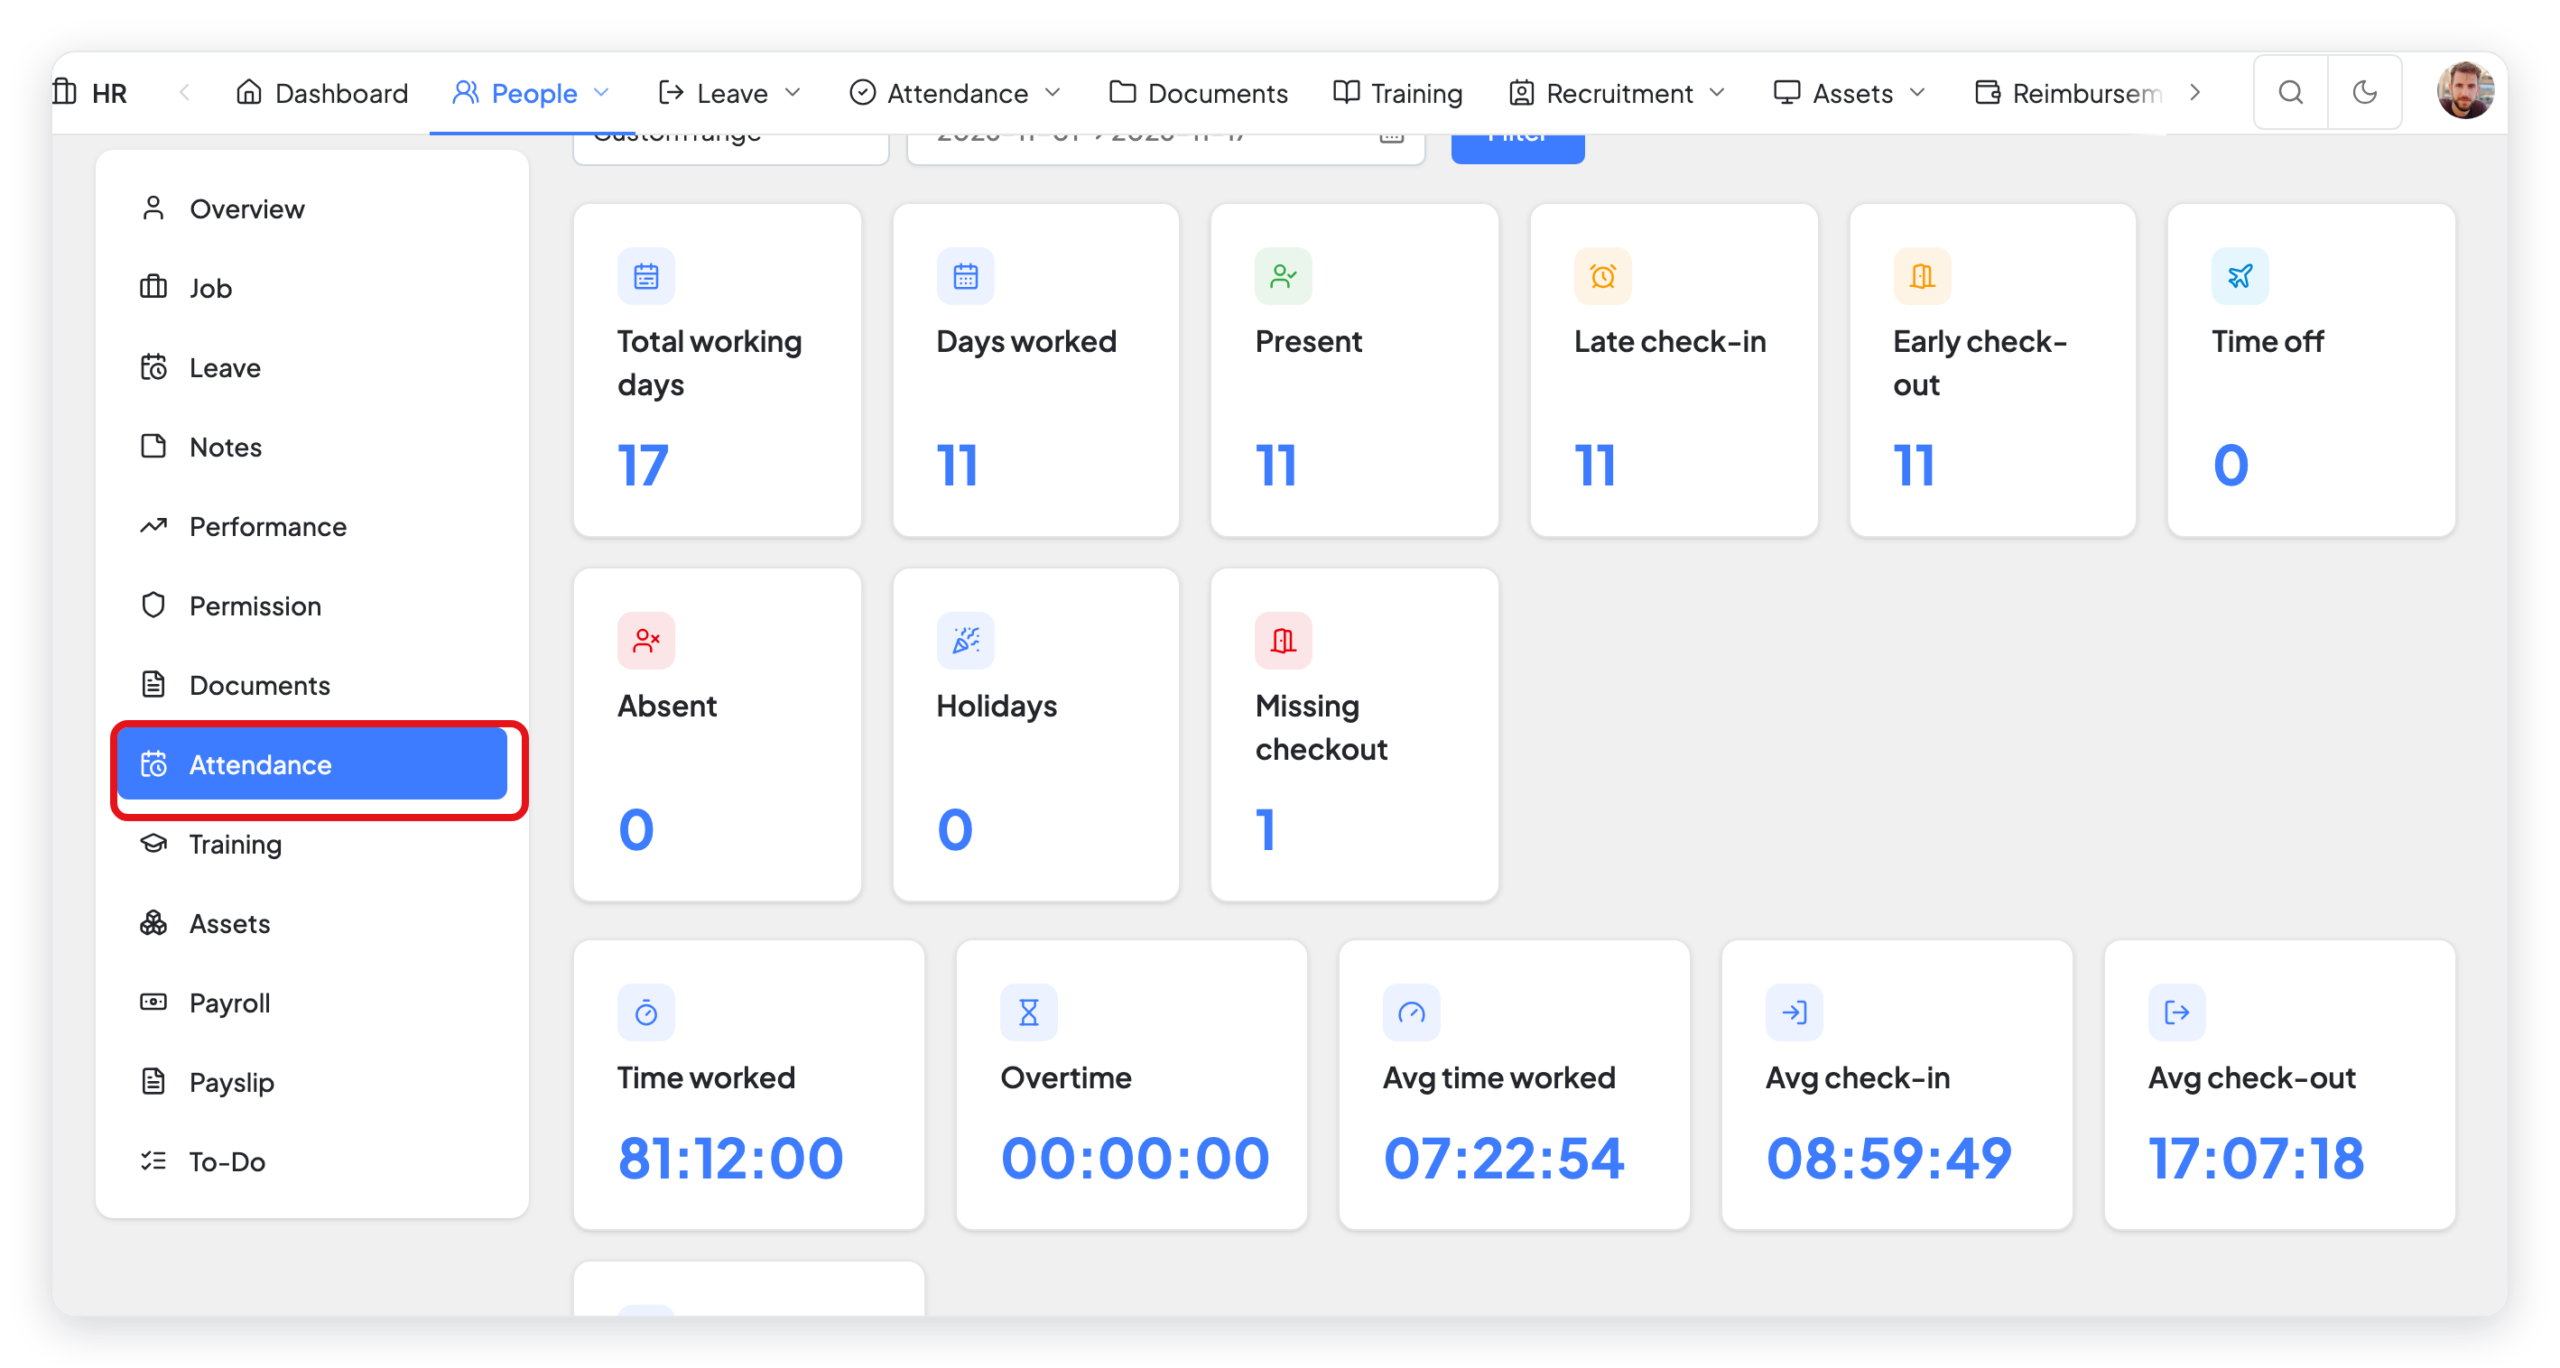
The tab shows the working days, the days worked, the late check-ins and early check-outs, the absent days, the time worked, and a daily list with each check-in and check-out.
What changed in 2.0
- The My Attendance box on the HR dashboard now shows the shift, the shift times, and the time worked.
- The Attendance tab on the employee profile now has summary cards, a chart of the daily work time, and a print button.
- The setting is on Attendance → Settings, under Self Attendance & Access.