
Job Openings
A job opening is a role that you hire for. When you publish a job opening, it shows on your website and candidates can apply.
Before you start
- You must be a WordPress administrator or an HR manager.
- Make your question sets first if you want screening questions on the application form.
- The department of the job must exist. You can add departments at People → Departments.
Step 1: Open the job openings list
- Go to WP ERP → HR → Recruitment → Job Openings.
- Click Add Job Opening.
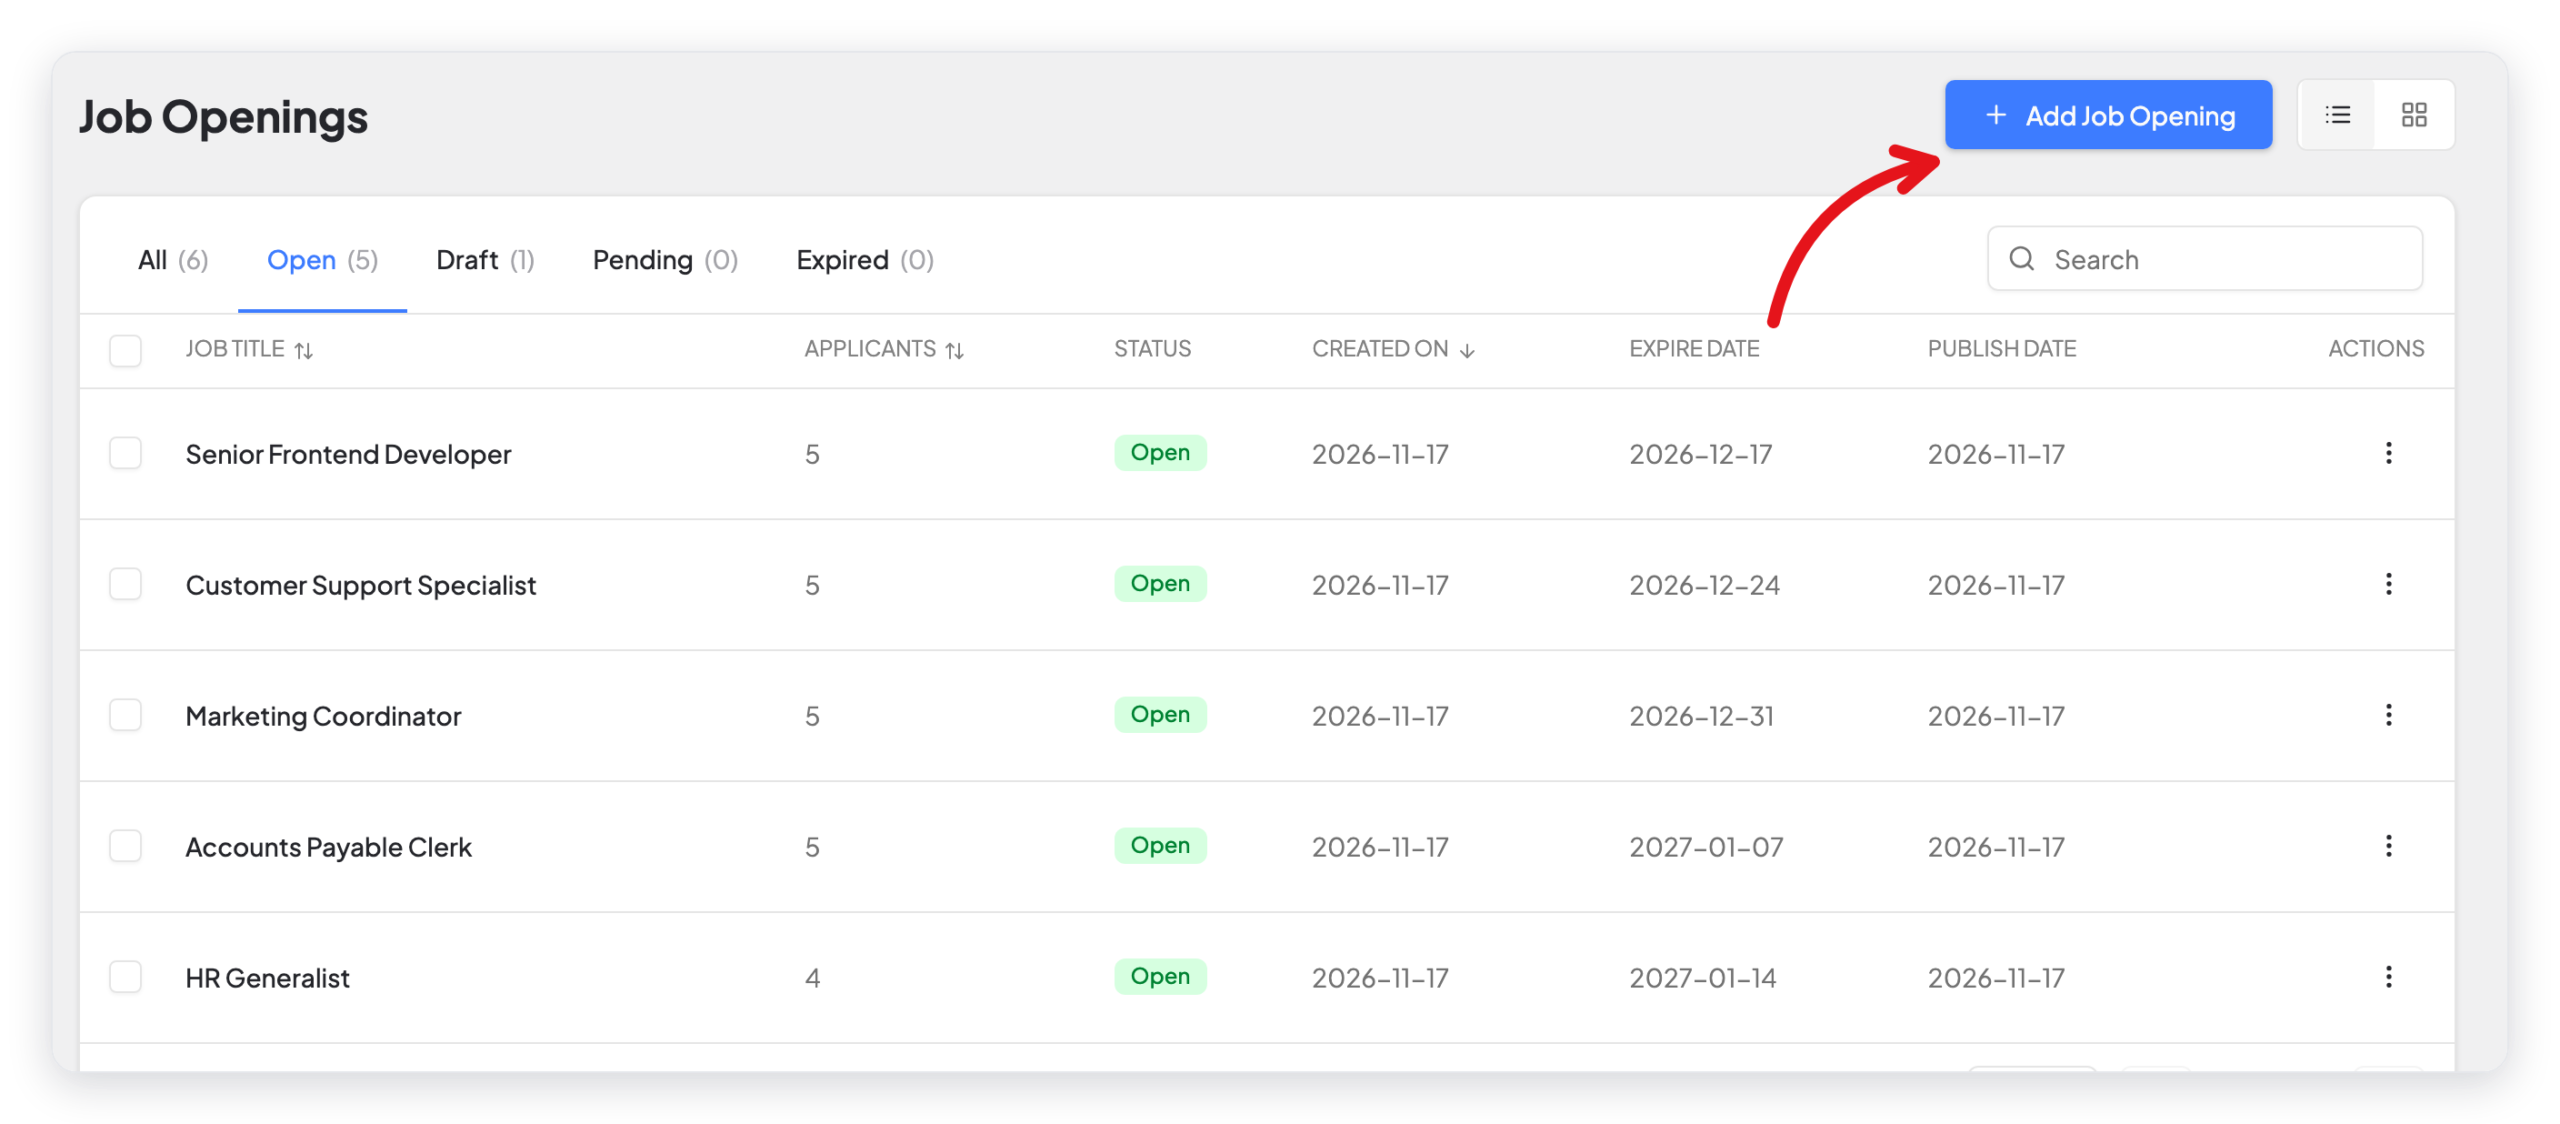
The list has tabs for All, Open, Draft, Pending, and Expired jobs. Use the buttons at the top right to change between the list view and the card view.
Step 2: Write the job description
The form has five steps. The steps show on the left side.
- Type the Position Title, for example Product Designer.
- Write the job description in Opening Descriptions. You can use headings, lists, links, and images.
- Click Next.
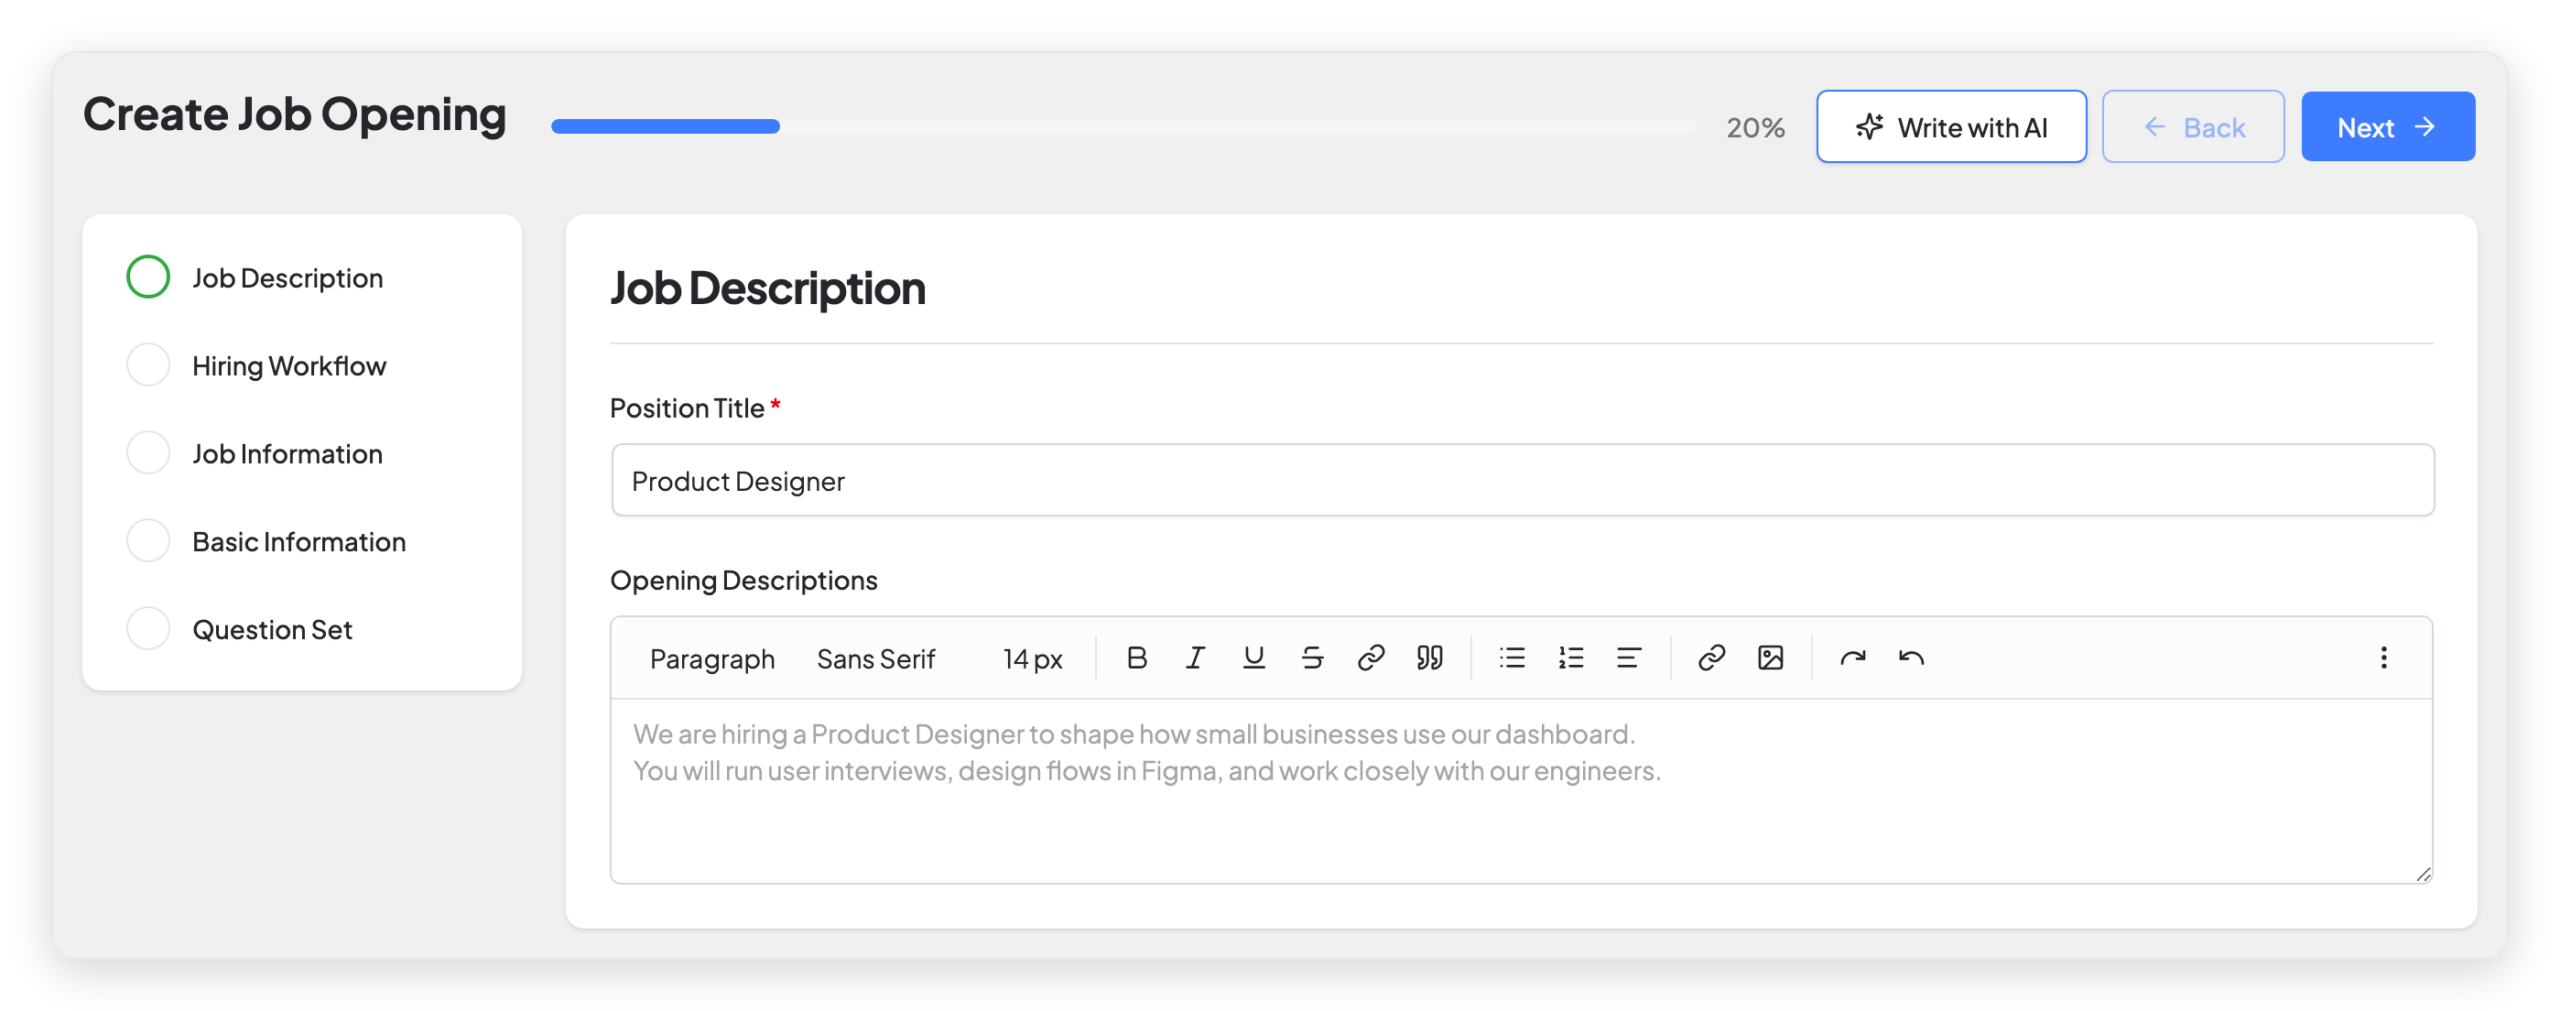
If you want help to write the description, click Write with AI. For more information, read AI Job Description Writer.
Step 3: Choose the hiring stages
The stages are the steps that each candidate goes through, for example Screening and Phone Interview.
- Turn on the switch of each stage that this job uses.
- To change the order, drag a stage, or use the up and down arrows.
- Click Next.
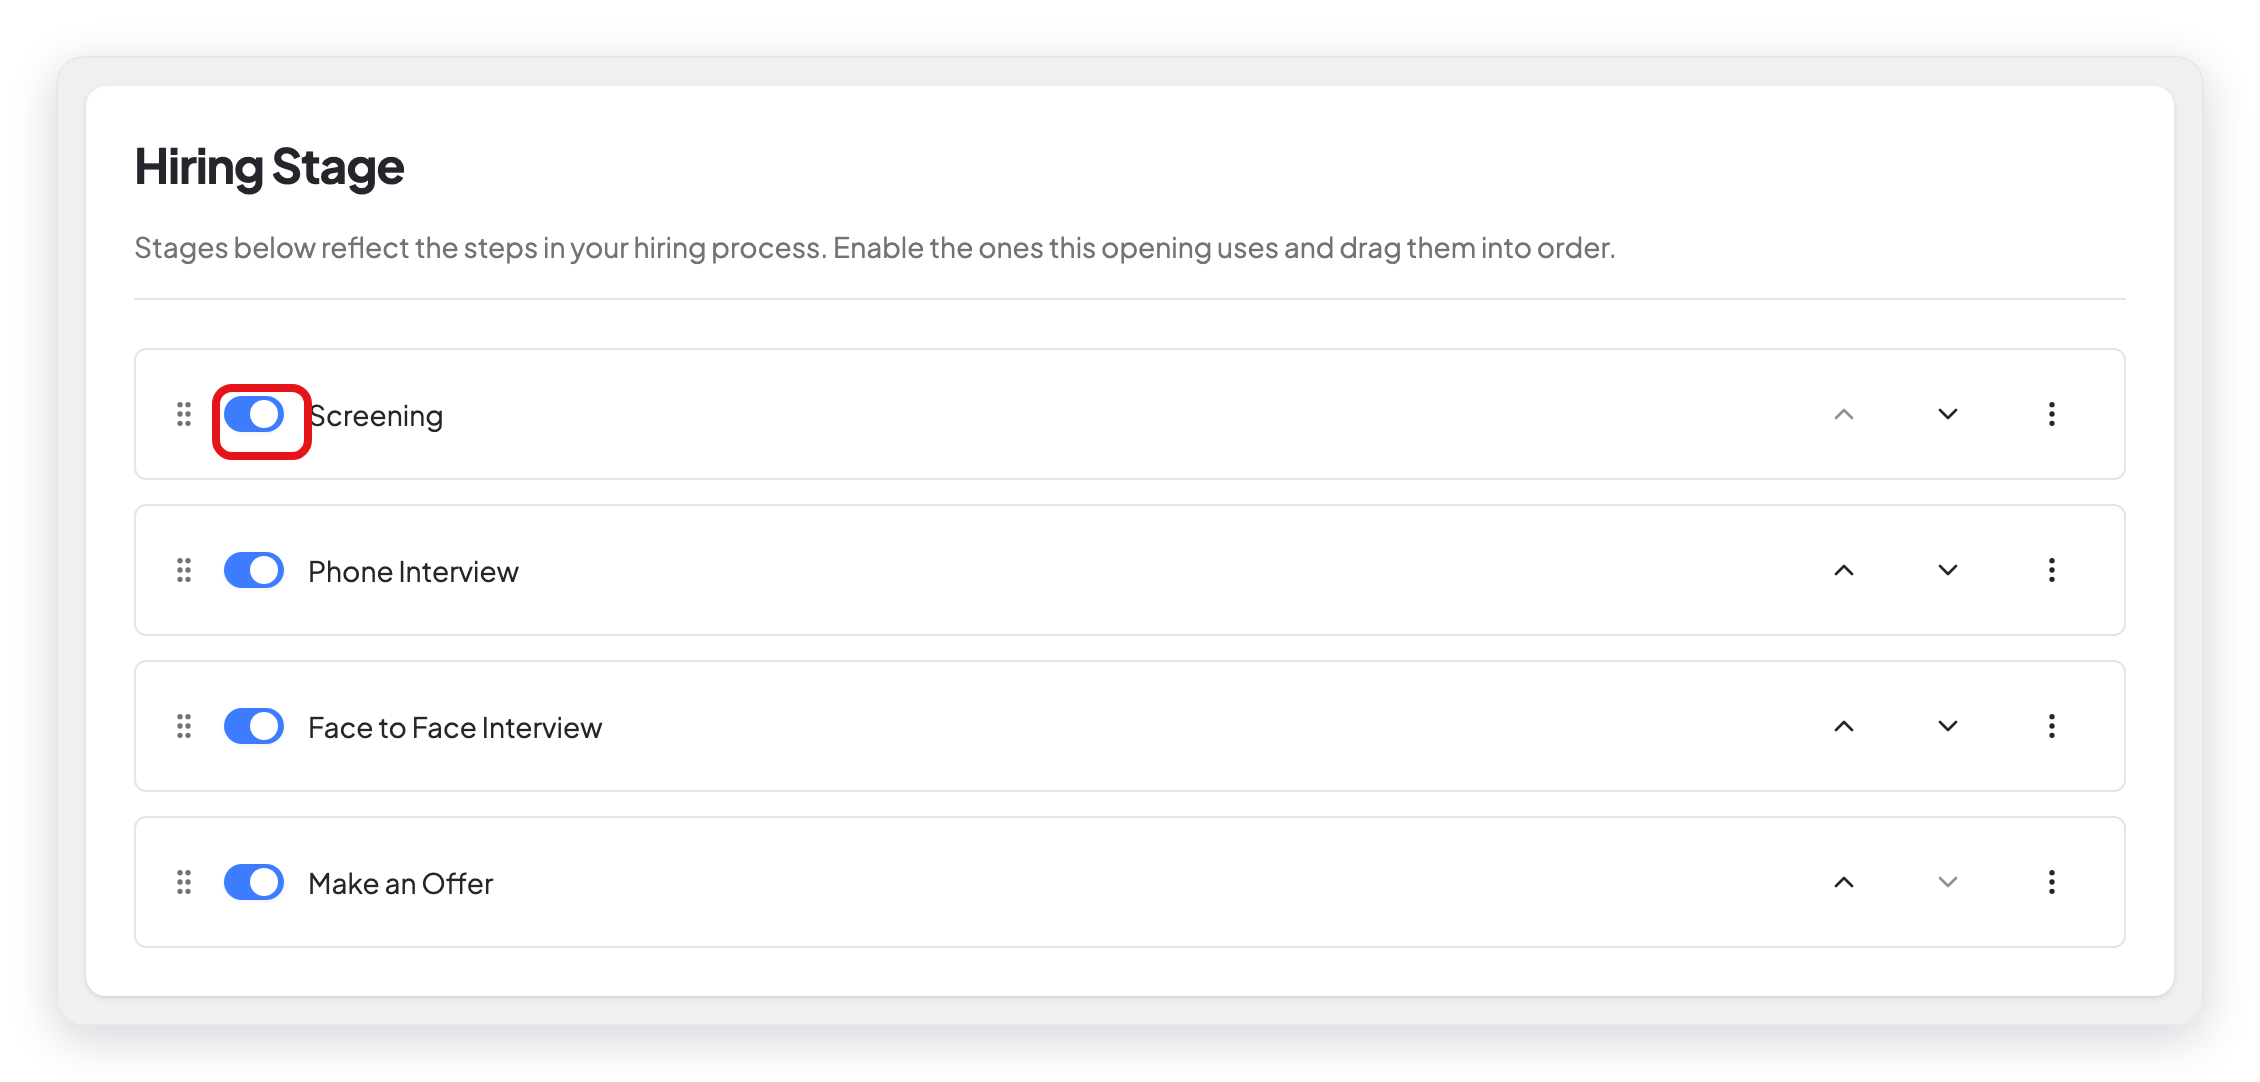
You must turn on at least one stage before you can publish the job. To add or rename stages, use the Stages page.
Step 4: Fill in the job information
This step has four parts.
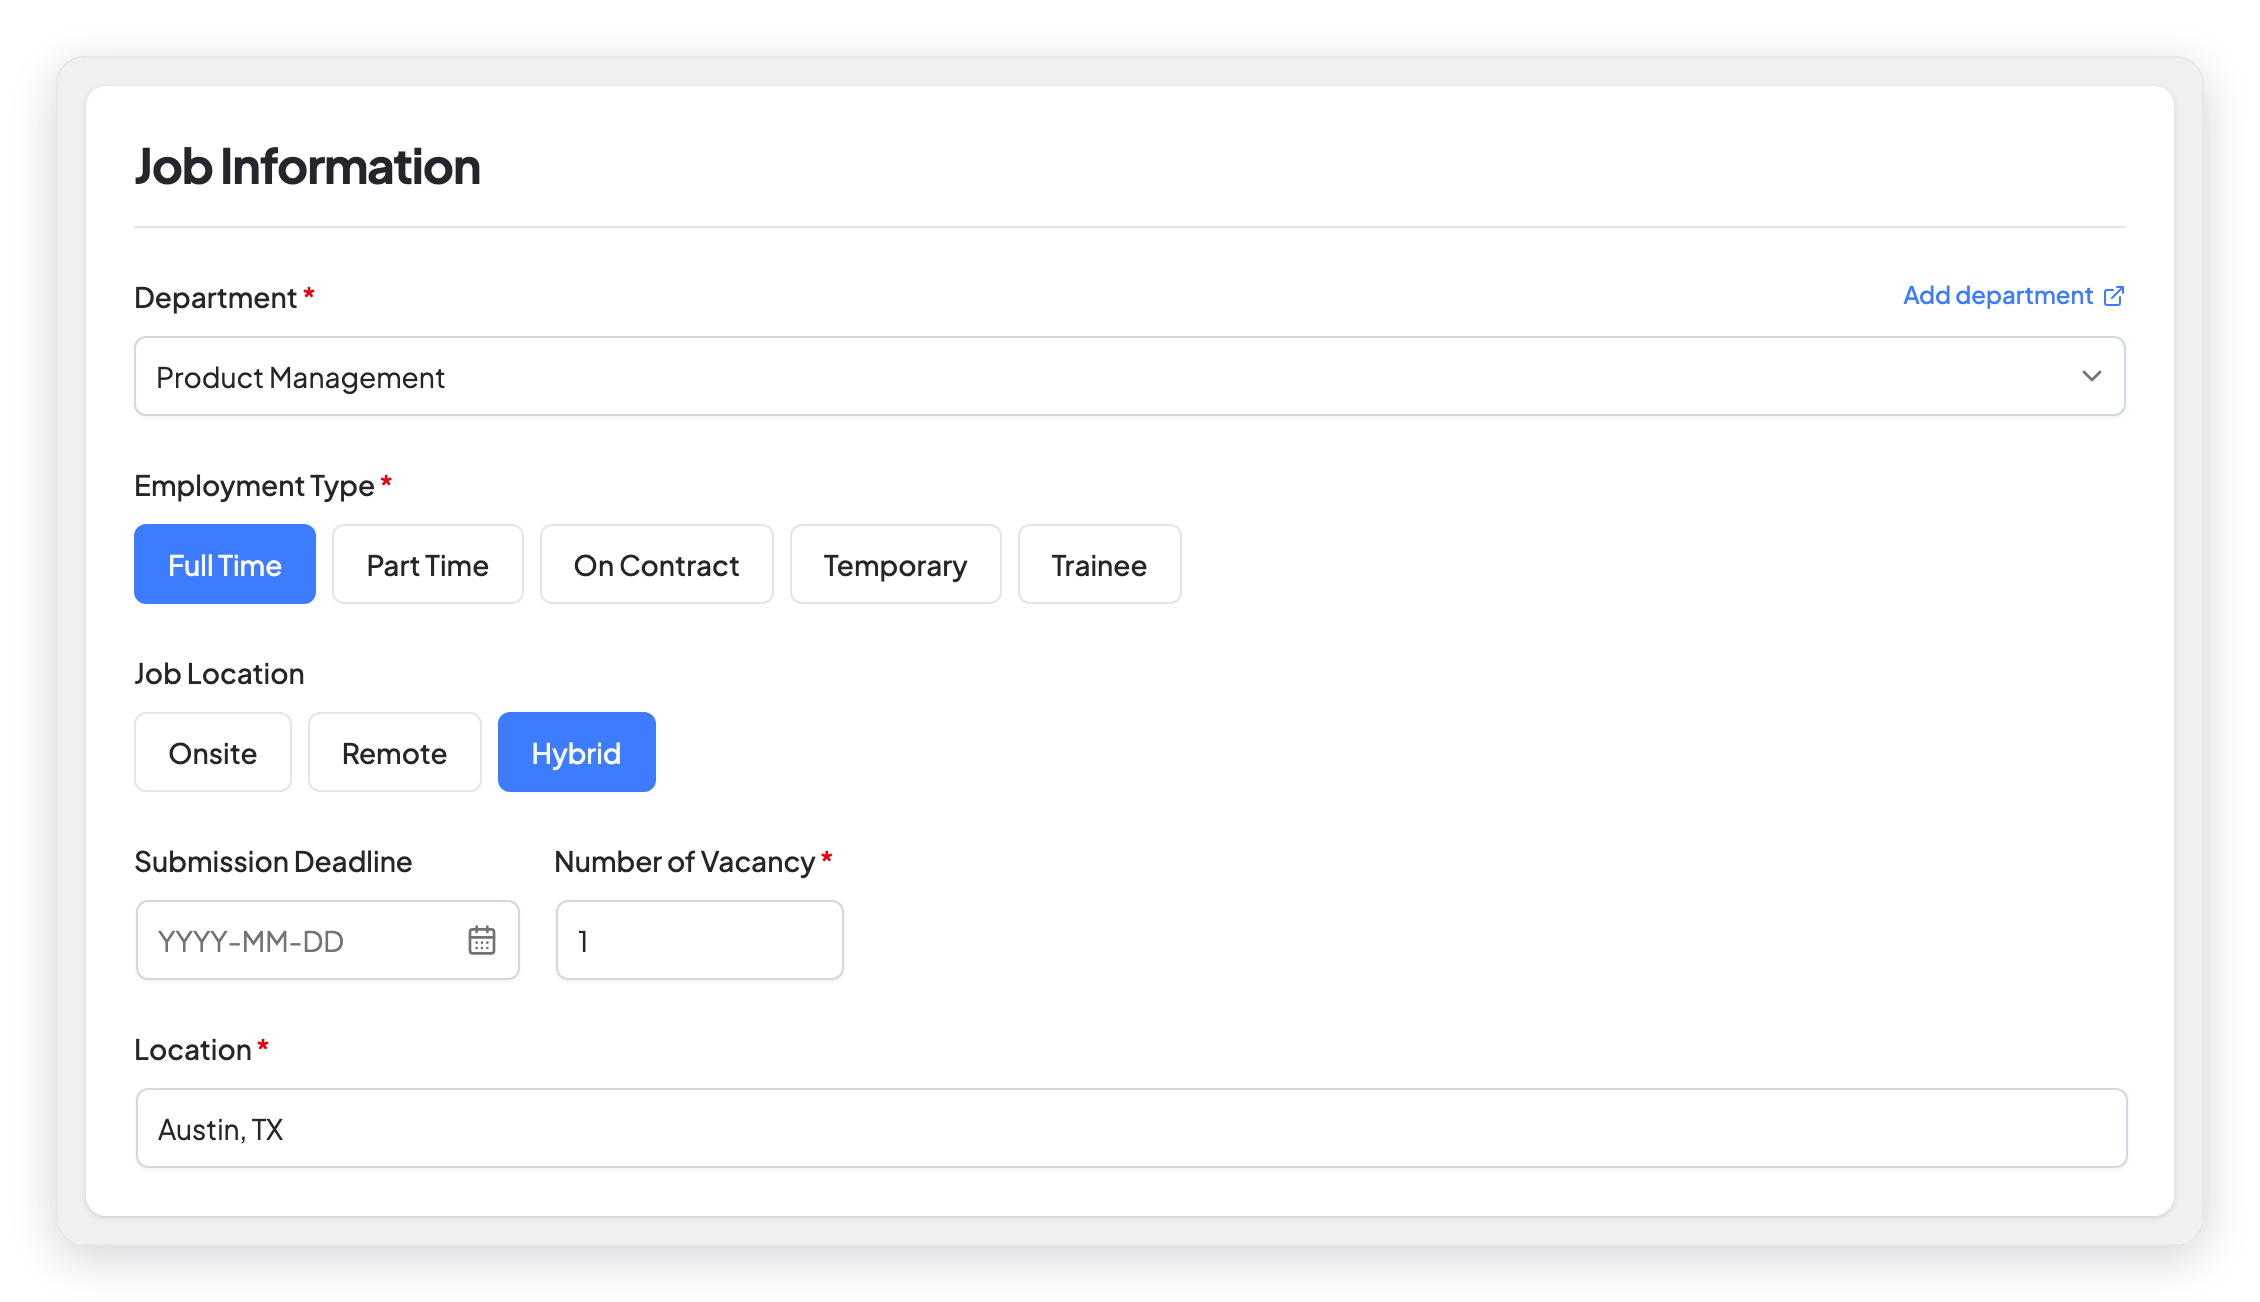
Job Information
- Select the Department.
- Select the Employment Type, for example Full Time.
- Select the Job Location: Onsite, Remote, or Hybrid.
- If the job has a last day to apply, select it in Submission Deadline.
- Type the Number of Vacancy and the Location.
Compensation & Benefits
- Select the Pay Type, the Currency, and the Salary Visibility.
- Type the Salary and, if there is one, the Signing Bonus.
- Select the Benefits and Perks of the job. To add a benefit that is not in the list, type it in Custom benefit and press Enter.
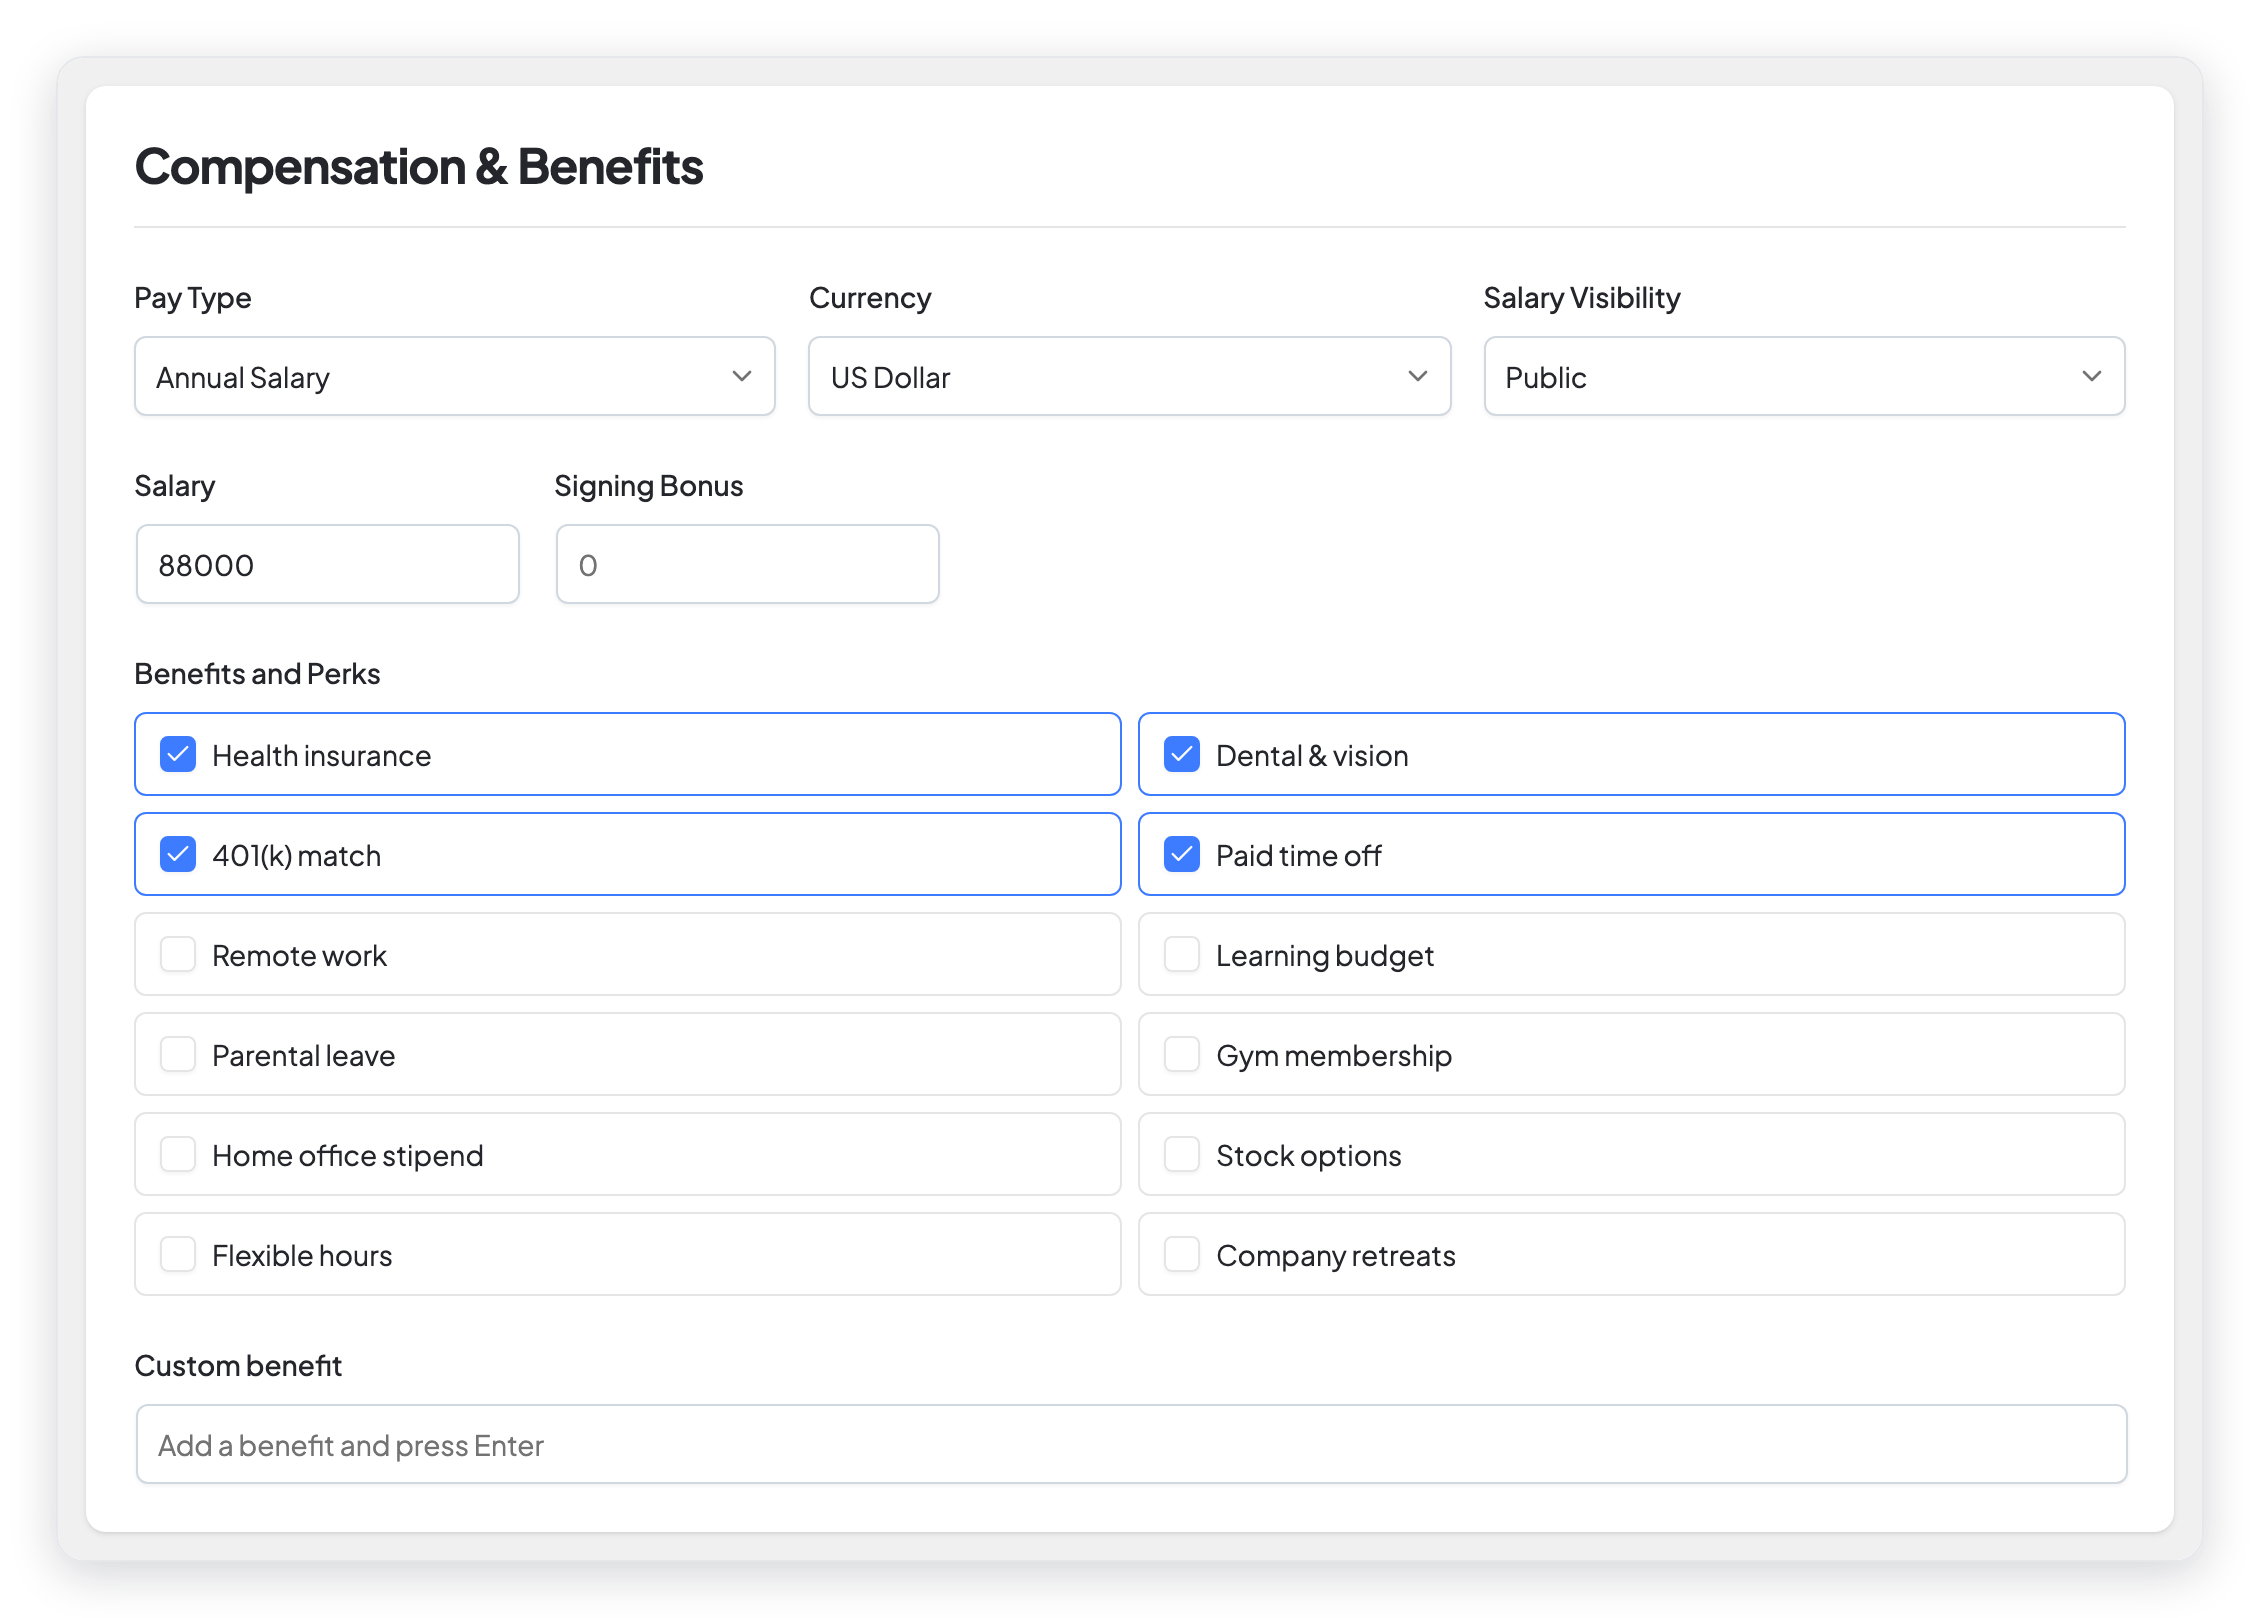
NOTE: In WP ERP Pro 2.0.0, the job list and the job page show the salary even when Salary Visibility is Hidden. If you do not want to show the salary, leave the Salary field empty.
Experience
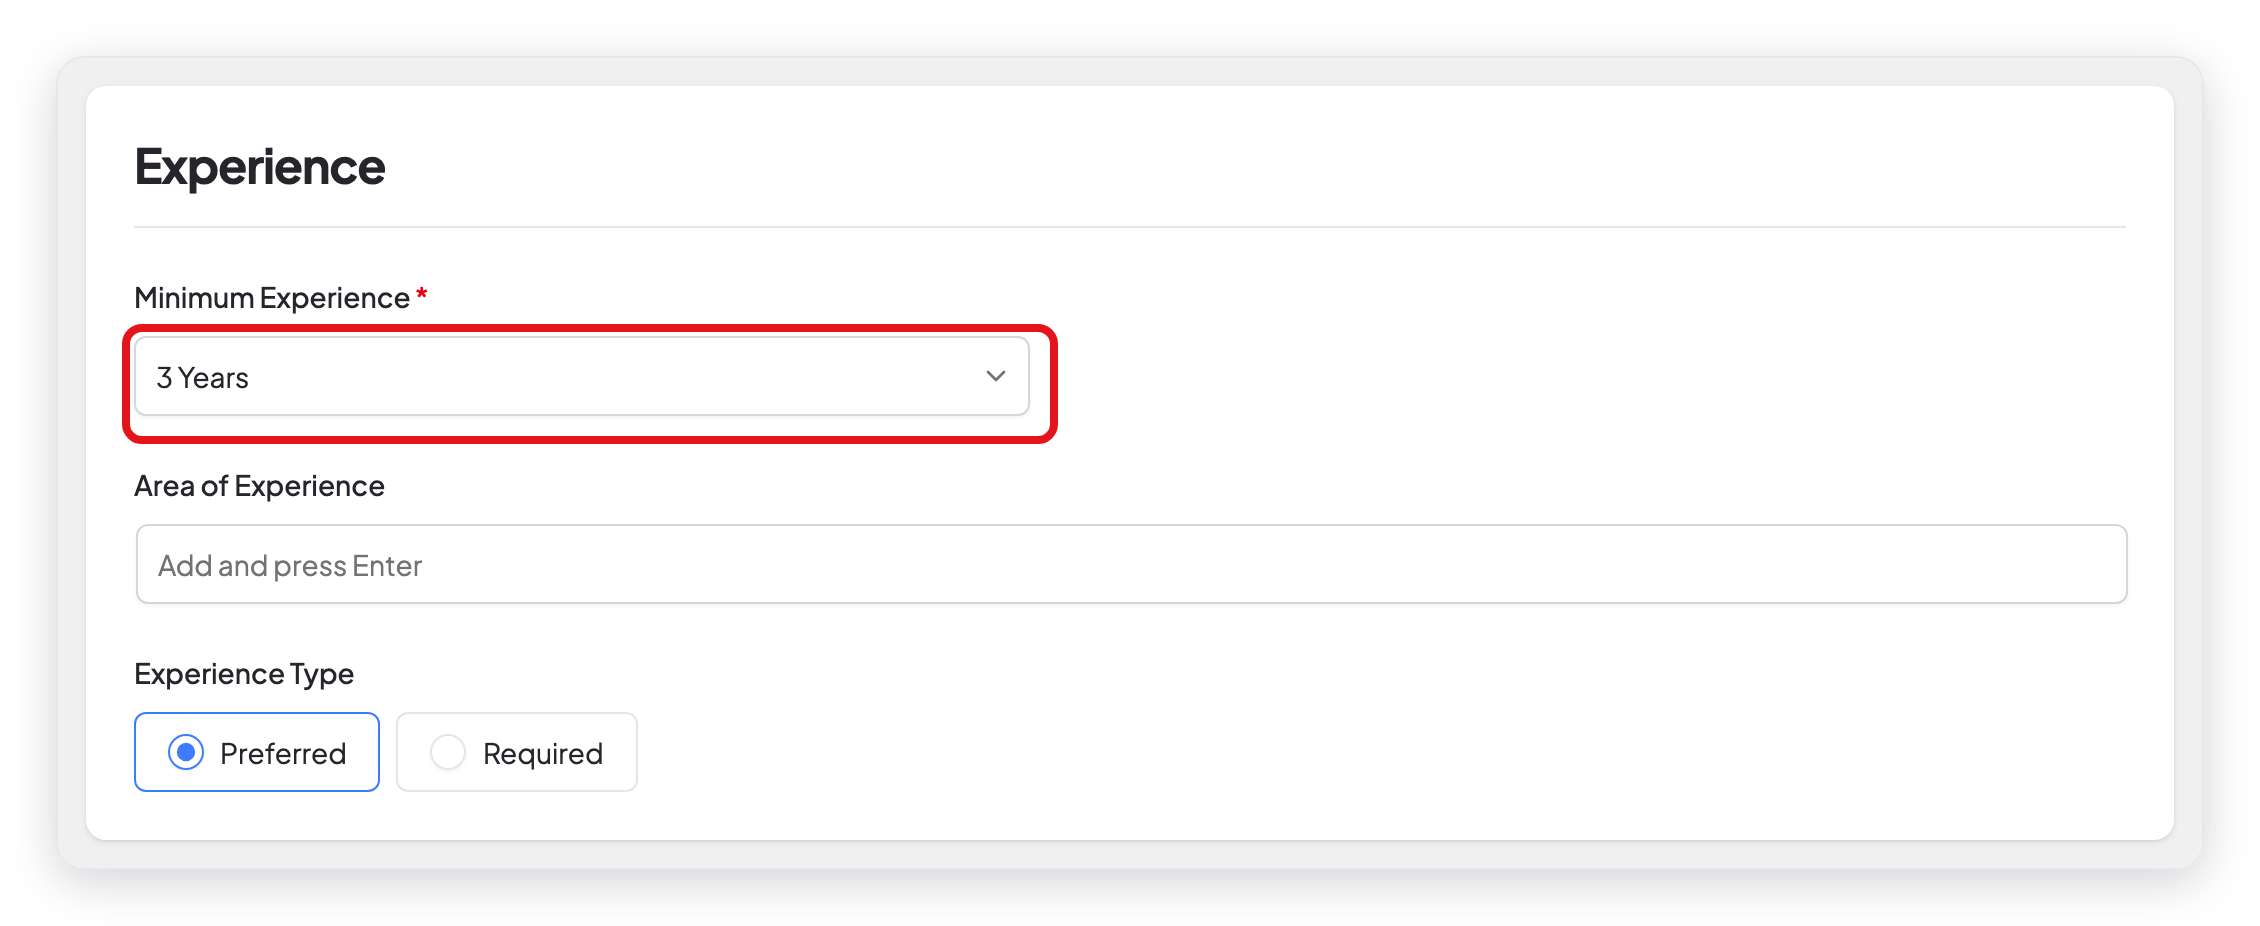
- Select the Minimum Experience.
- In Area of Experience, type a skill area and press Enter. You can add more than one.
- Select the Experience Type: Preferred or Required.
Job Schema Information (optional)
Fill in the street address, locality, postal code, and country of the job. Search engines use this information to show your job in job search results.
When the four parts are complete, click Next.
Step 5: Choose the application form fields
The Name, Email, and Upload CV/Resume fields are always on the application form.
- In Optional Fields, select each field that you want on the form, for example Mobile or Cover Letter.
- To make a field necessary, turn on its Required switch.
- Click Next.
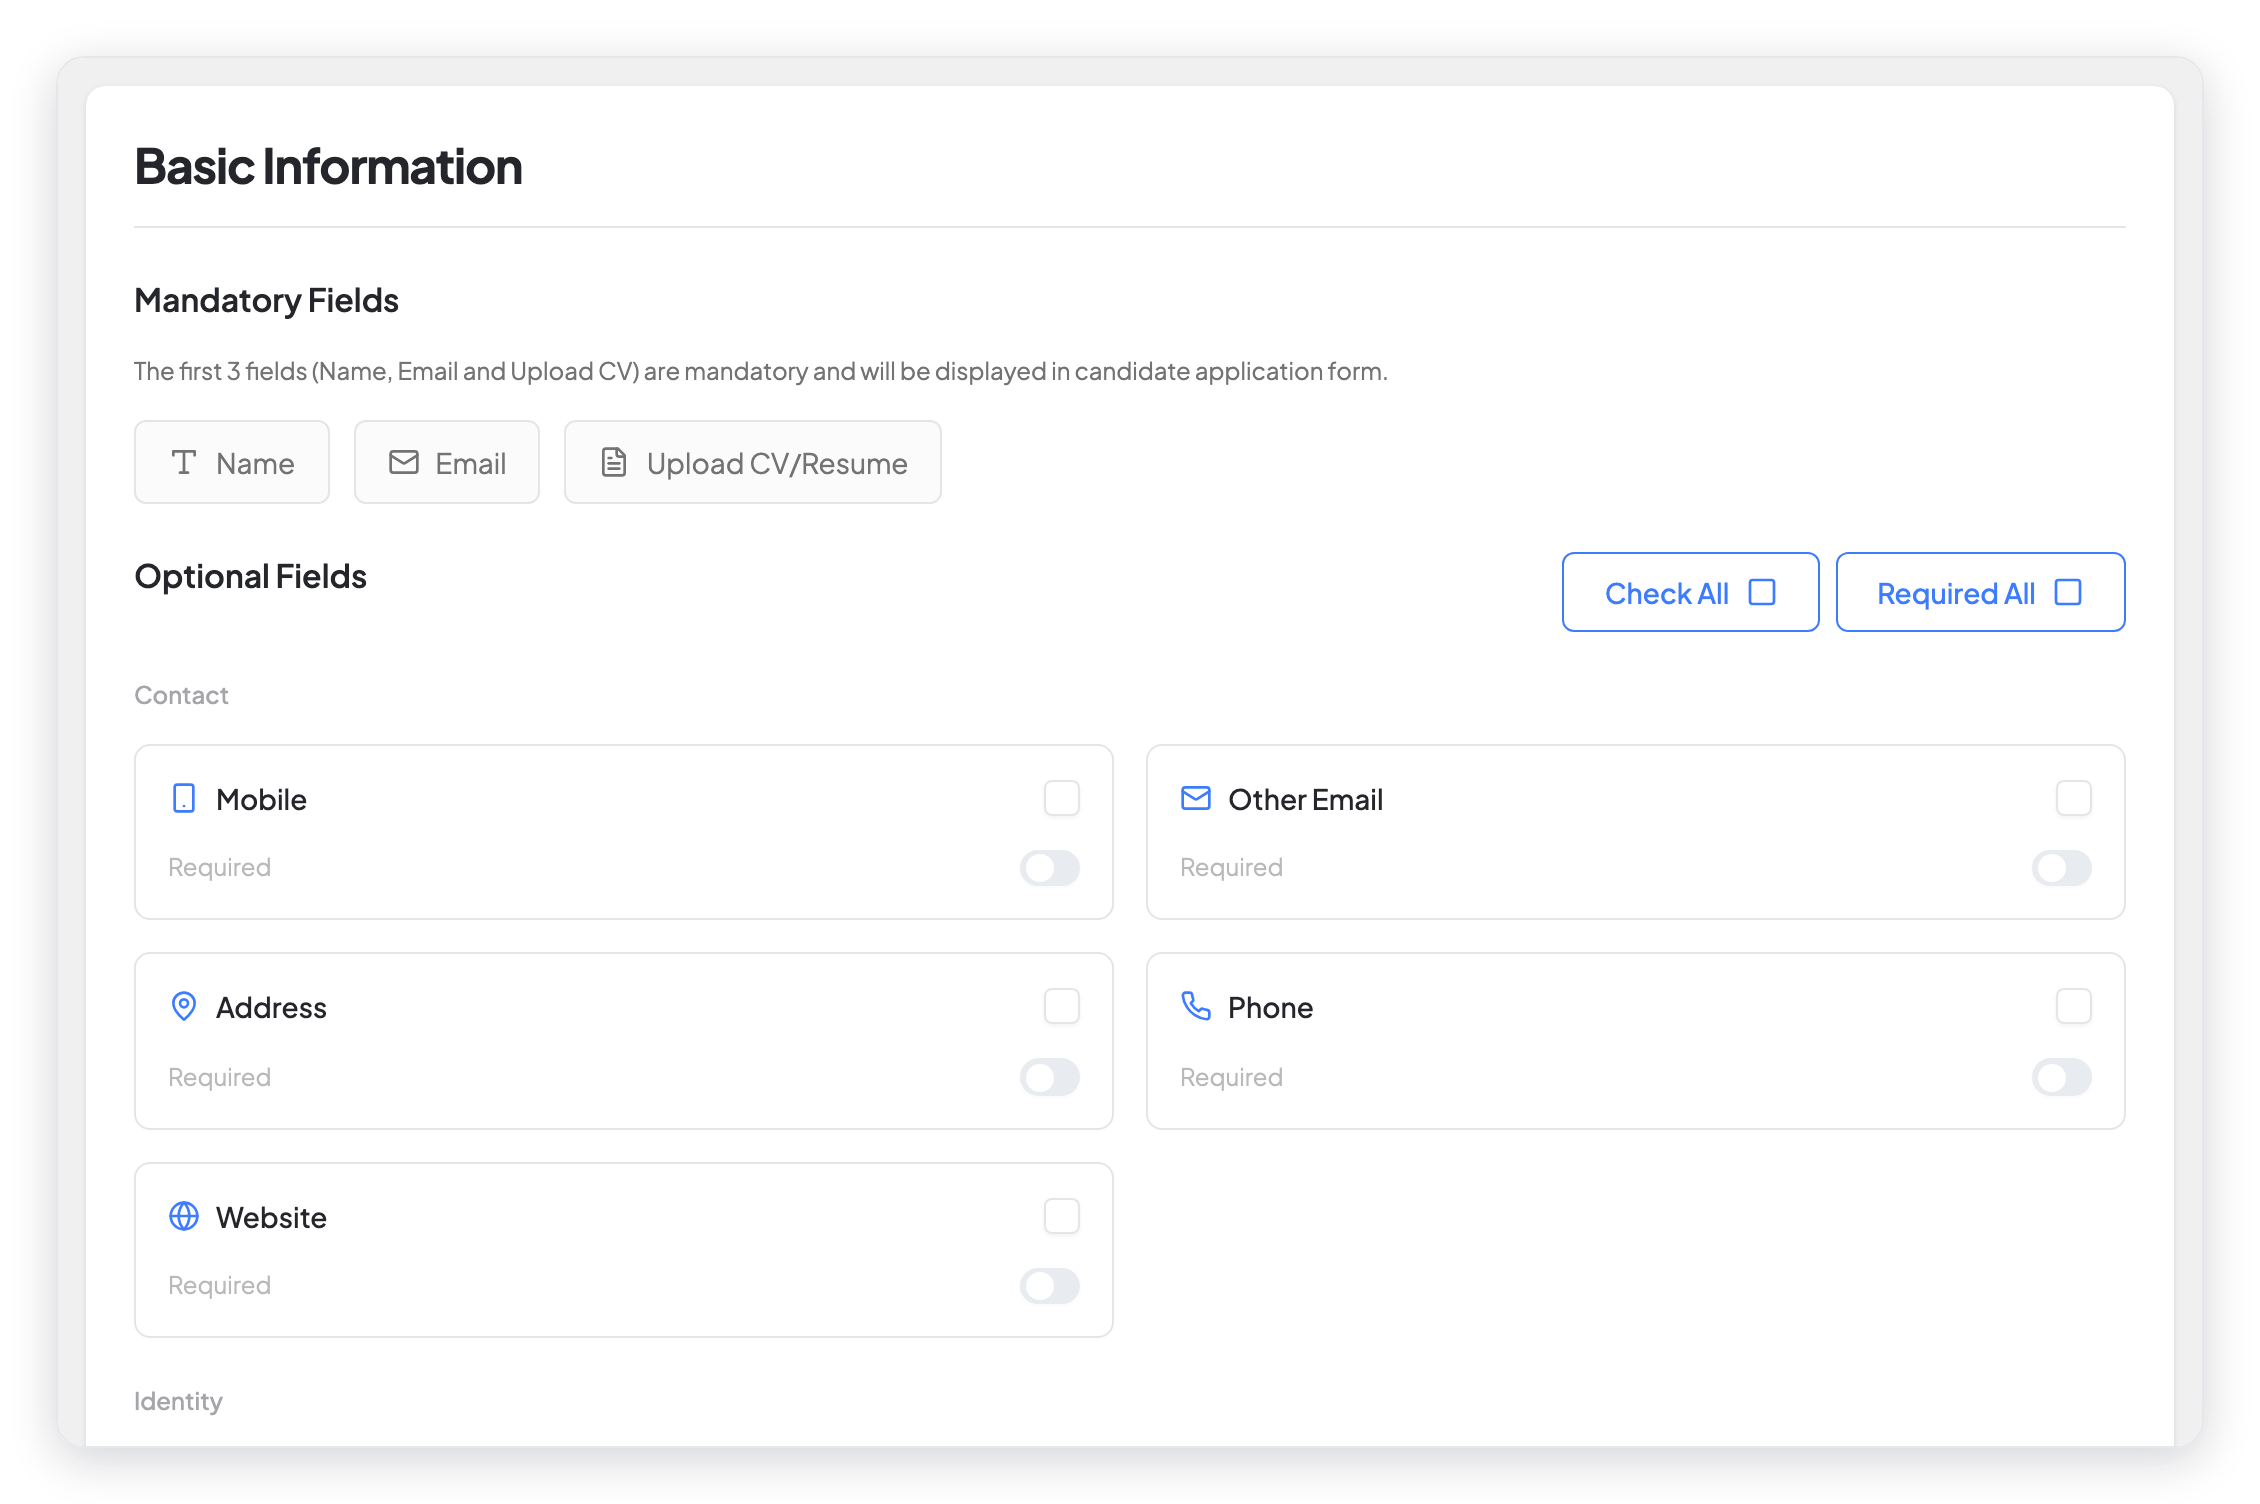
To select all fields at the same time, click Check All. To make all selected fields necessary, click Required All.
If you use the Custom Field Builder, your custom employee fields show under Additional Fields.
Step 6: Add screening questions and publish
- Select each question set that candidates must answer.
- Click Save & Publish.
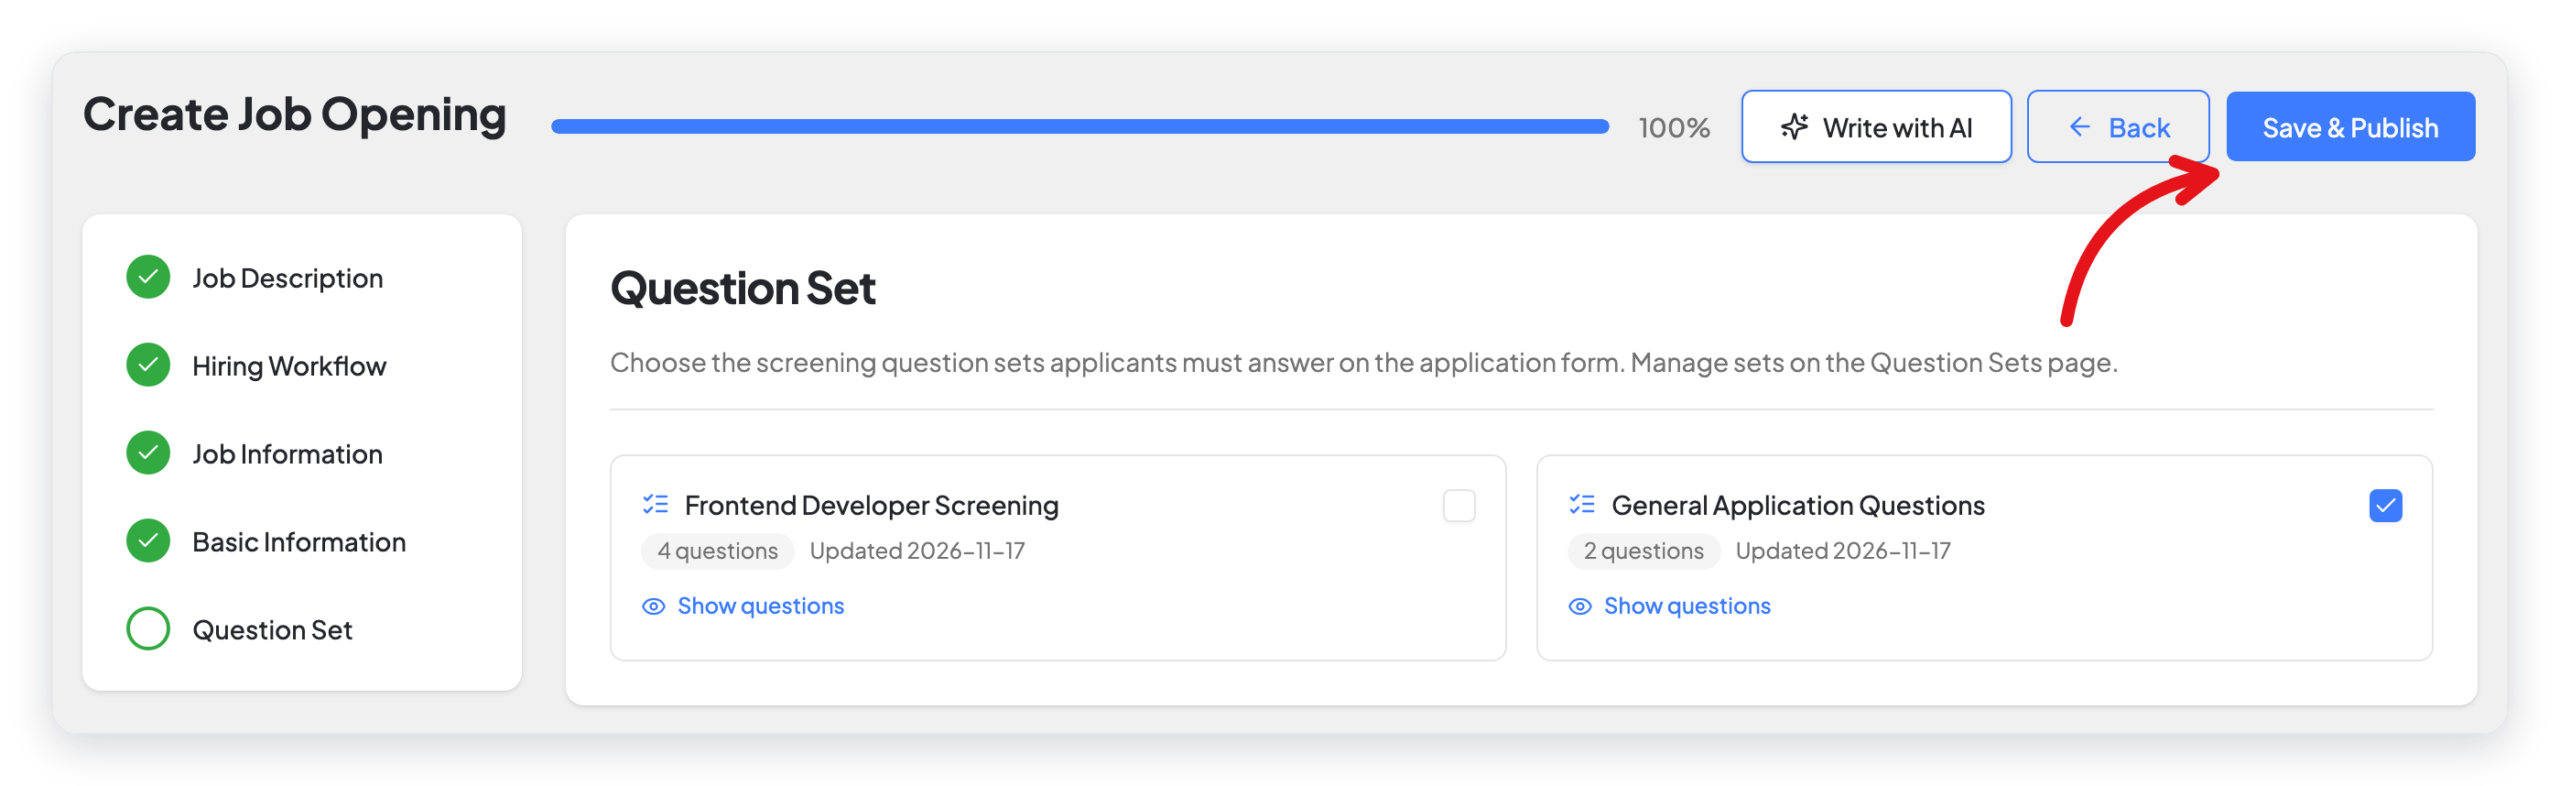
To save the job without publishing it, click Save as draft.
Result
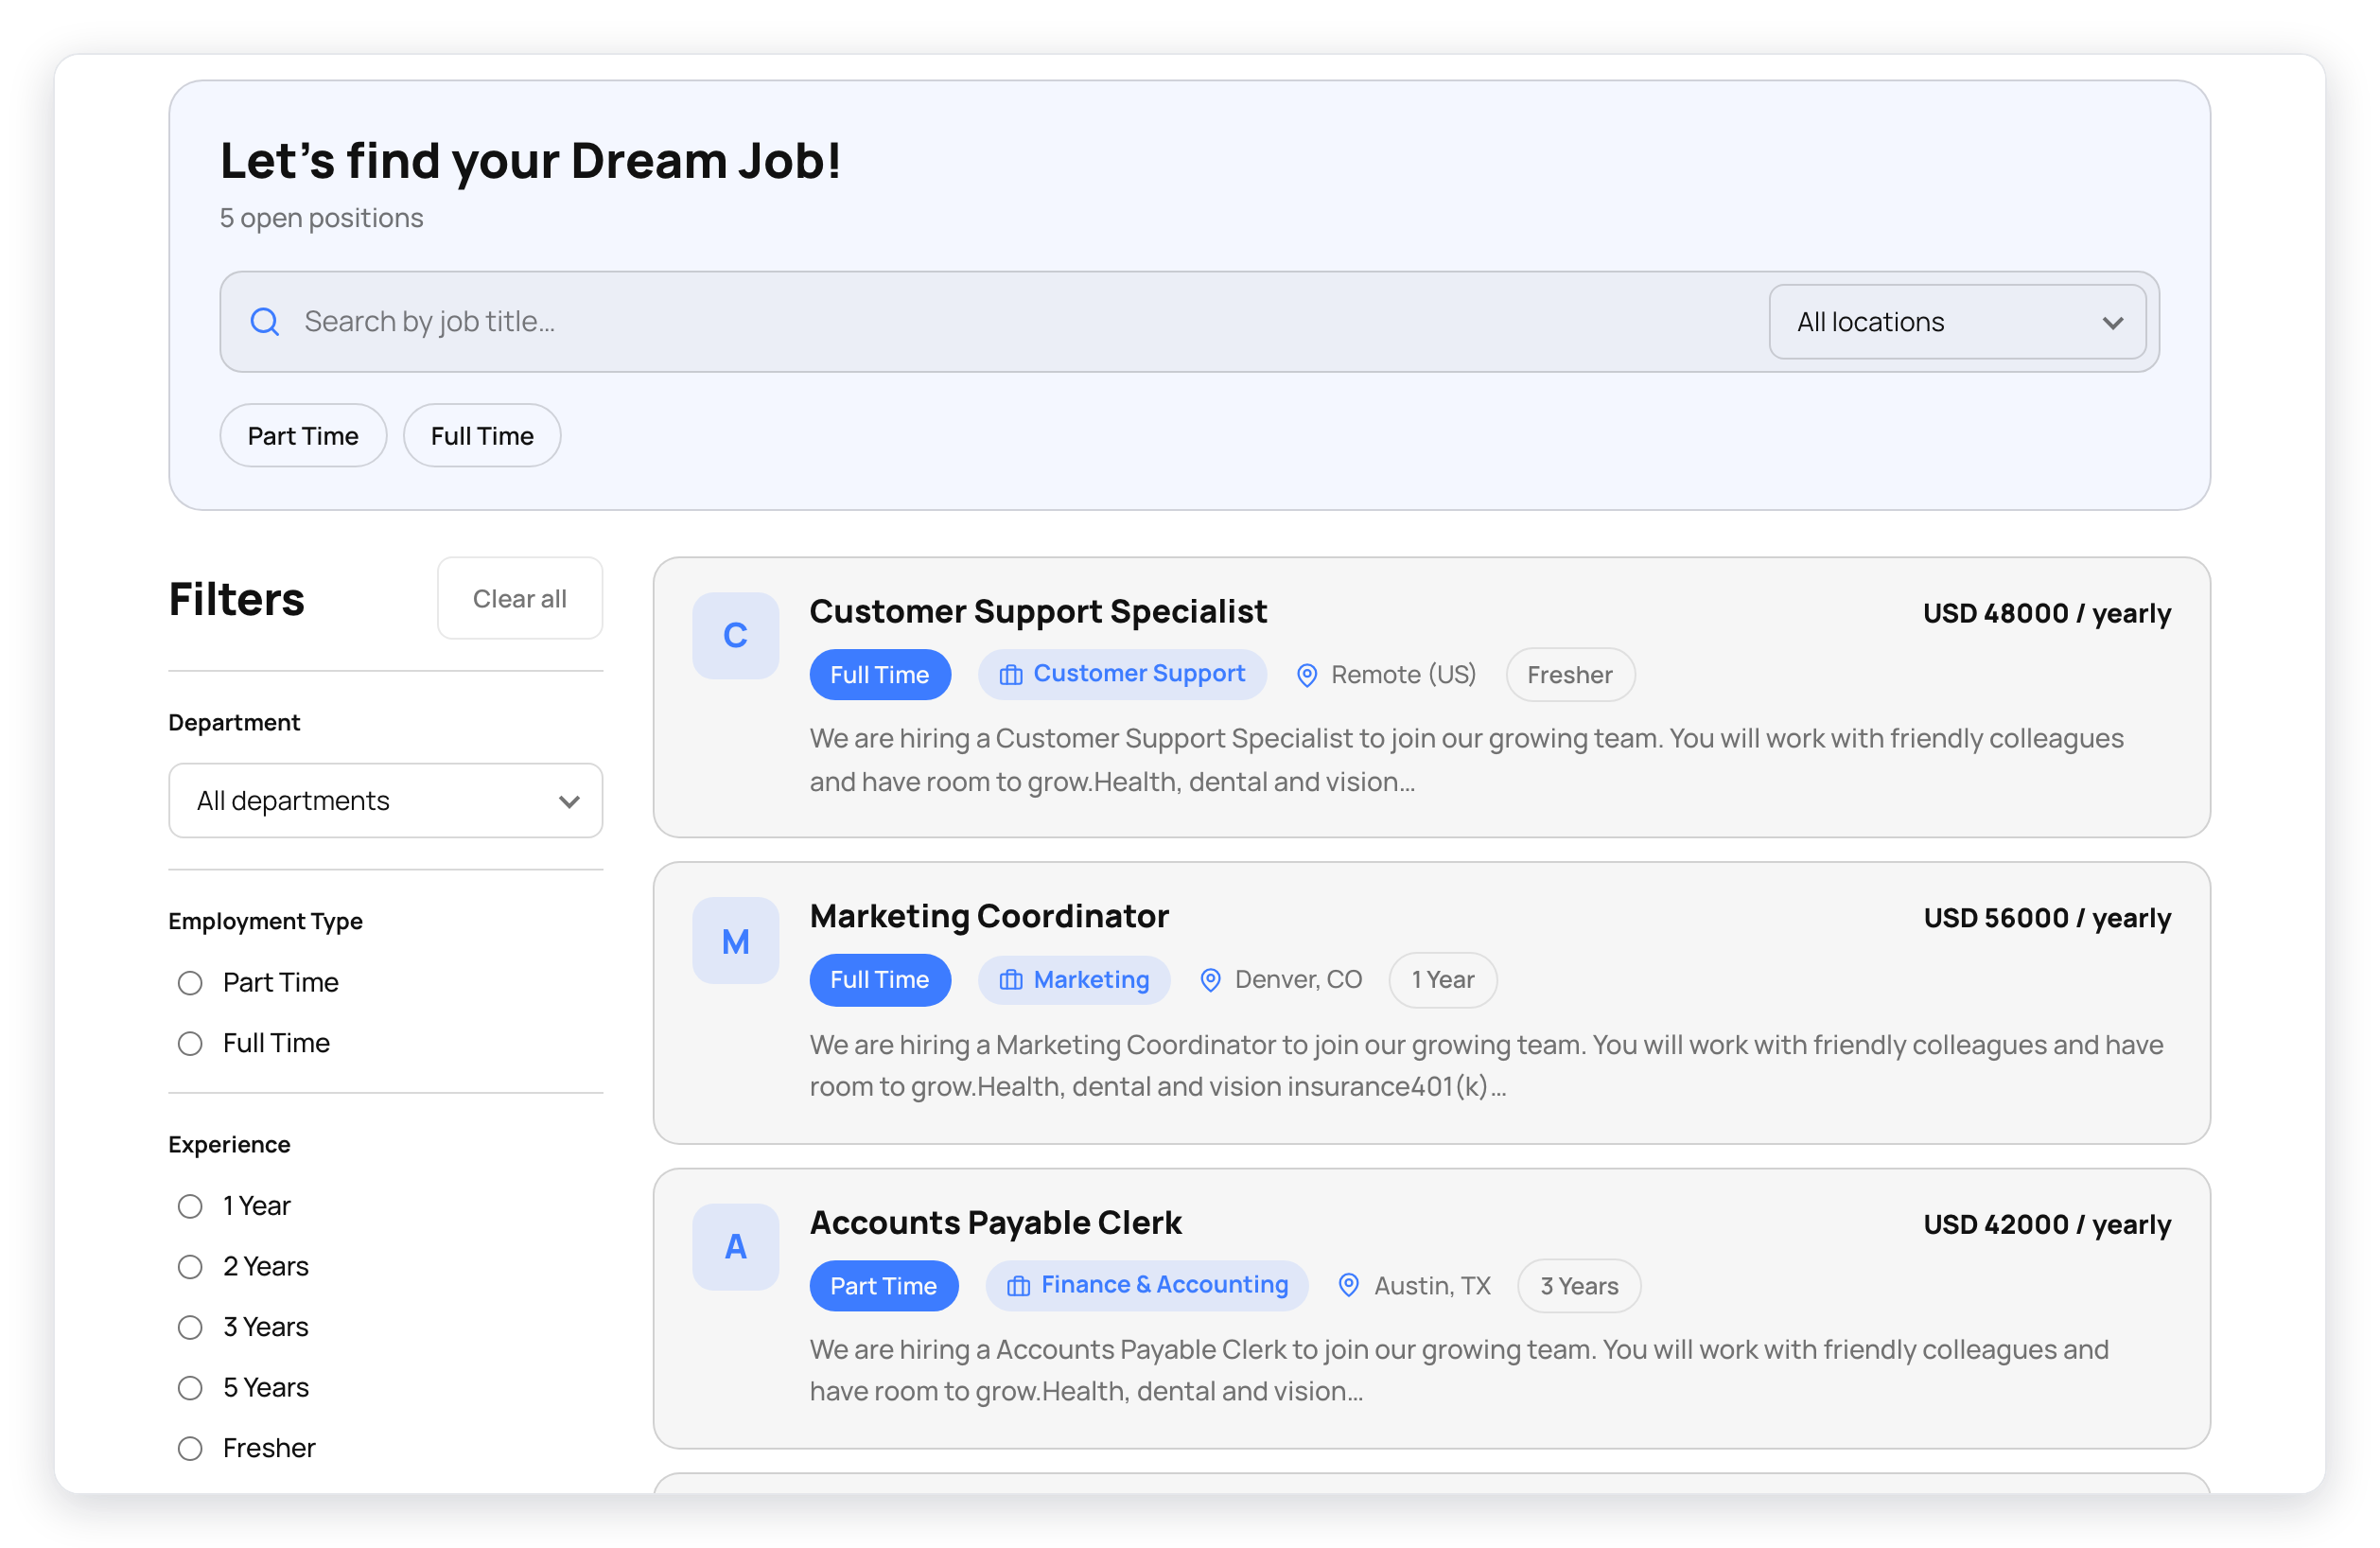
The job is in the Open tab of the job openings list. The job shows on your Job List Page, and candidates can apply.
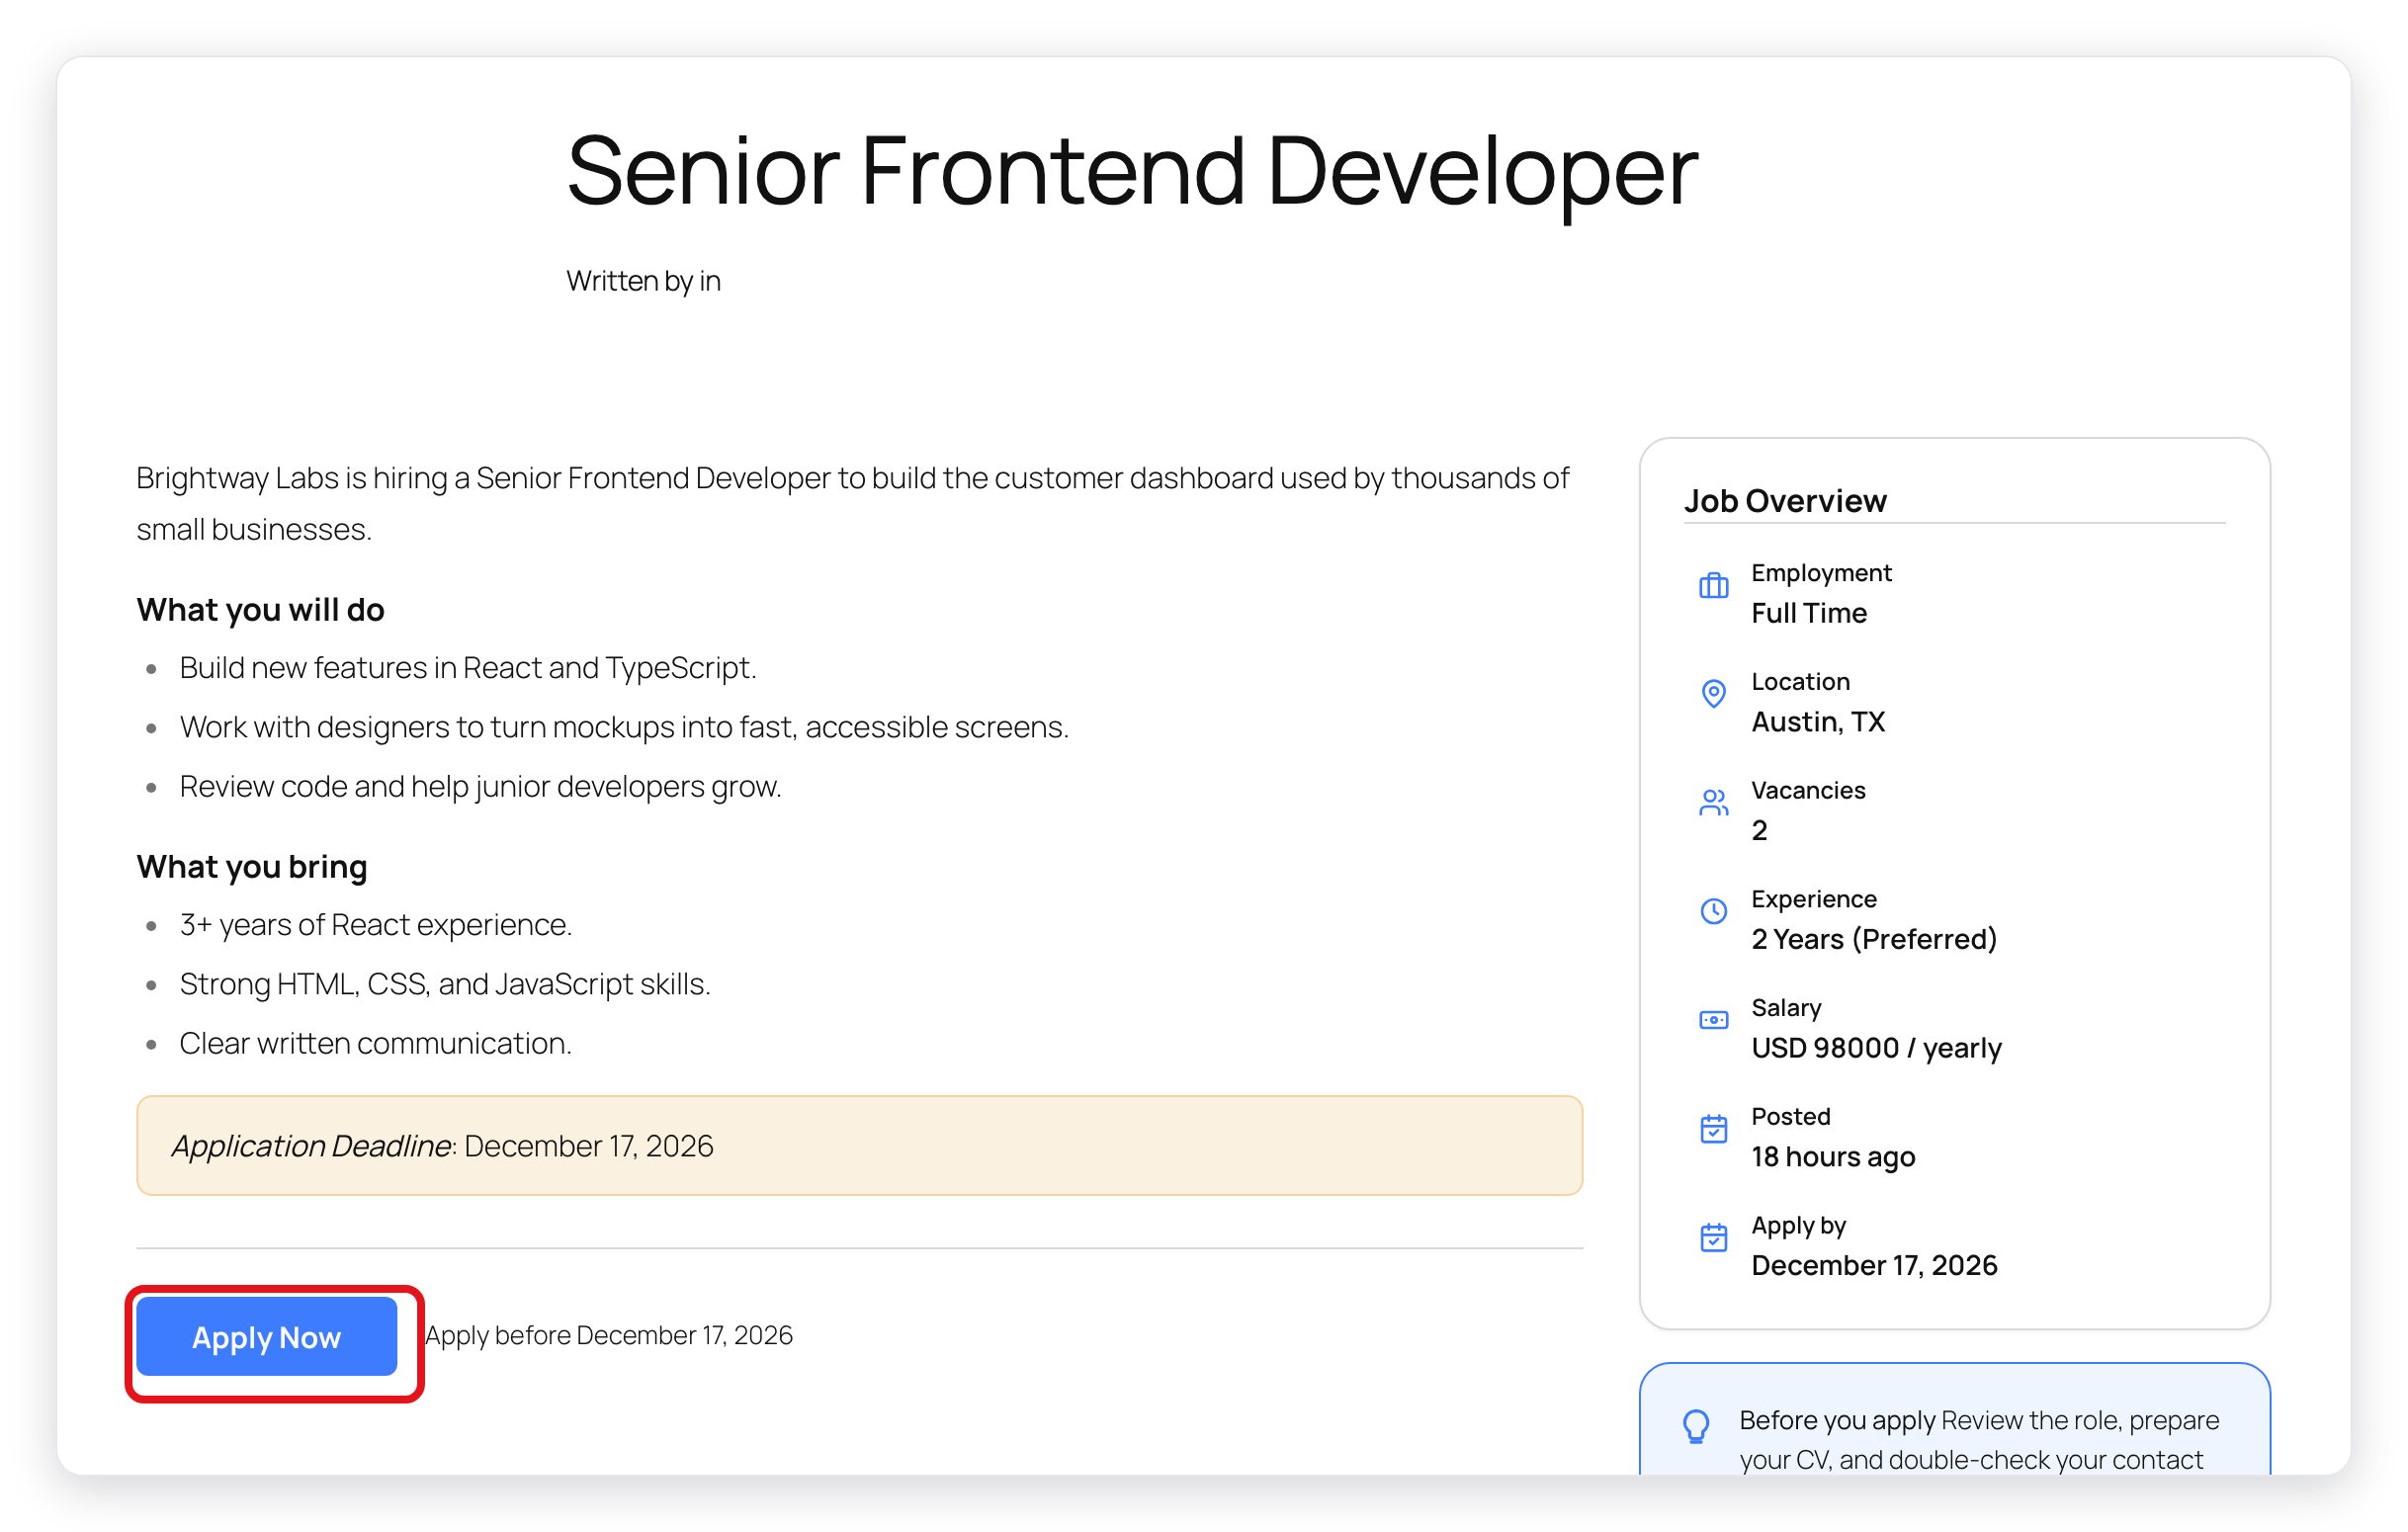
Each job has its own page. The page shows the description, a Job Overview box, and an Apply Now button.
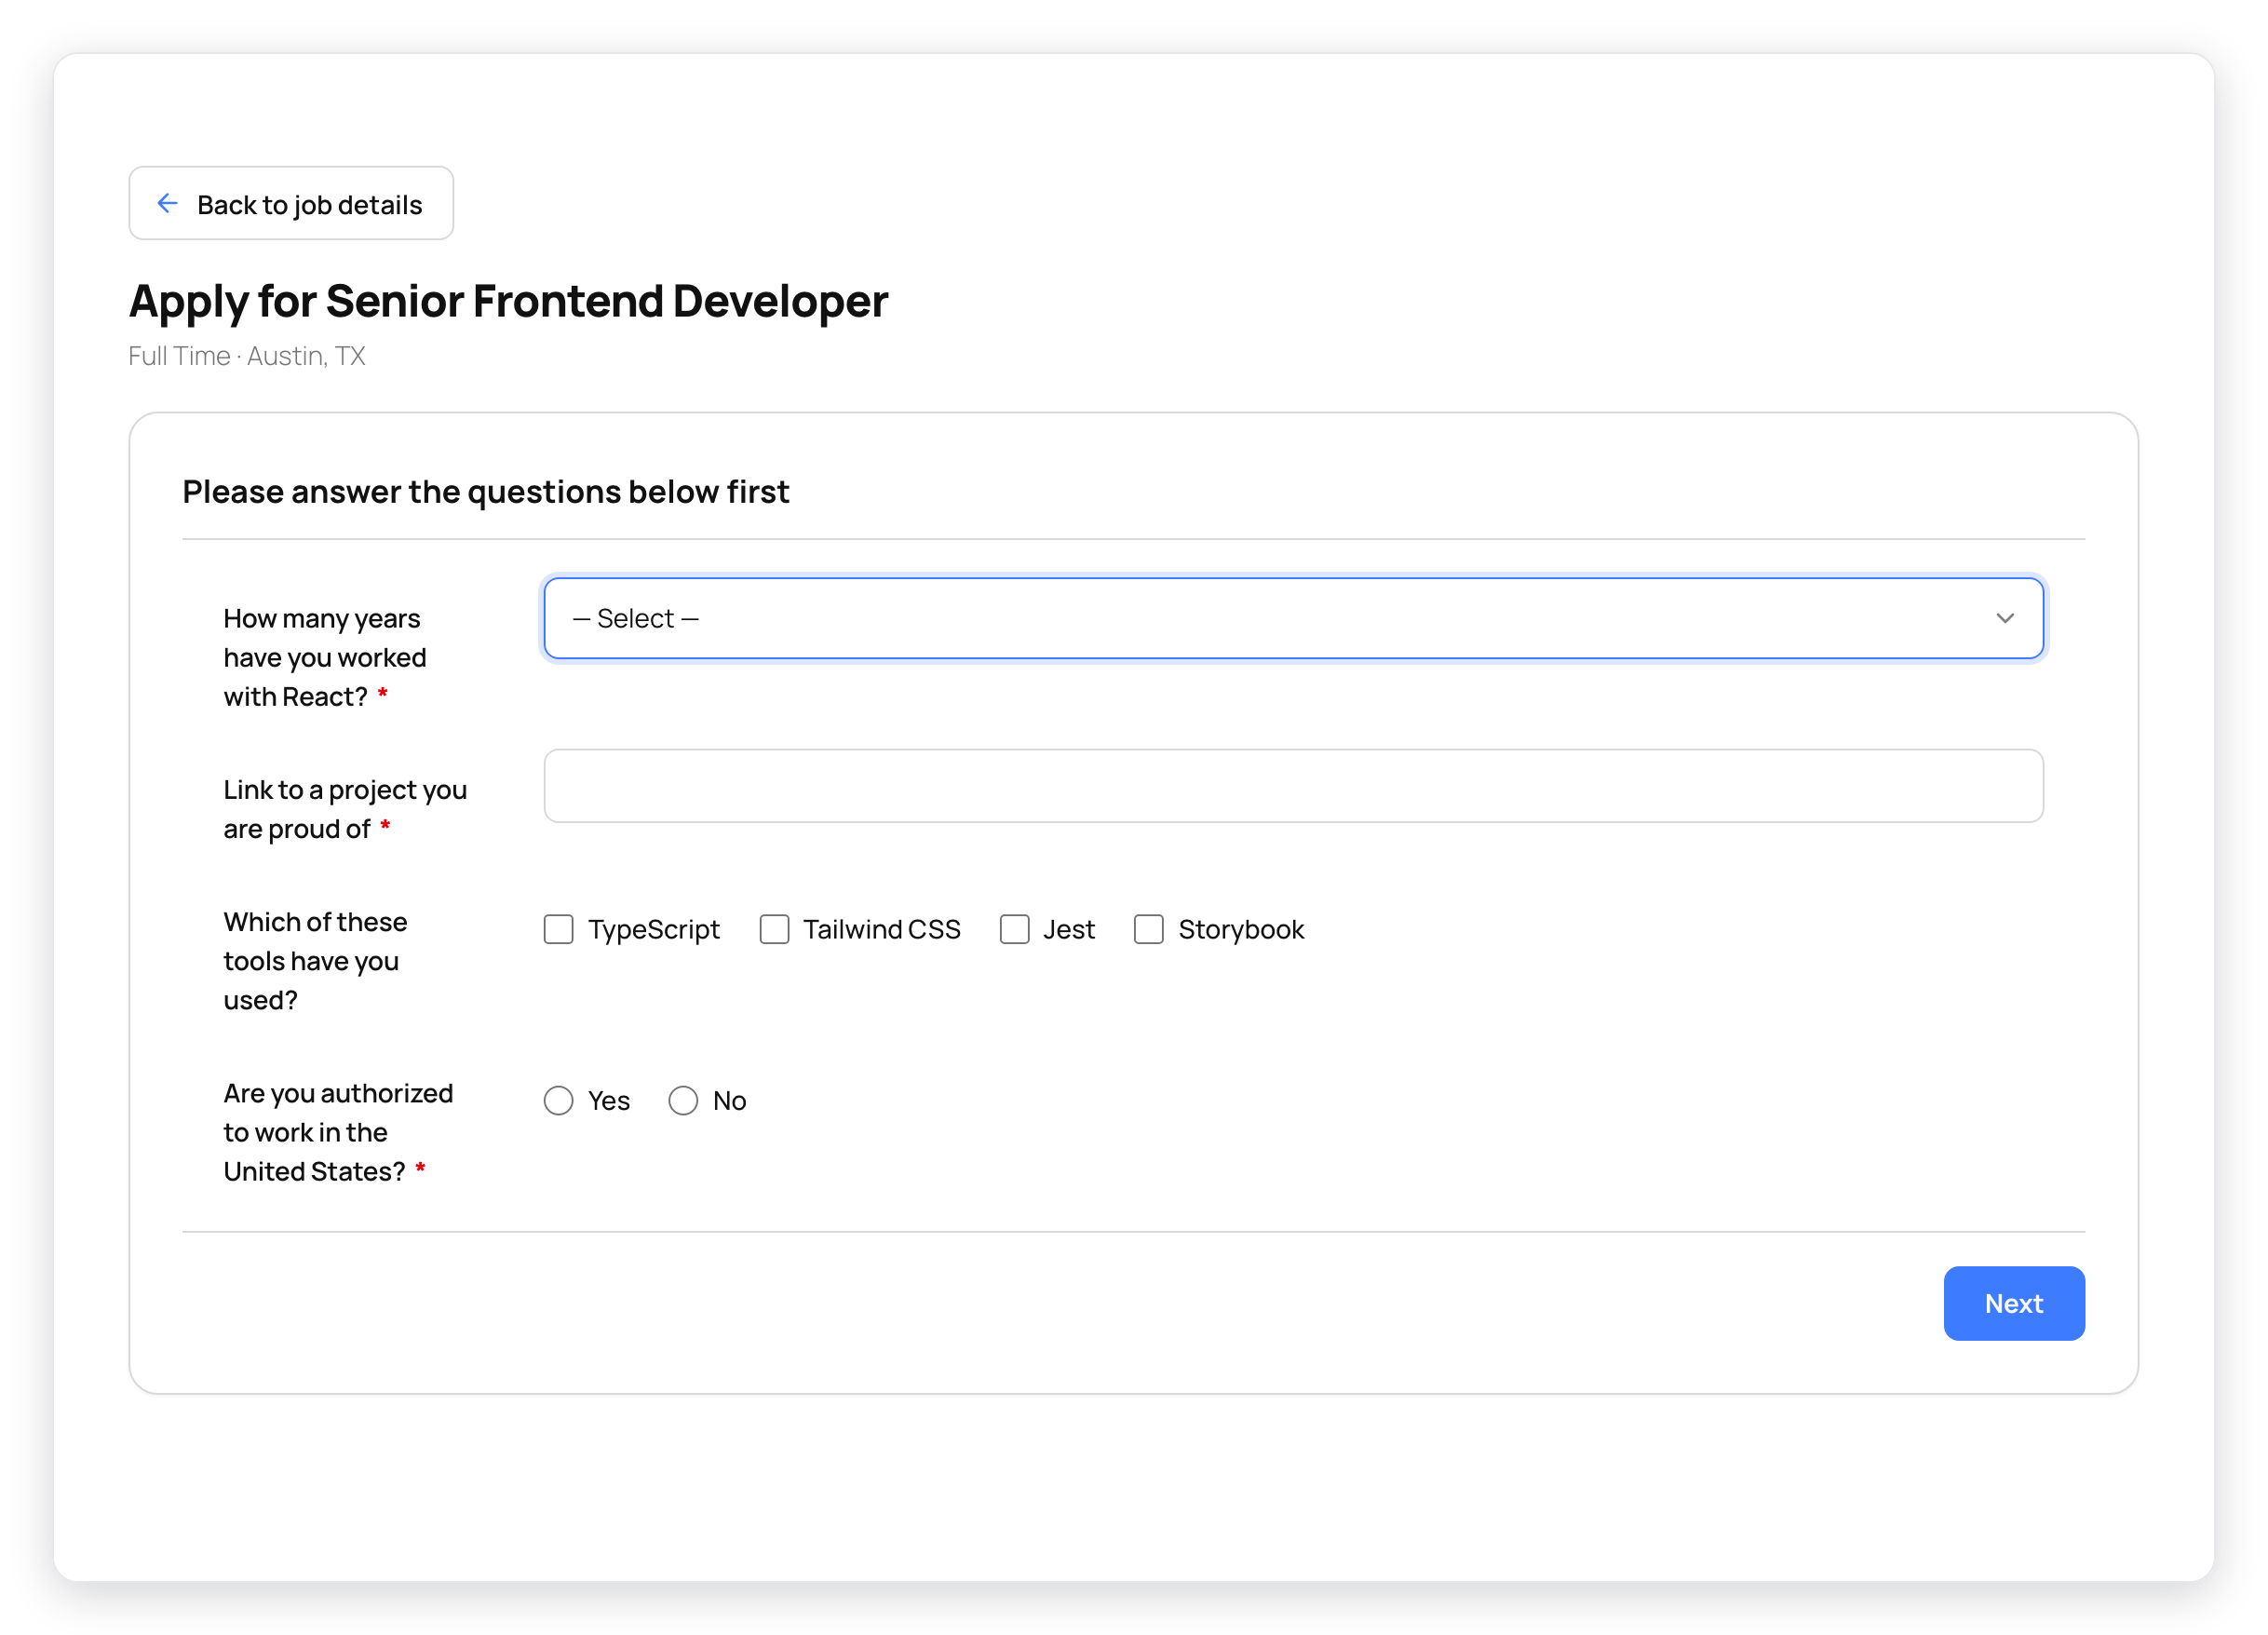
When a candidate clicks Apply Now, the screening questions show first. Then the candidate fills in the form fields and uploads a CV.
Manage a job opening
On the job openings list, click the ⋮ button of a job. Then select an action.
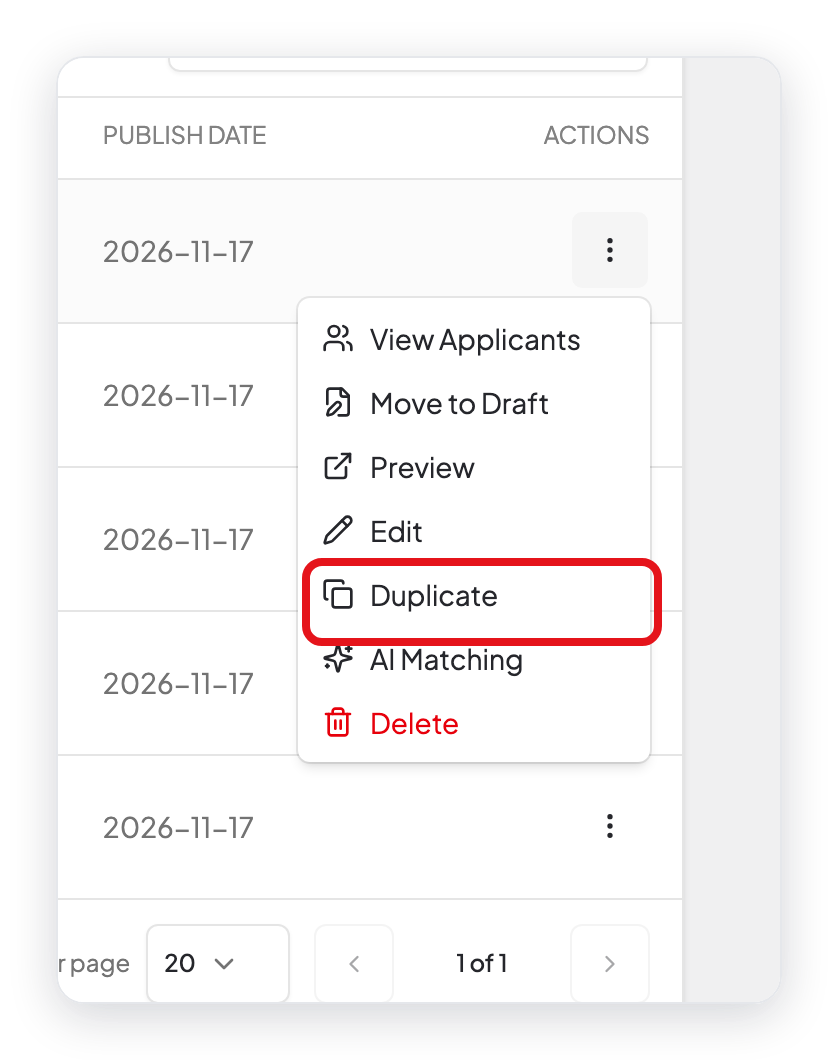
| Action | What it does |
|---|---|
| View Applicants | Opens the candidates of this job. |
| Move to Draft | Removes the job from your website. You can publish it again later. |
| Preview | Opens the job page on your website. |
| Edit | Opens the five steps of the job form. |
| Duplicate | Makes a copy of the job. Use it for a job that is almost the same. |
| AI Matching | Opens the AI settings of this job. Read AI Settings Configuration. |
| Delete | Deletes the job. |
After the submission deadline, the job page does not let candidates apply.
What changed in 2.0
- The job form has five steps: Job Description, Hiring Workflow, Job Information, Basic Information, and Question Set. The old form had the questionnaire as a separate page.
- The fields "Select Hiring Lead" and "Internal Job Code" are not in the 2.0 job form.
- New fields: Job Location (Onsite, Remote, Hybrid), Salary Visibility, Signing Bonus, Benefits and Perks, Area of Experience, and Experience Type.
- Copy Job Openings is now the Duplicate action.
- You can attach more than one question set to a job.
- Write with AI opens the AI Job Description Writer.